
DESIGN YOUR FIRST 3D PRINTED CAR PART TODAY
Designing your first car part from a blank CAD screen can be tough.
So I created a spark plug wire holder design you can quickly modify that will help you learn the basics of automotive CAD design.
START SIMPLE
The best way to get started is with a very basic design.
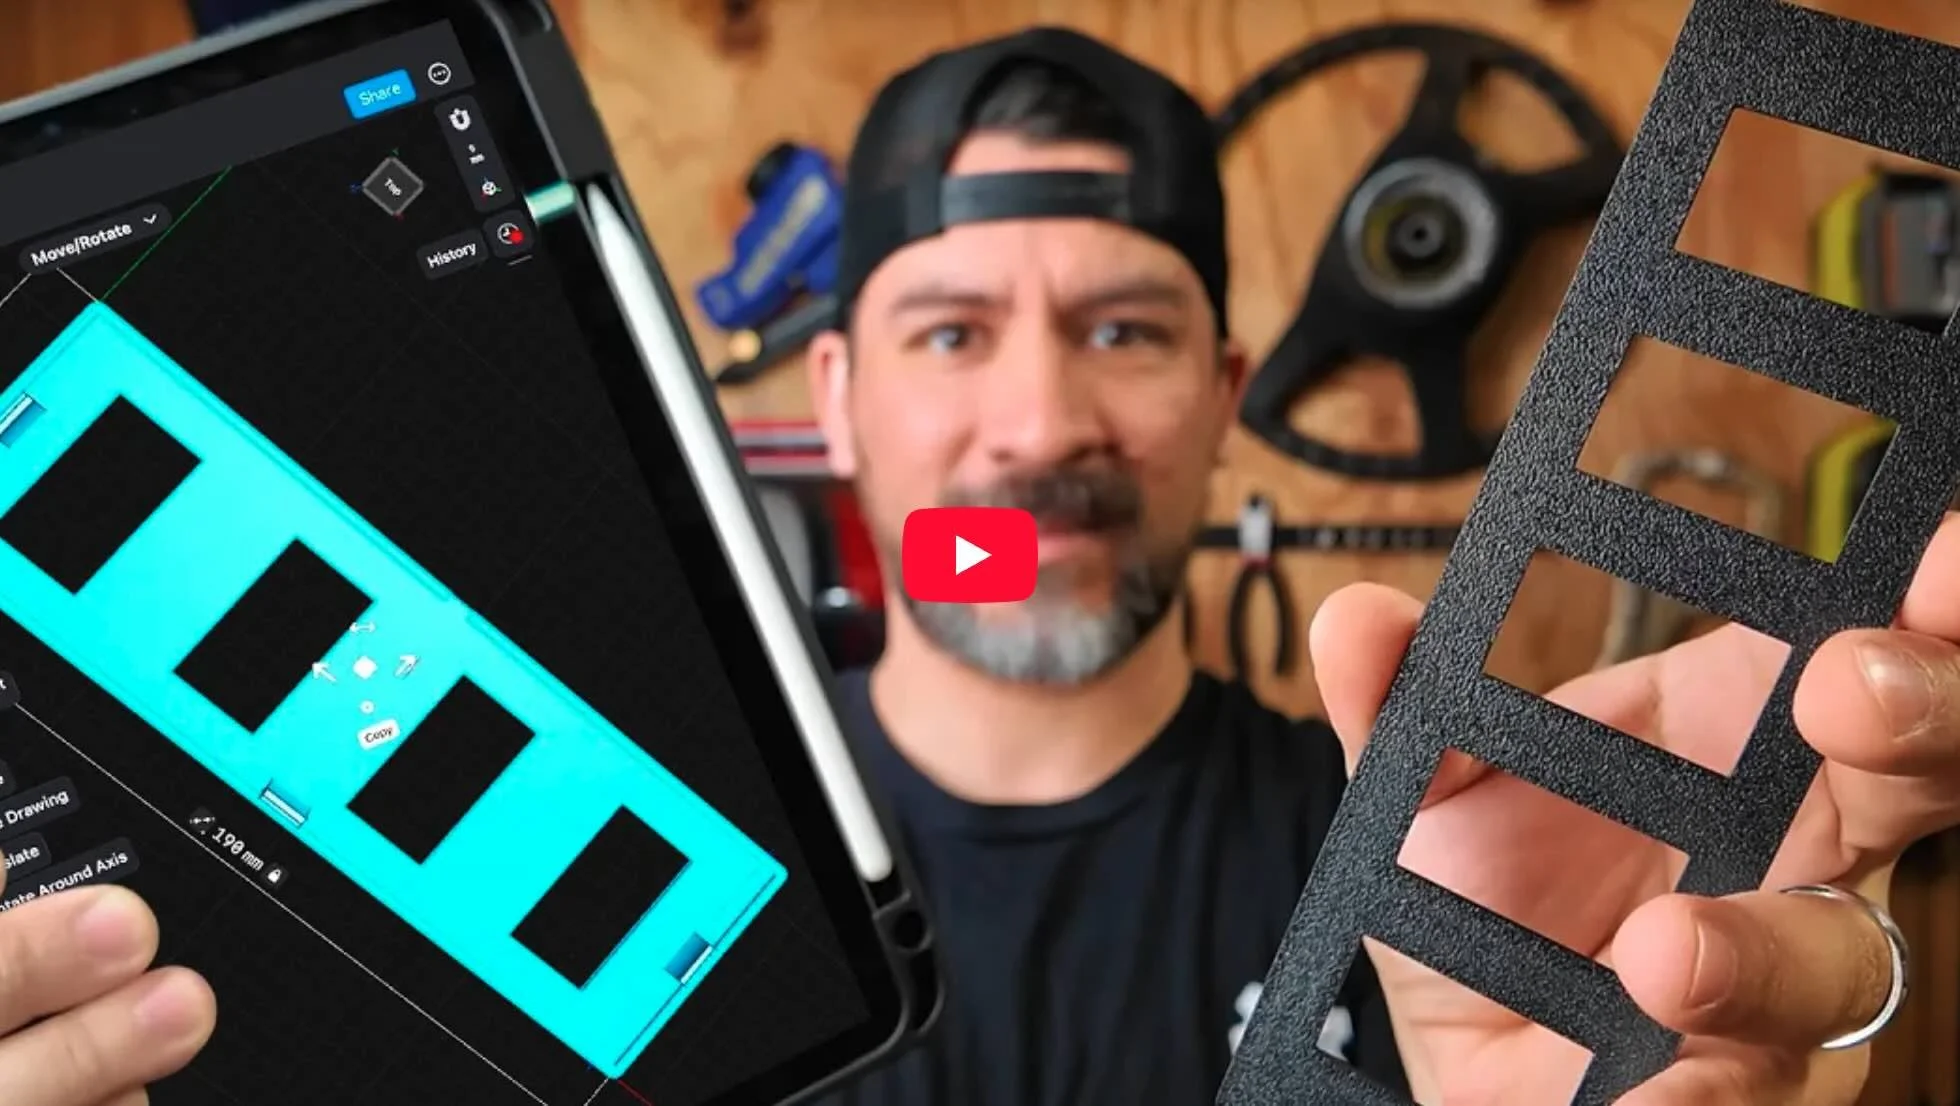
I picked a spark plug wire separator clip you can modify for your project car in just a few simple steps.

1. DOWNLOAD SHAPR3D
Designing your first car part doesn’t need to be complicated. Which is why you should download [Shapr3d here].
Shapr3d is by far one of the easiest and most powerful CAD software programs we’ve tried.
It even works with an iPAD and Apple pencil, but you can also download a desktop version too.
💡 Pro Tip: You can give the free trial a run or use the free version. The only downside to the free version is low resolution exports. If you want the pro version, just use affiliate code ALLABOUTTHEBUILD10 for 10% off.
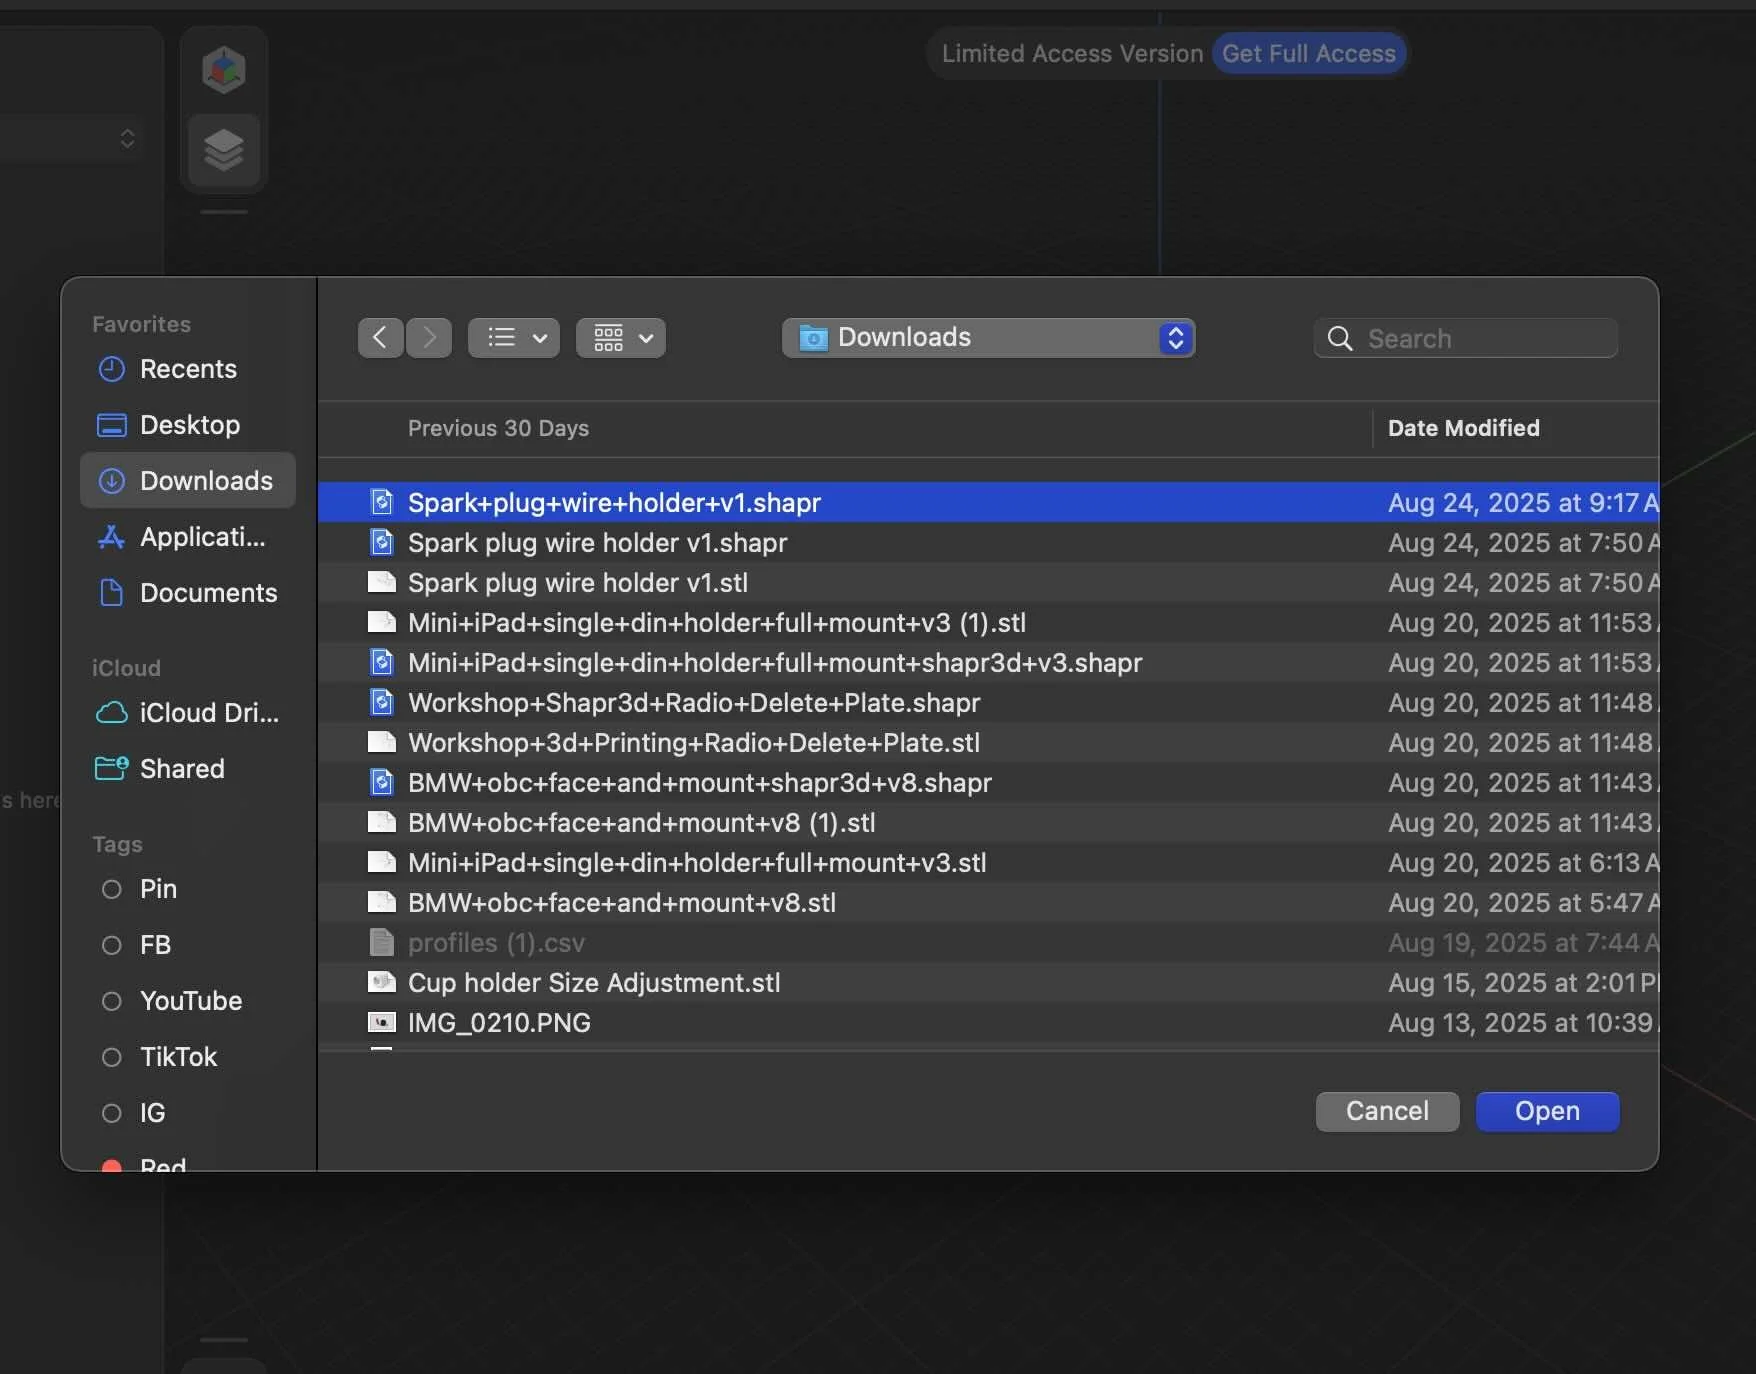
2. IMPORT THE FREE SHAPR3D FILE
The design has already been created, so all you have to do is download and import the design into Shapr3d with the import feature.
Grab the full 3d printing car parts guide plus the pre-made car parts STL bundle that includes the spark plug wire holder design.

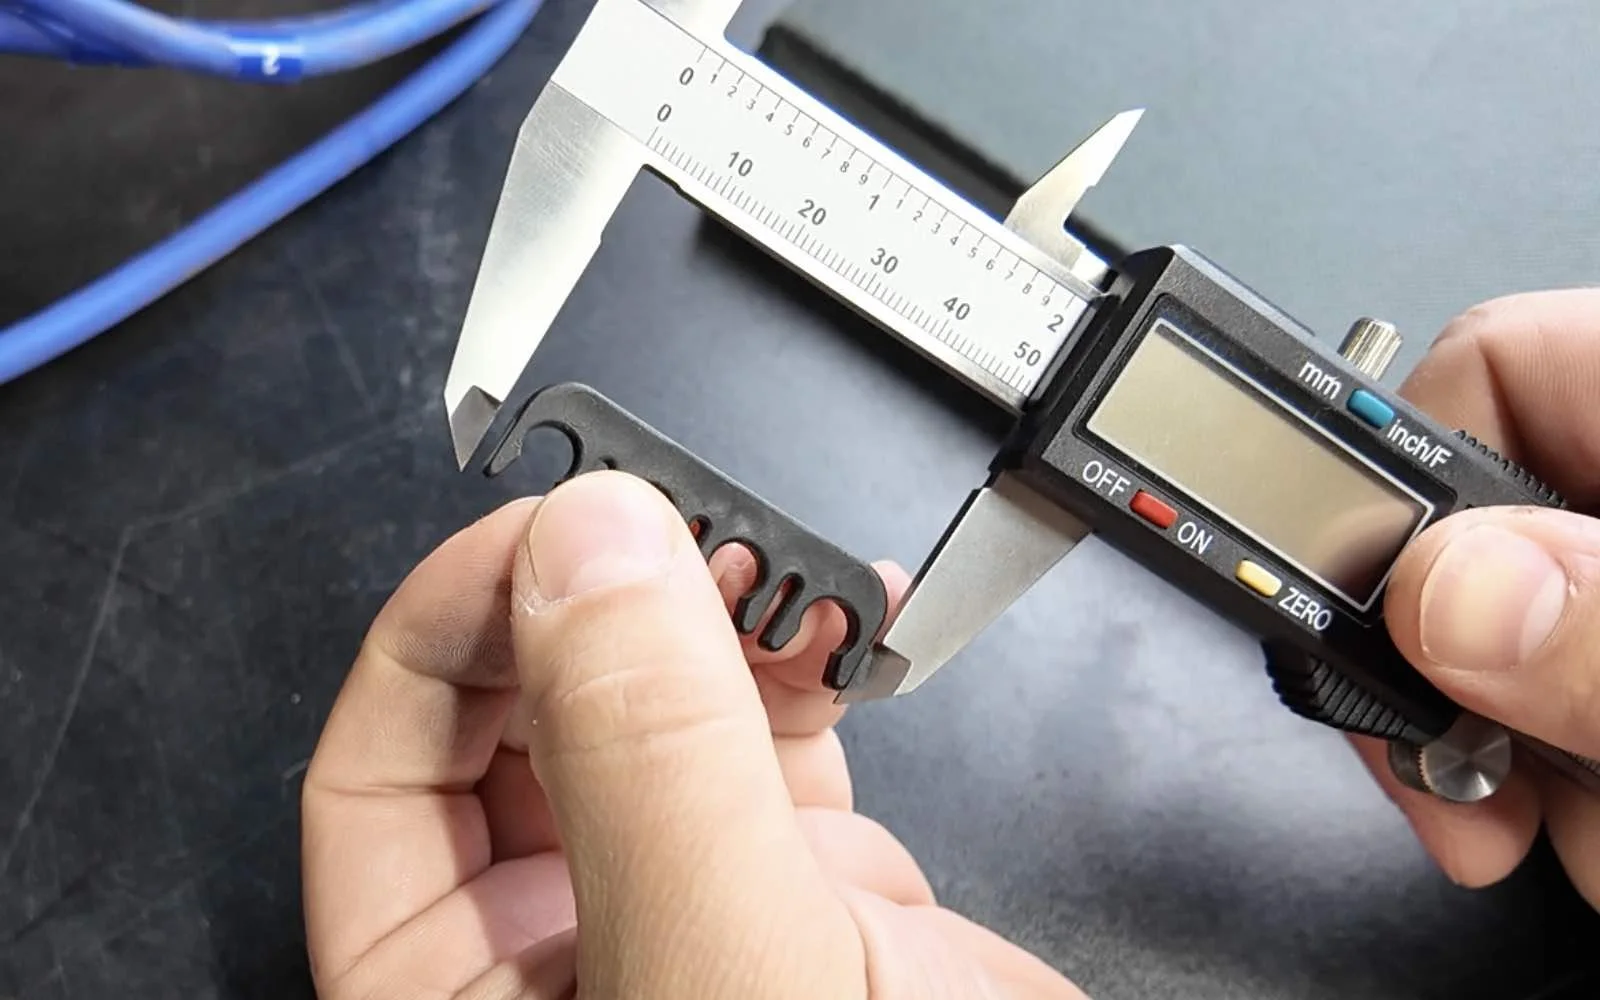
3. MEASURE YOUR PART
Grab a measuring tool like a caliper or ruler and start taking measurements of your spark plug wire clip.
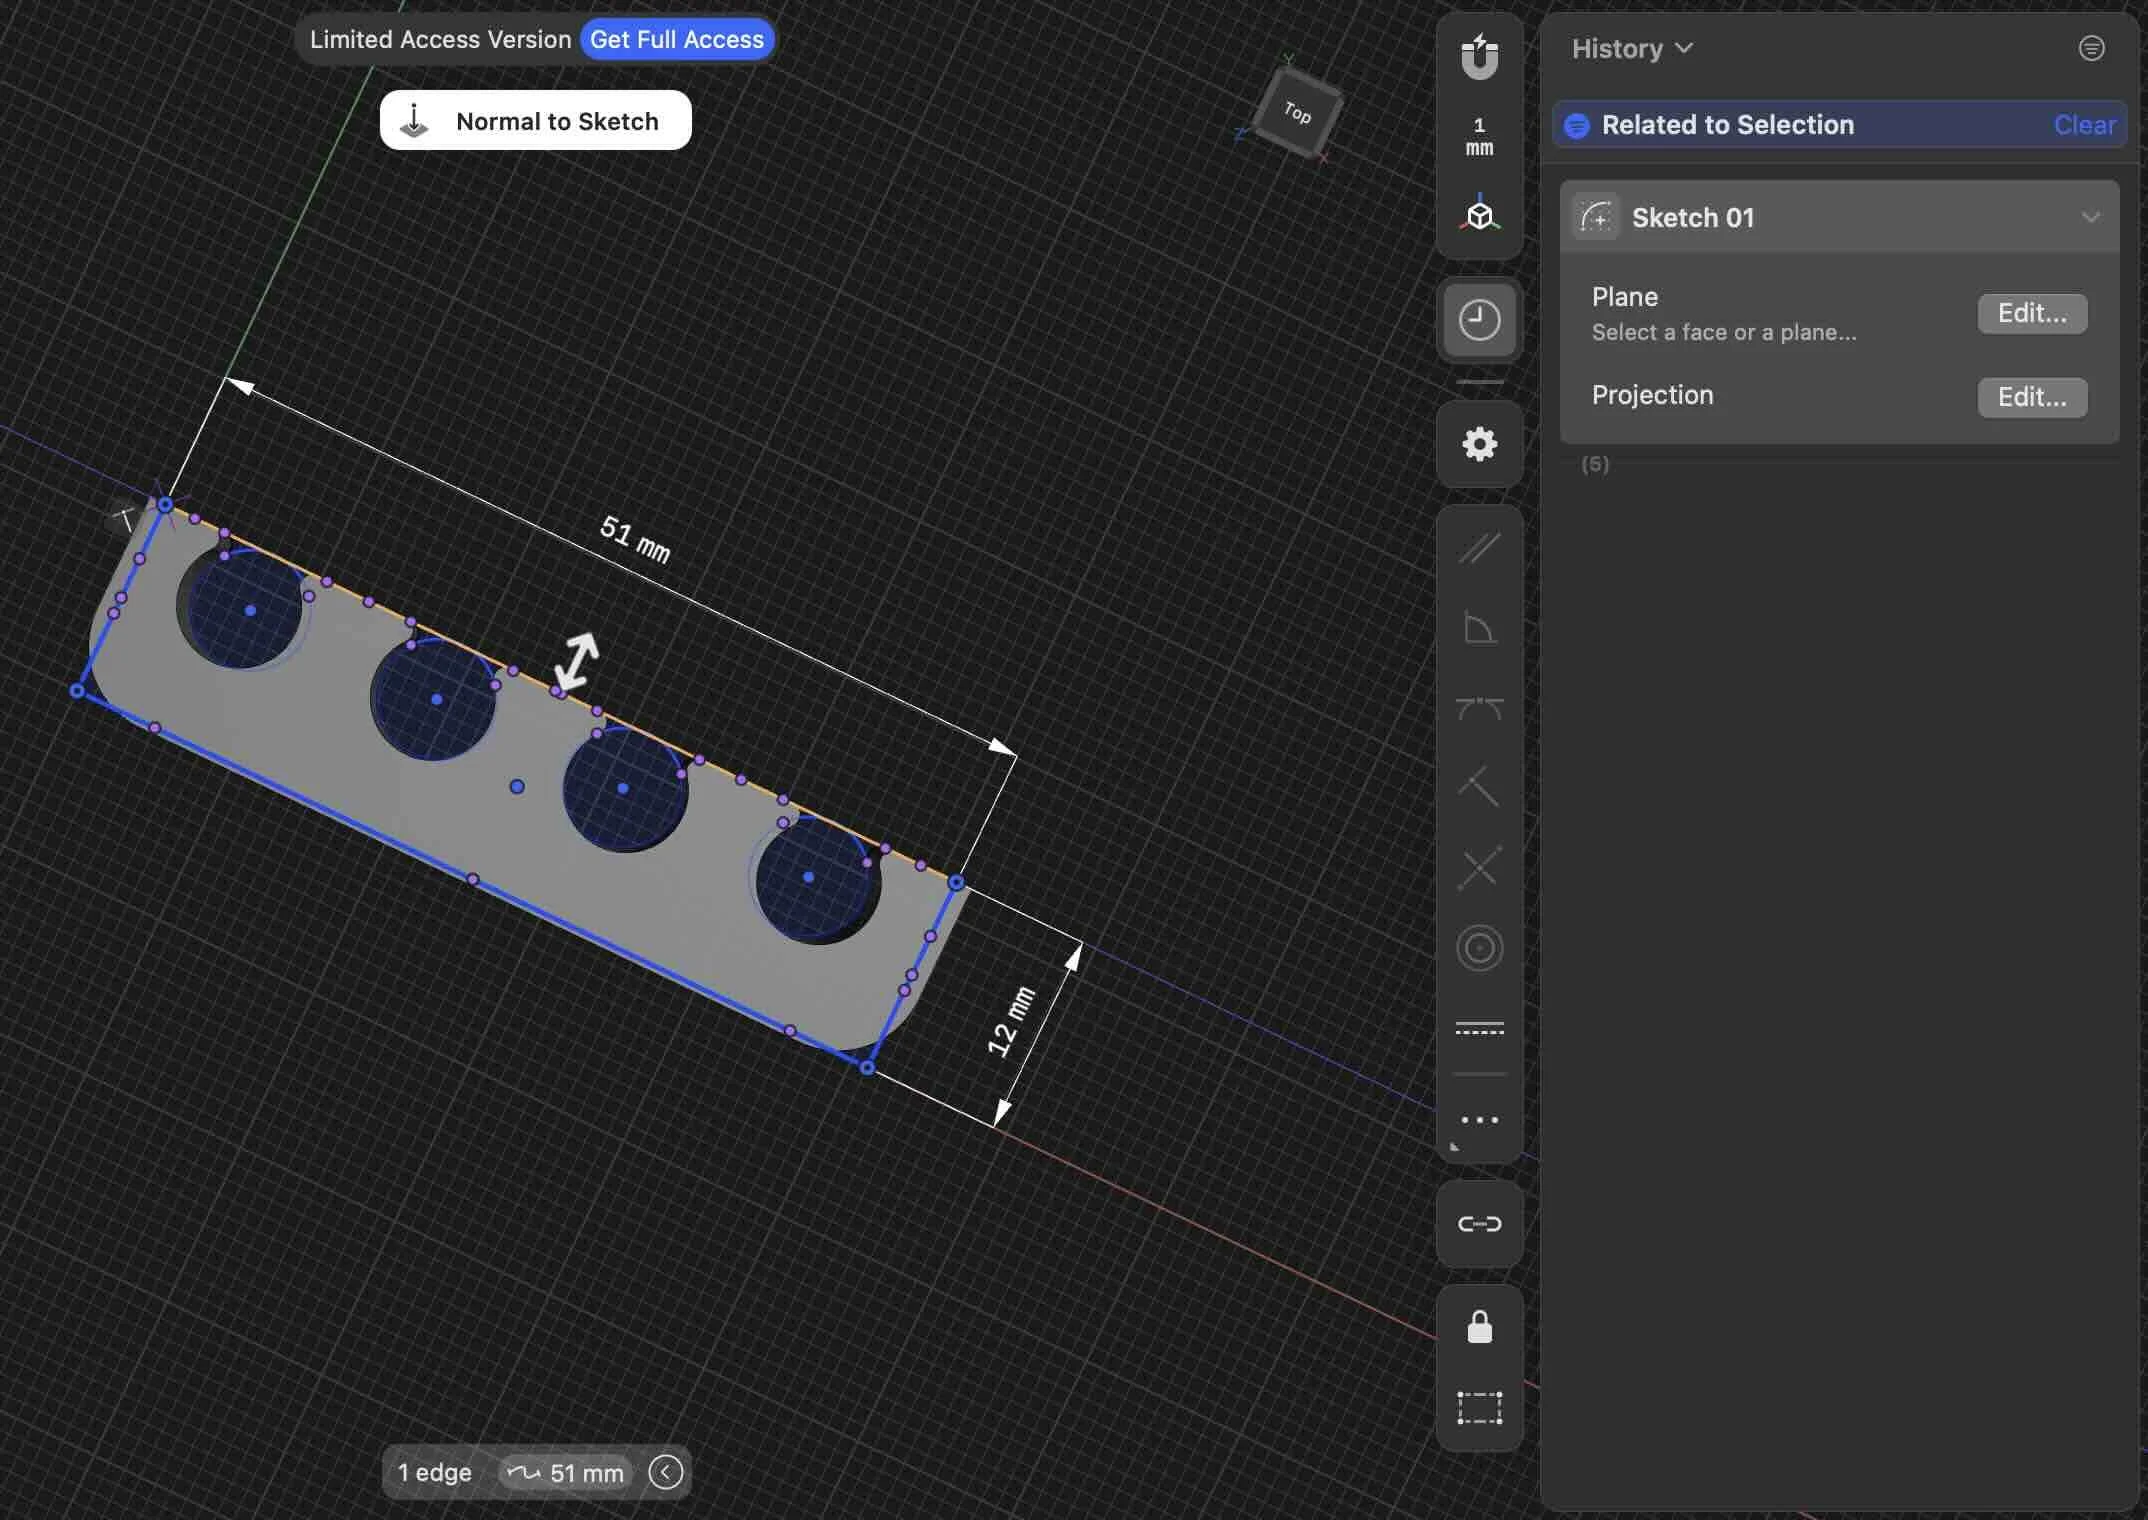
4. MODIFY THE SIZE
Use the history tool in shapr3d on the right hand menu to modify the sketch size. You can adjust the length, width, or diameter of the circles.
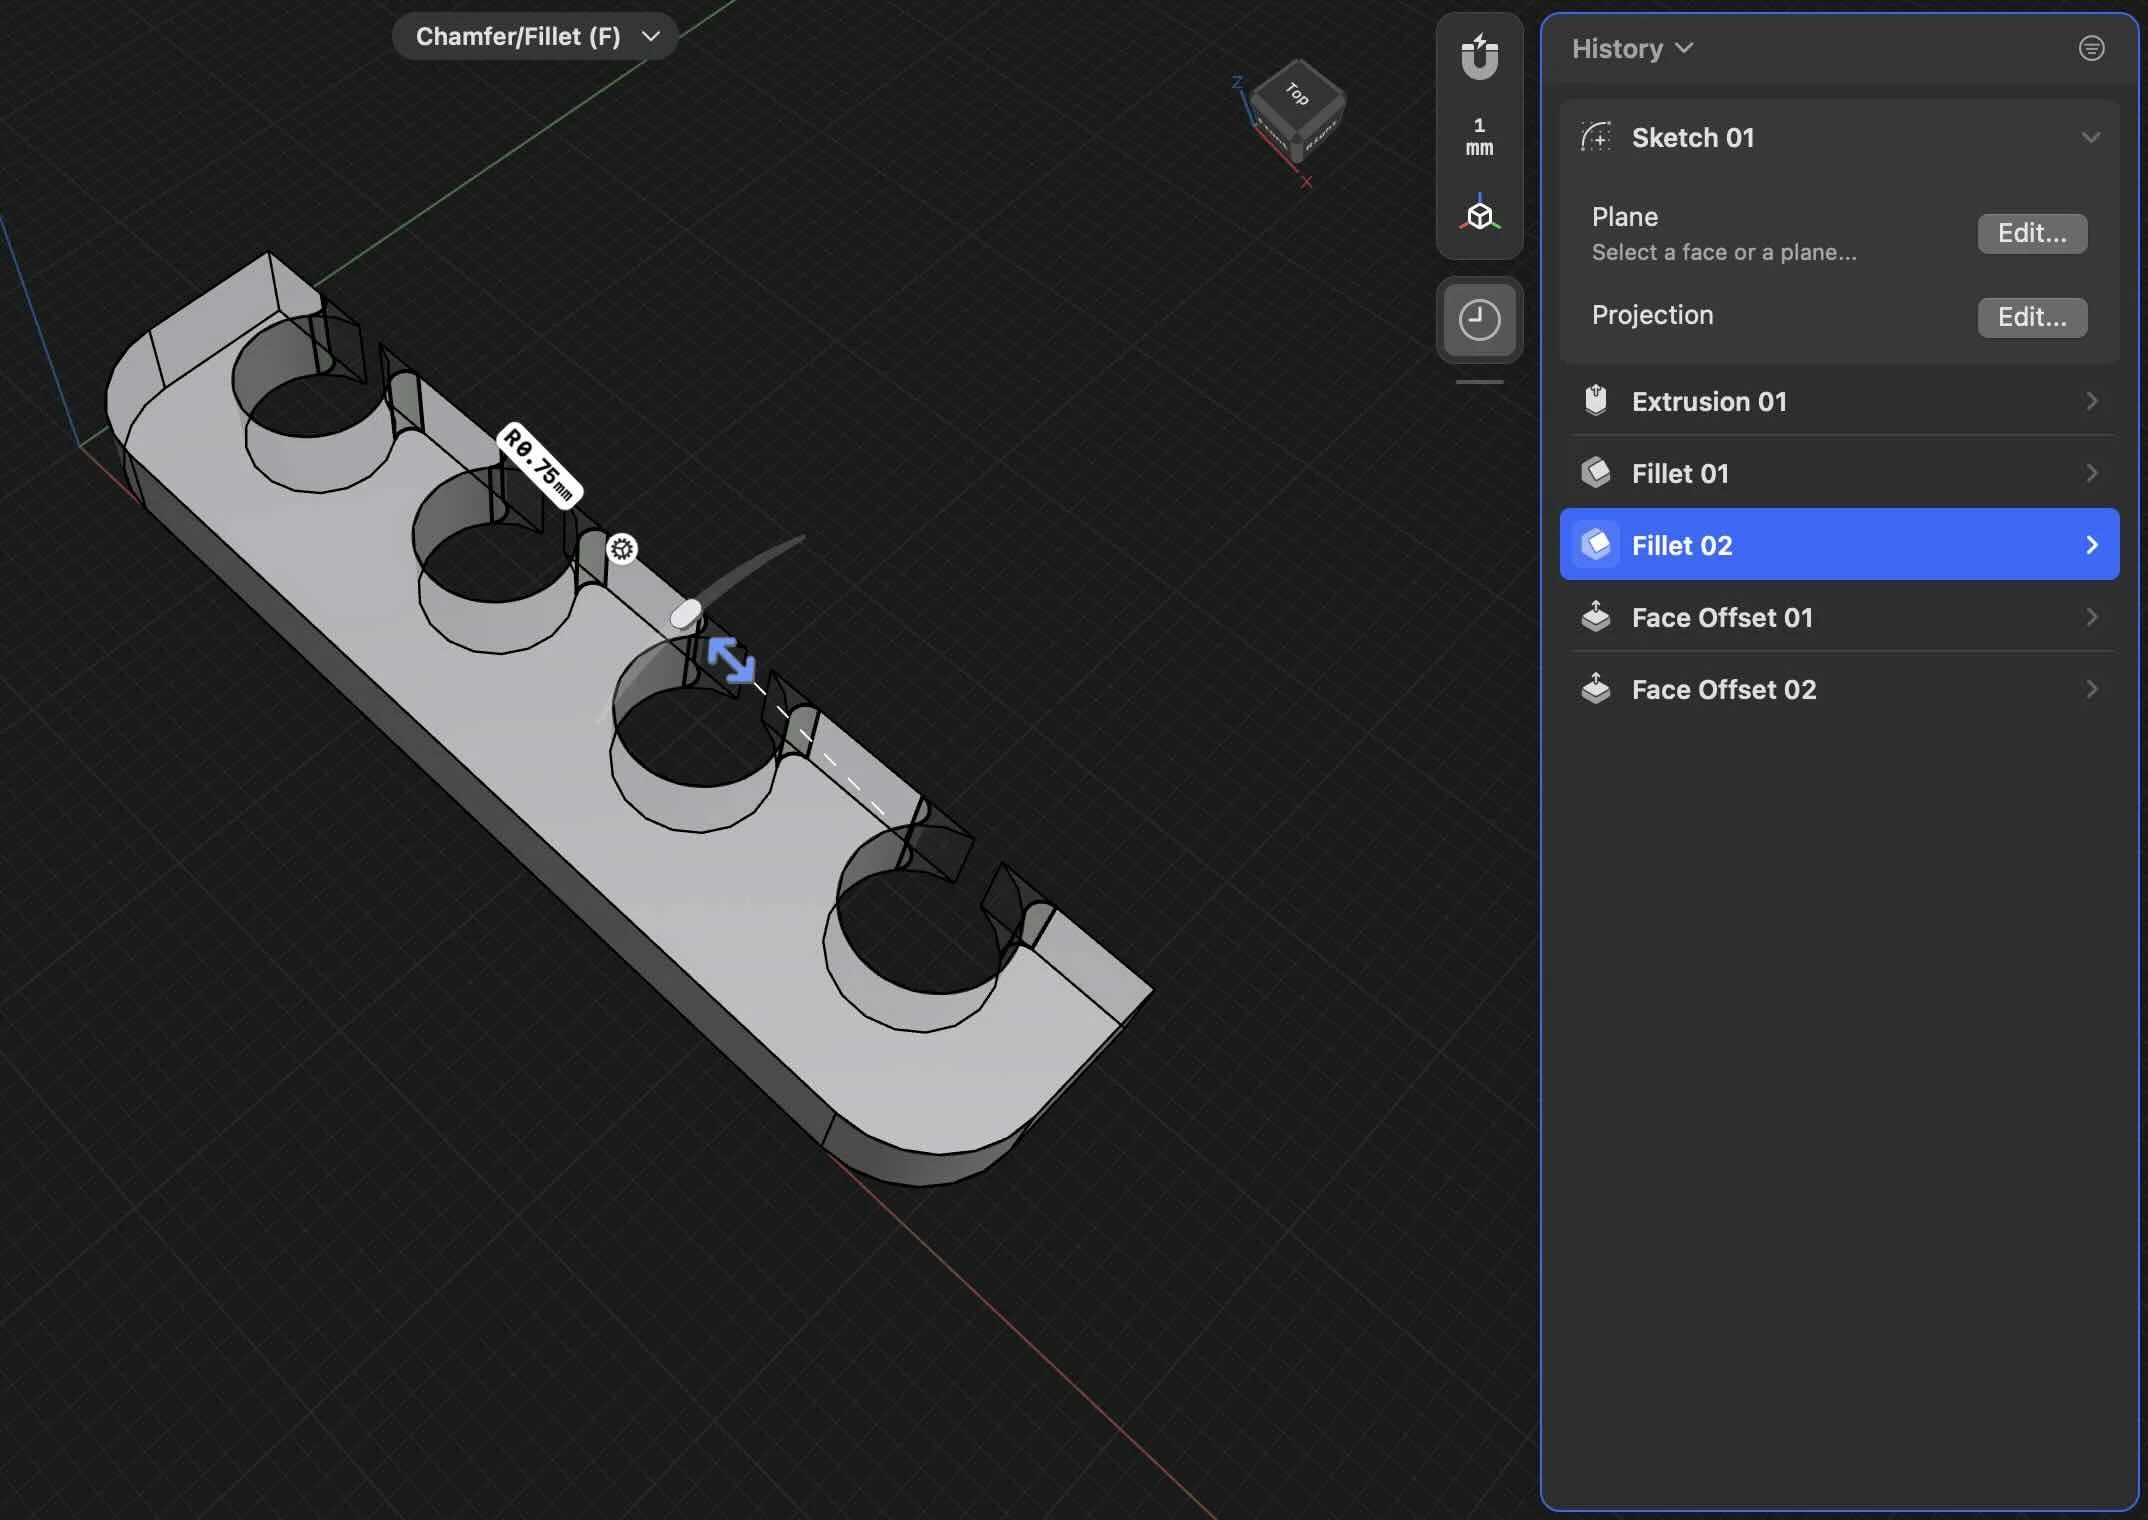
If you want the spark plug wire holder to be thicker, you can also modify the height or by clicking the Extrusion in the history panel.
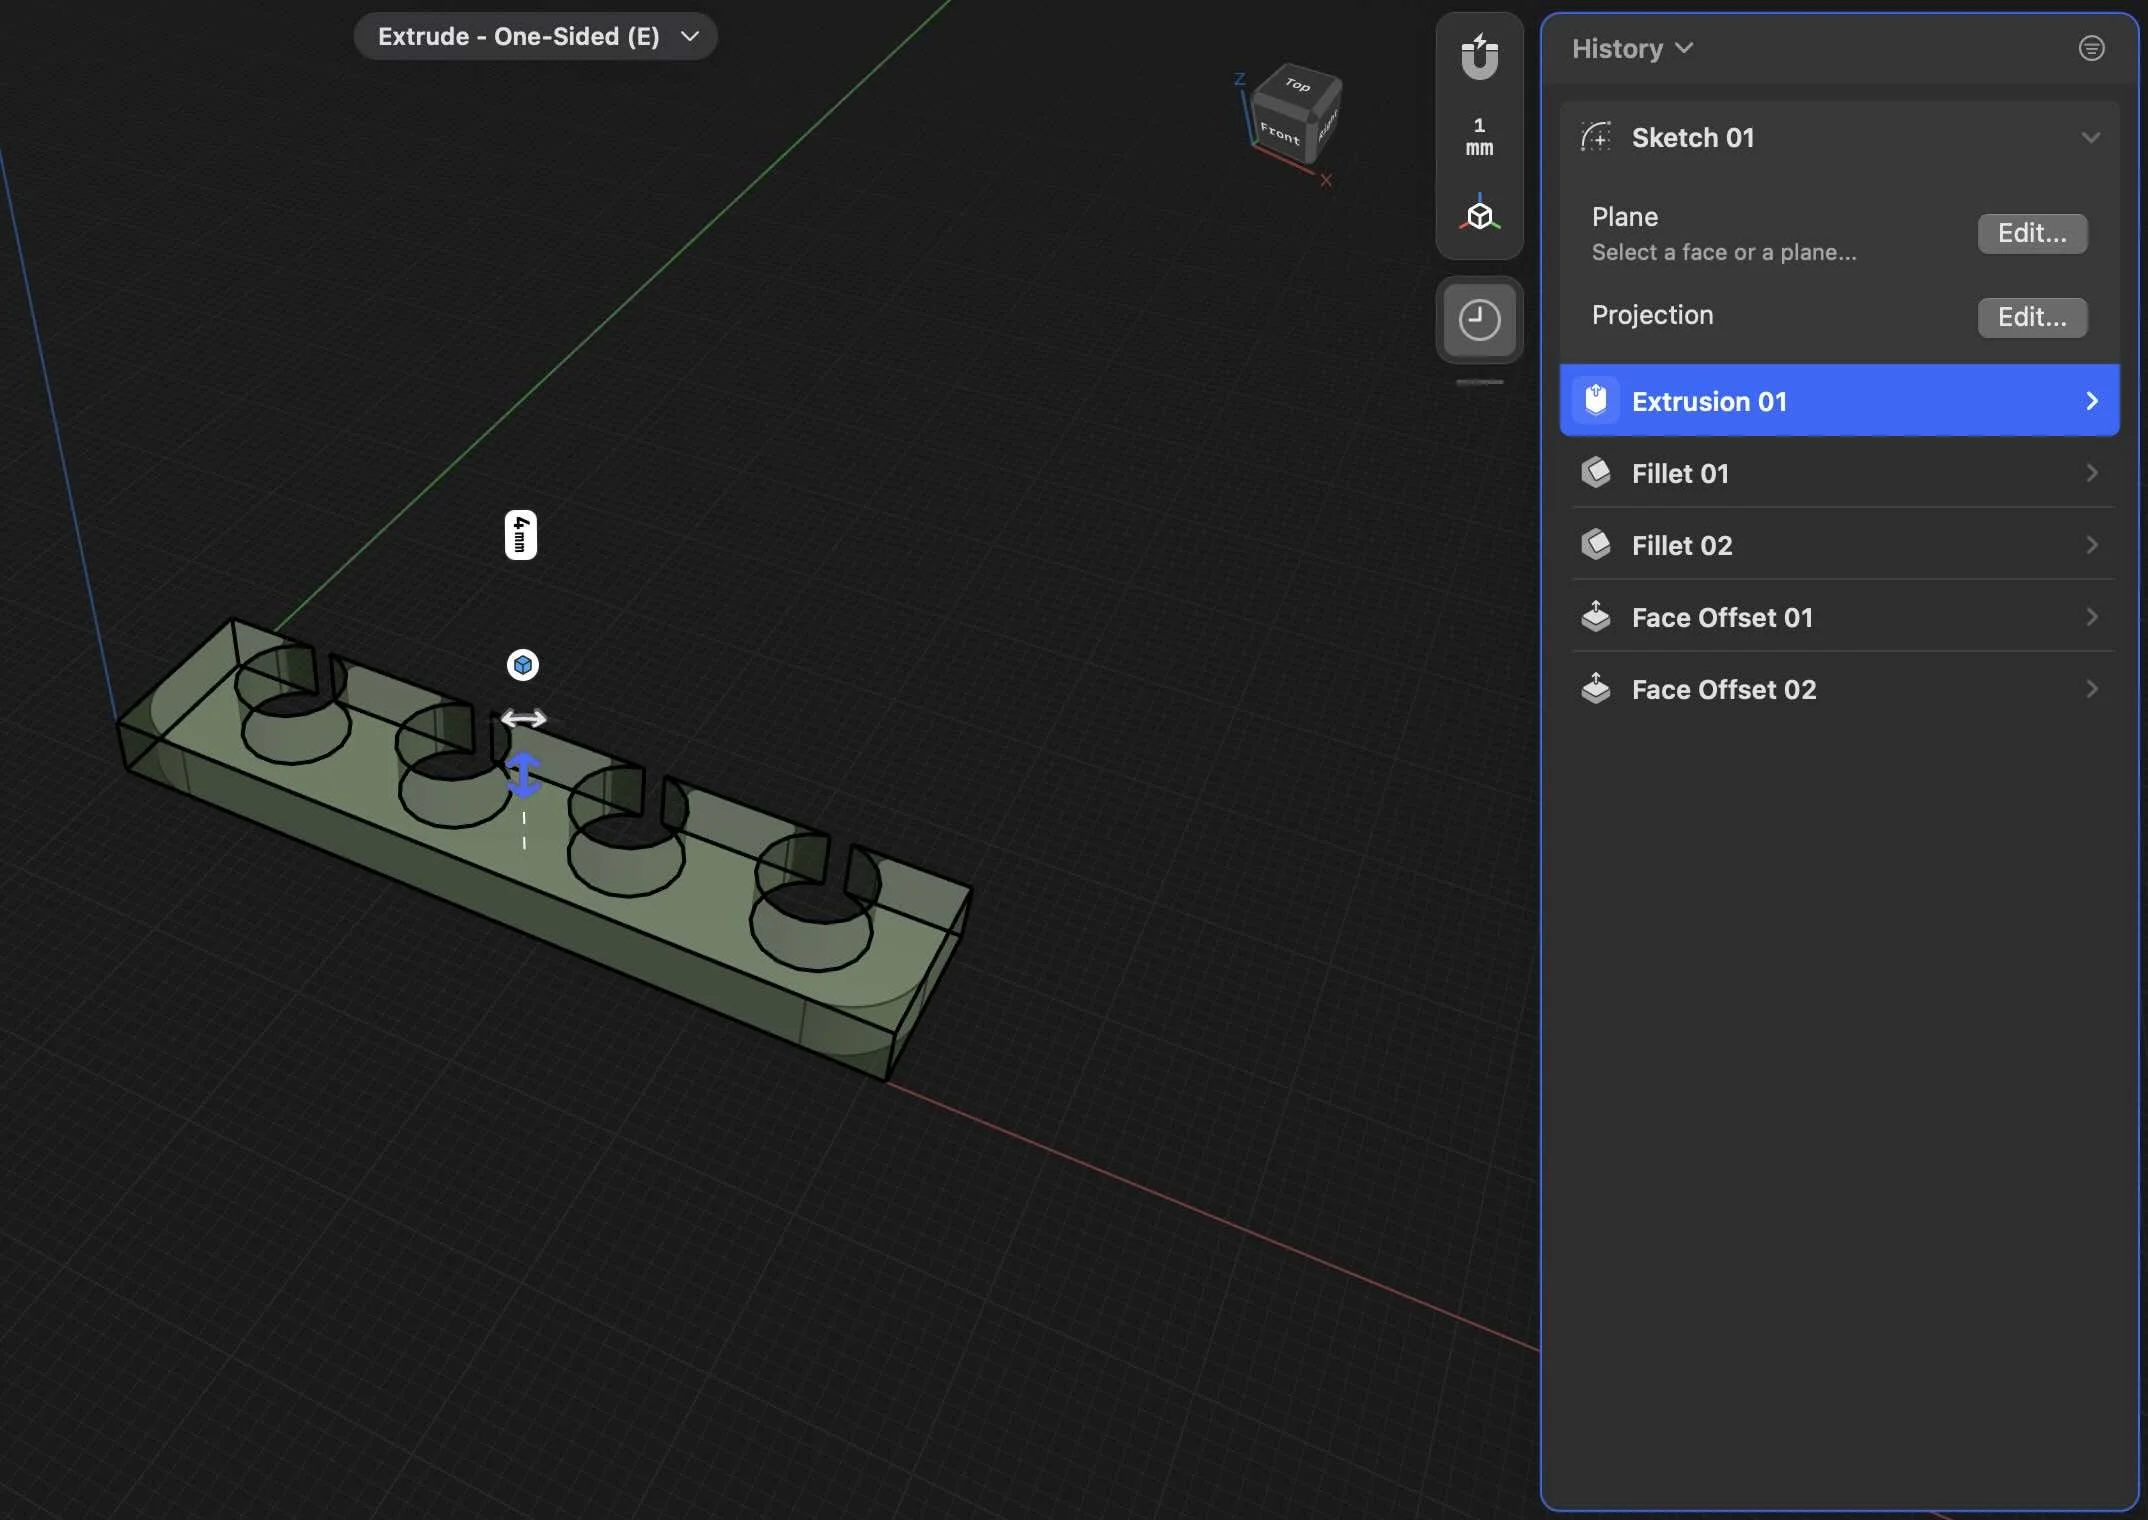
You can also modify the fillets to provide a tigher fit.
5. EXPORT AND PRINT THE DESIGN
Use the Shapr3d export feature to export the design to an STL file and add it to your 3d printing software to print.
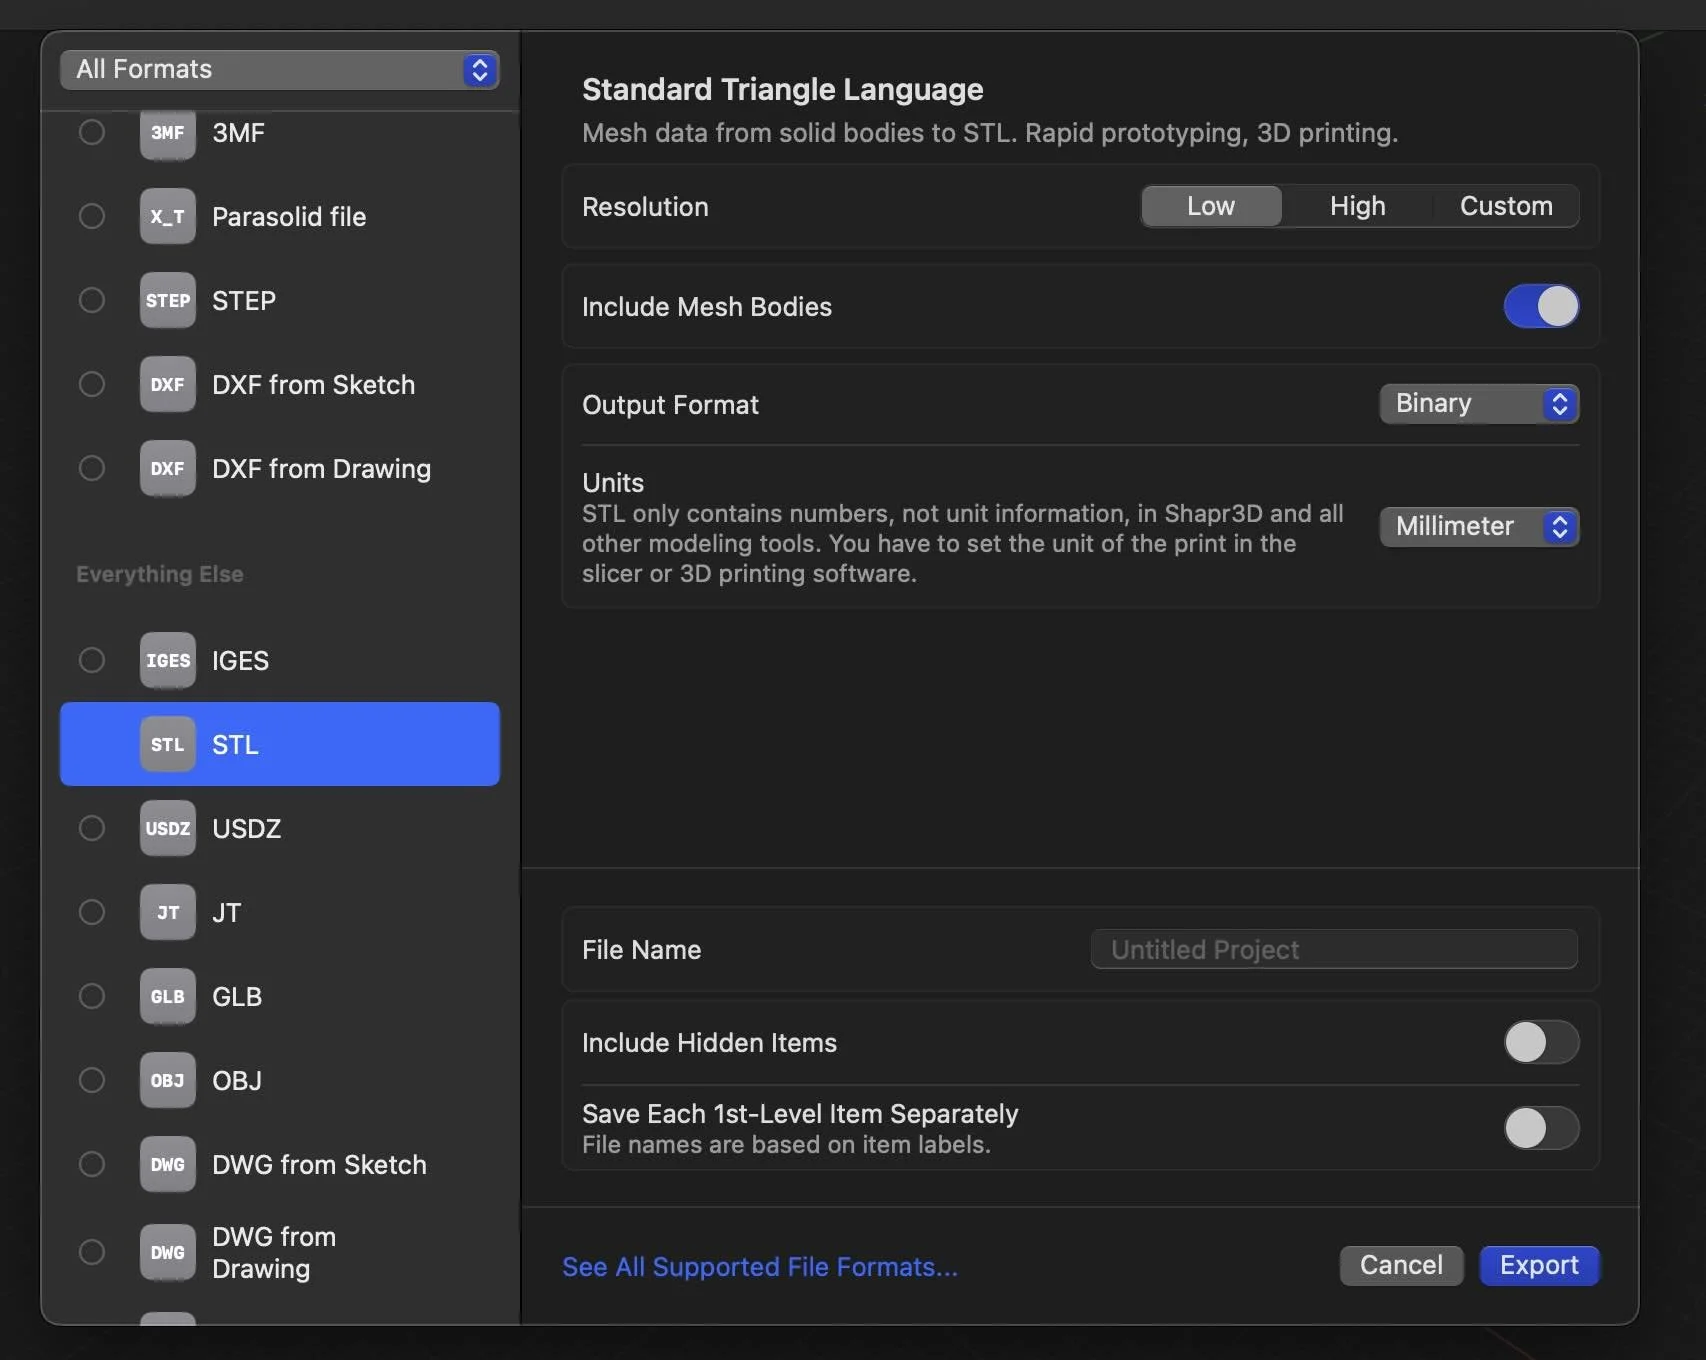
Note: If you don’t have a 3d printer yet, you can also send your part to a print on demand service like PCBway.com.
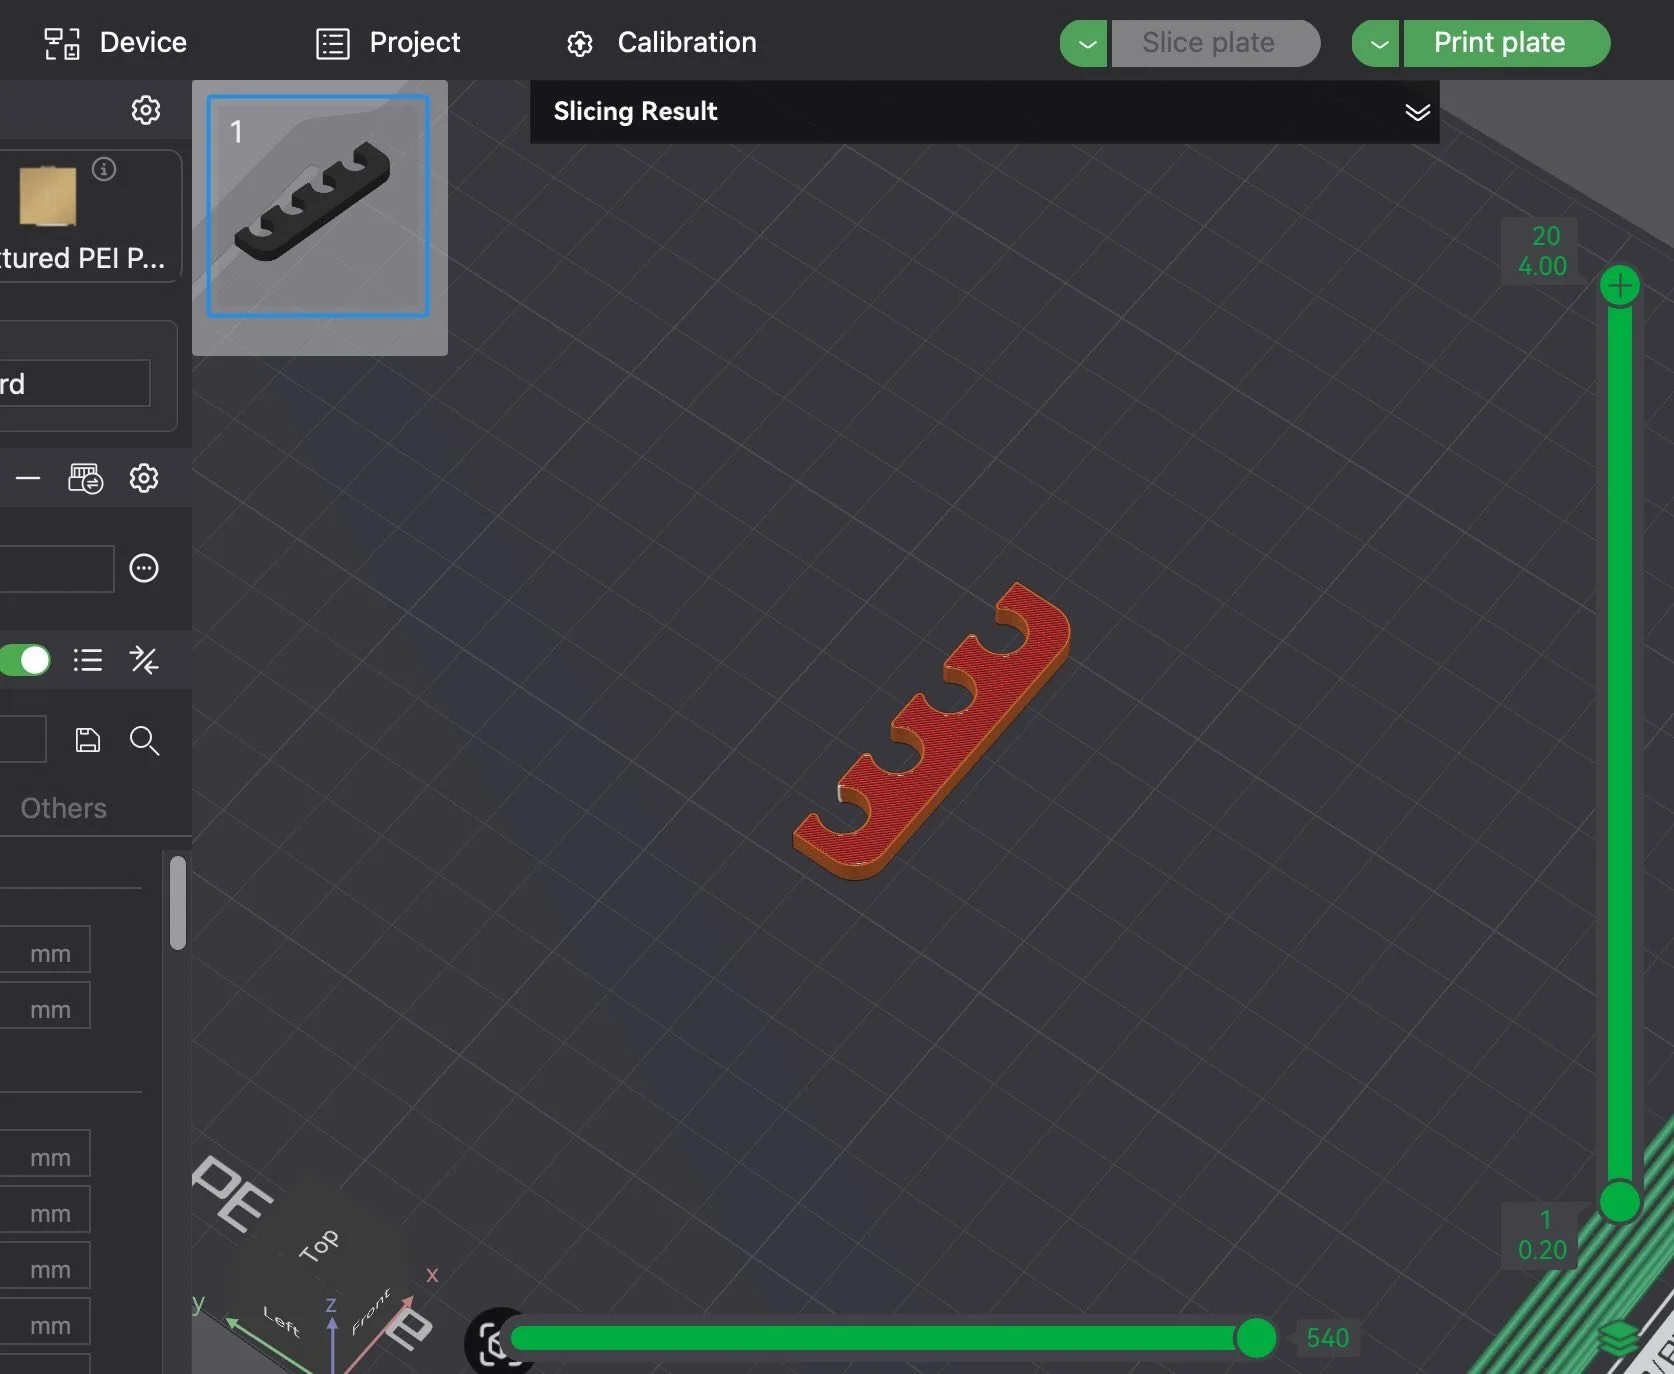
7. TEST FIT THE DESIGN
Here’s the design. Let’s check the fitment:


…PERFECT FIT…
If the size is slightly off you can go back to Shapr3D and adjust the scale using the history function.
To learn more about designing custom 3d printed car parts check out the workshop:
Design 3d Printed Car Parts That Match Your Exact Build.
One afternoon. No complex software. Parts that fit your build perfect.
Instant Access, Risk Free Money Back Guarantee