HOW TO 3D PRINT MULTICOLOR CAR PARTS THAT LOOK BETTER THAN OEM
If you want to start 3D printing car parts and want to take them to the next level — multicolor printing is the easiest way to make your builds look 10x better than OEM.
🎨 ASA Filament – Best UV and heat resistance
🔧 Bambu Lab P1S/X1C - Enclosed 3d printer
🔥 Bambu Lab AMS 2 Pro – Automatic filament changes + built-in dryer
Grab the full 3d printing car parts guide plus the pre-made car parts STL bundle that includes the wheel cap design.
WHY MULTICOLOR 3D PRINTING MATTERS
Most 3D printed car parts are are boring.
They work — but they rarely look great.
Multicolor 3D printing changes that by allowing you to print logos, highlights, or text directly onto your 3d printed car part.
No paint. No decals. No fading.
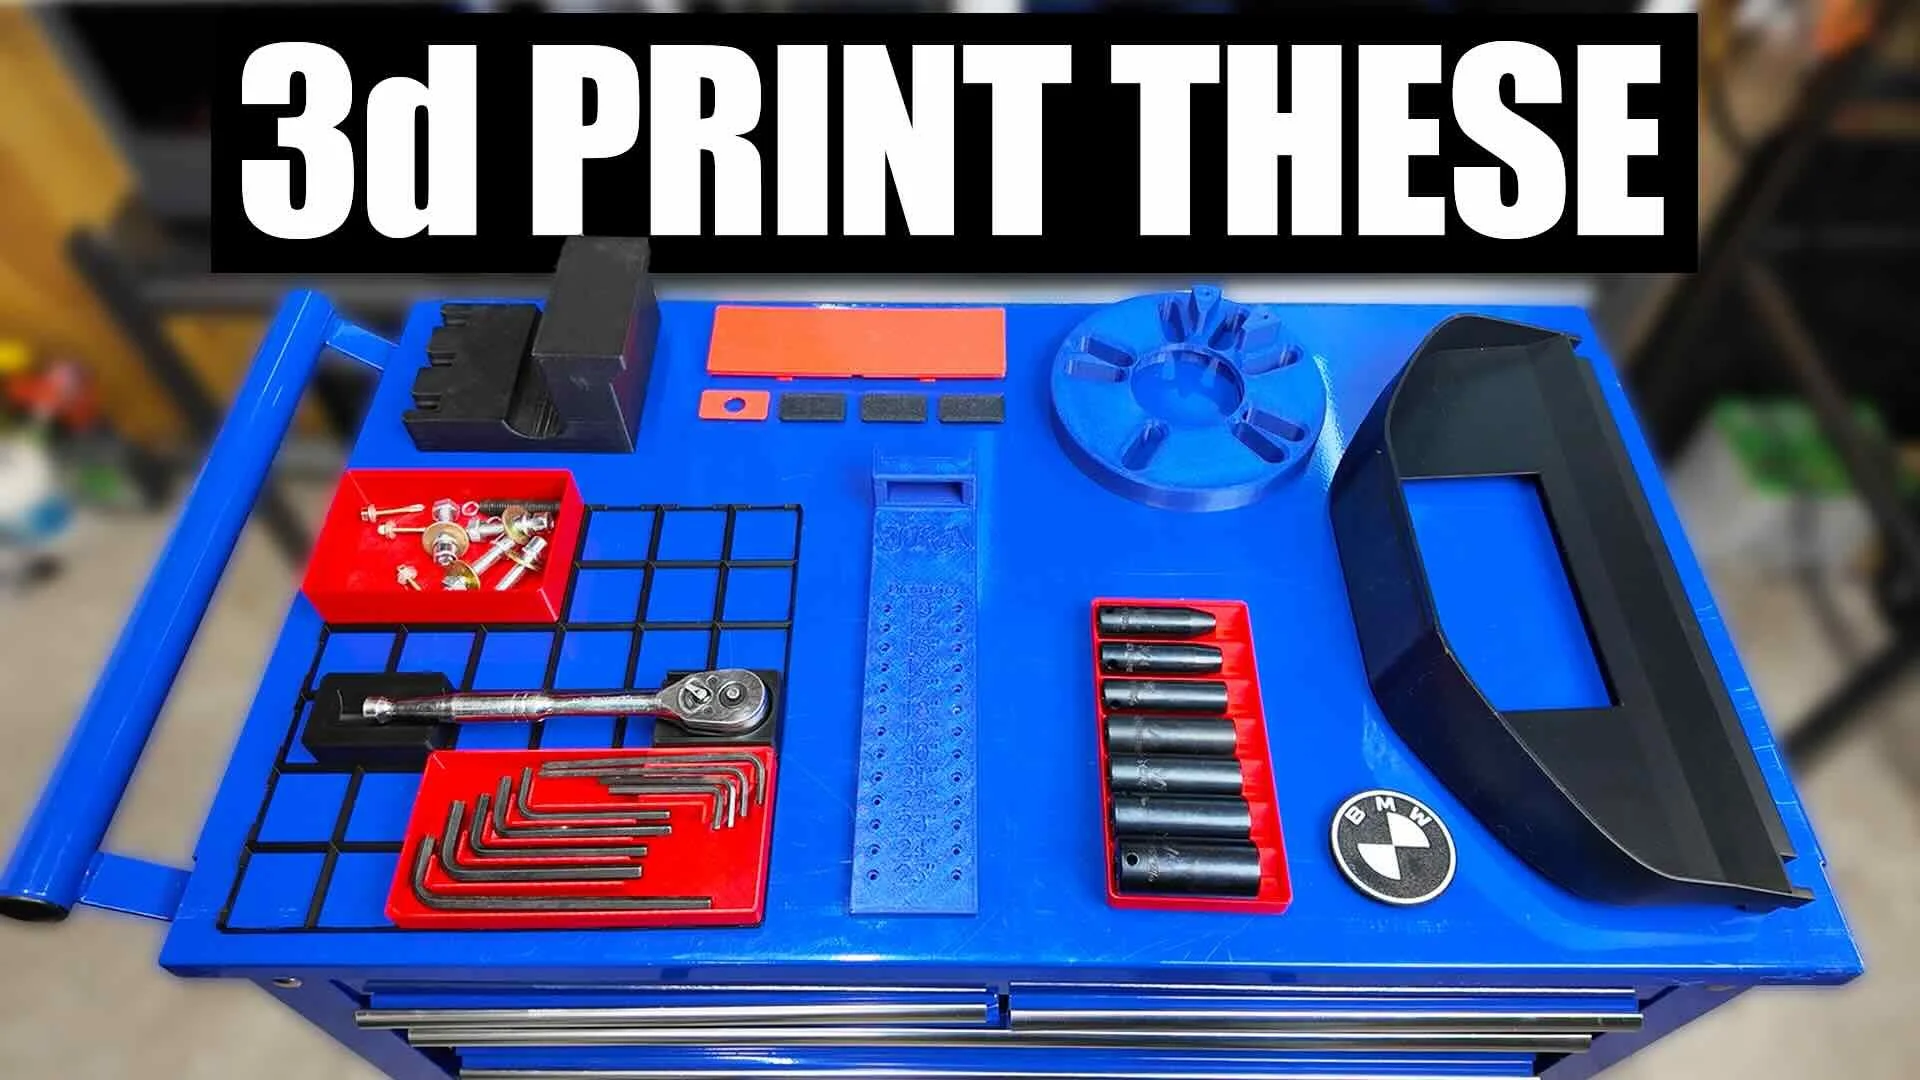
It’s ideal for:
Wheel cap covers
Radio delete plates
Dash inserts
Custom badges and emblems
Aero Discs and trim overlays

THE BEST FILAMENT FOR MULTICOLOR AUTOMOTIVE PRINTS
Now if you want your prints to survive heat, sunlight, and rain — ASA (Acrylic Styrene Acrylonitrile) is the go-to filament.

Why ASA works best:
☀️ UV-resistant — won’t fade like ABS
💧 Water-resistant — perfect for exterior parts
🔥 Heat-resistant — up to 210°F
🎨 Available in multiple colors
You can grab some from [Bambu Lab here]
The only catch? ASA filament can absorb some moisture before its printed, so always dry your filament before printing for the best results.
How to dry ASA:
Use a filament dryer or an AMS unit with a built-in dryer that heats the filament before printing.
WHAT IS AN AMS (AUTOMATIC MATERIAL SYSTEM)?
The [Bambu Lab AMS 2] takes multicolor 3D printing from “painful” to “easy.”

Here’s how it works:
Each spool is motor-fed into the extruder’s hot-end automatically.
When your print switches color, the AMS cuts, retracts, purges the old filament, and loads the next filament.
The printer purges leftover filament into a small block (called a purge tower) to prevent color bleeding.
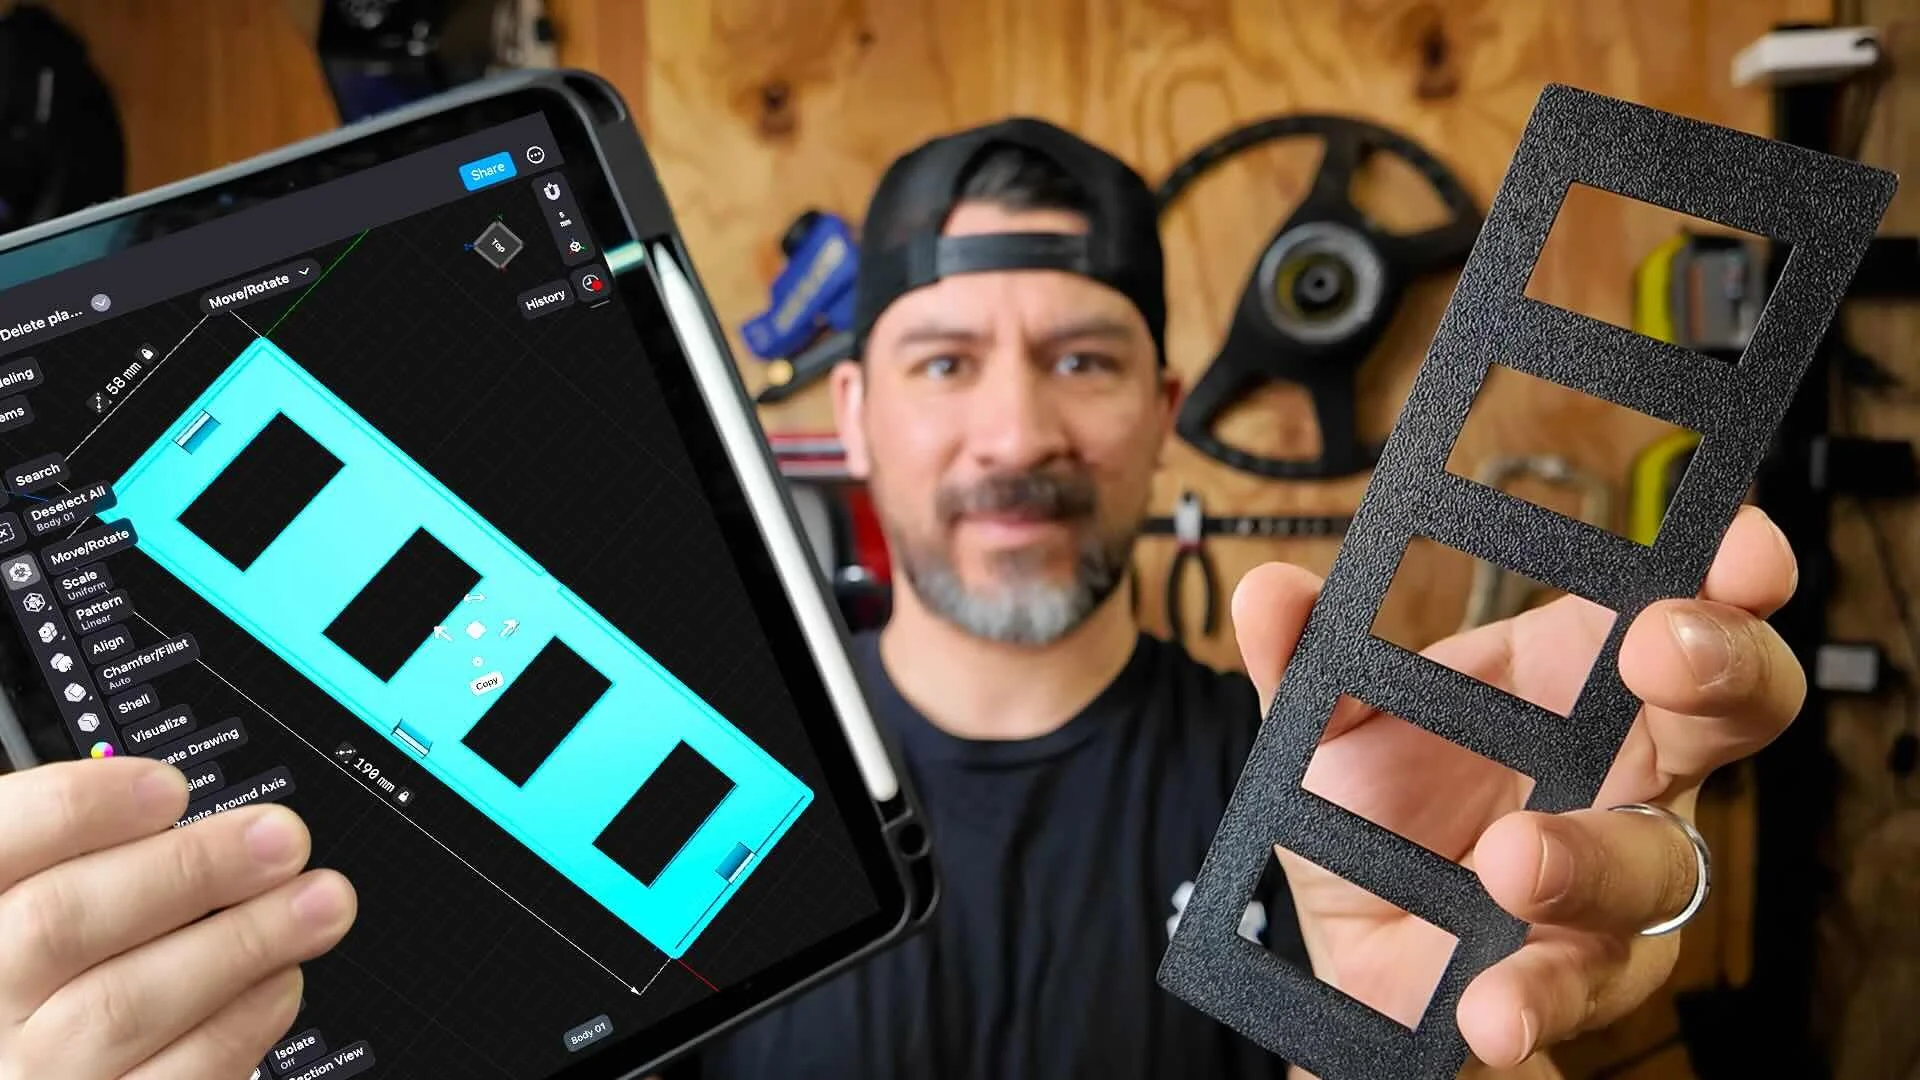
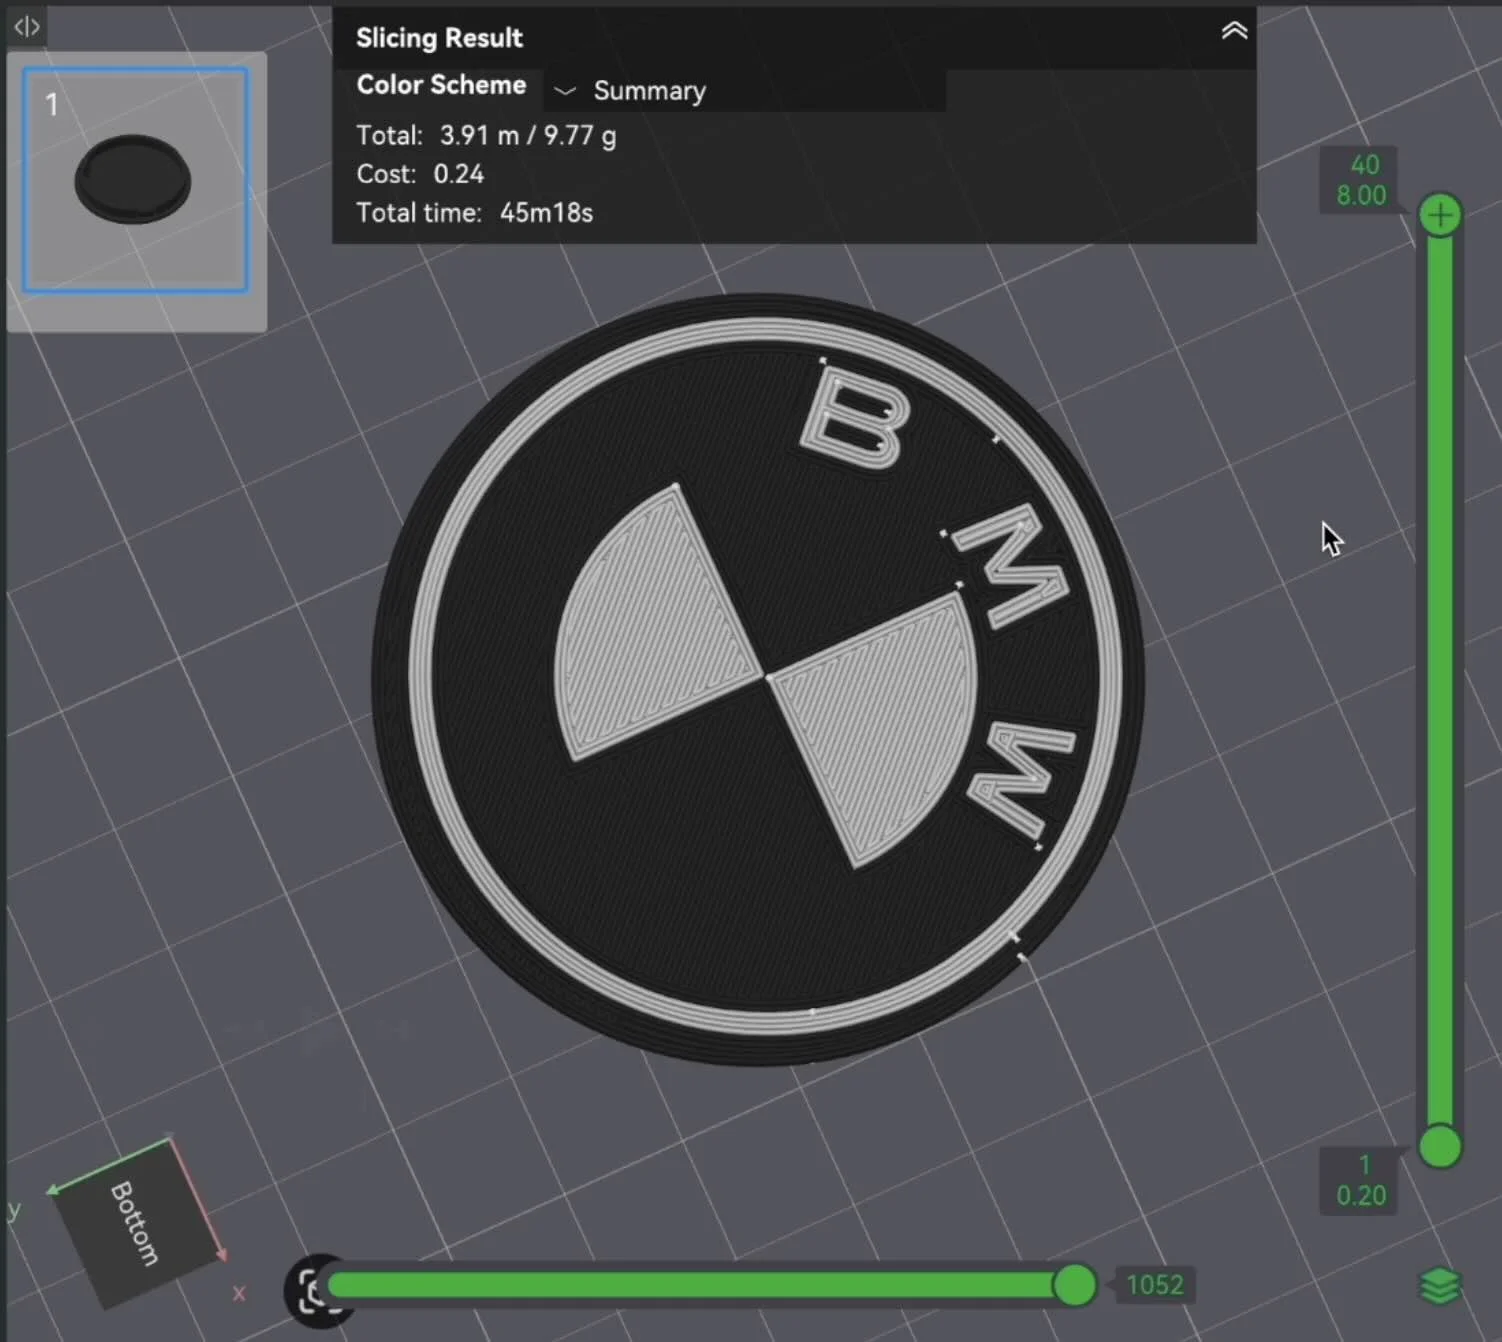
STEP-BY-STEP: PRINTING MULTICOLOR CENTER WHEEL CAP COVERS
⬇️ Download Wheel Cap Cover Shapr3d File Here
⬇️ Download Pre-made Wheel Cap Cover STL Here
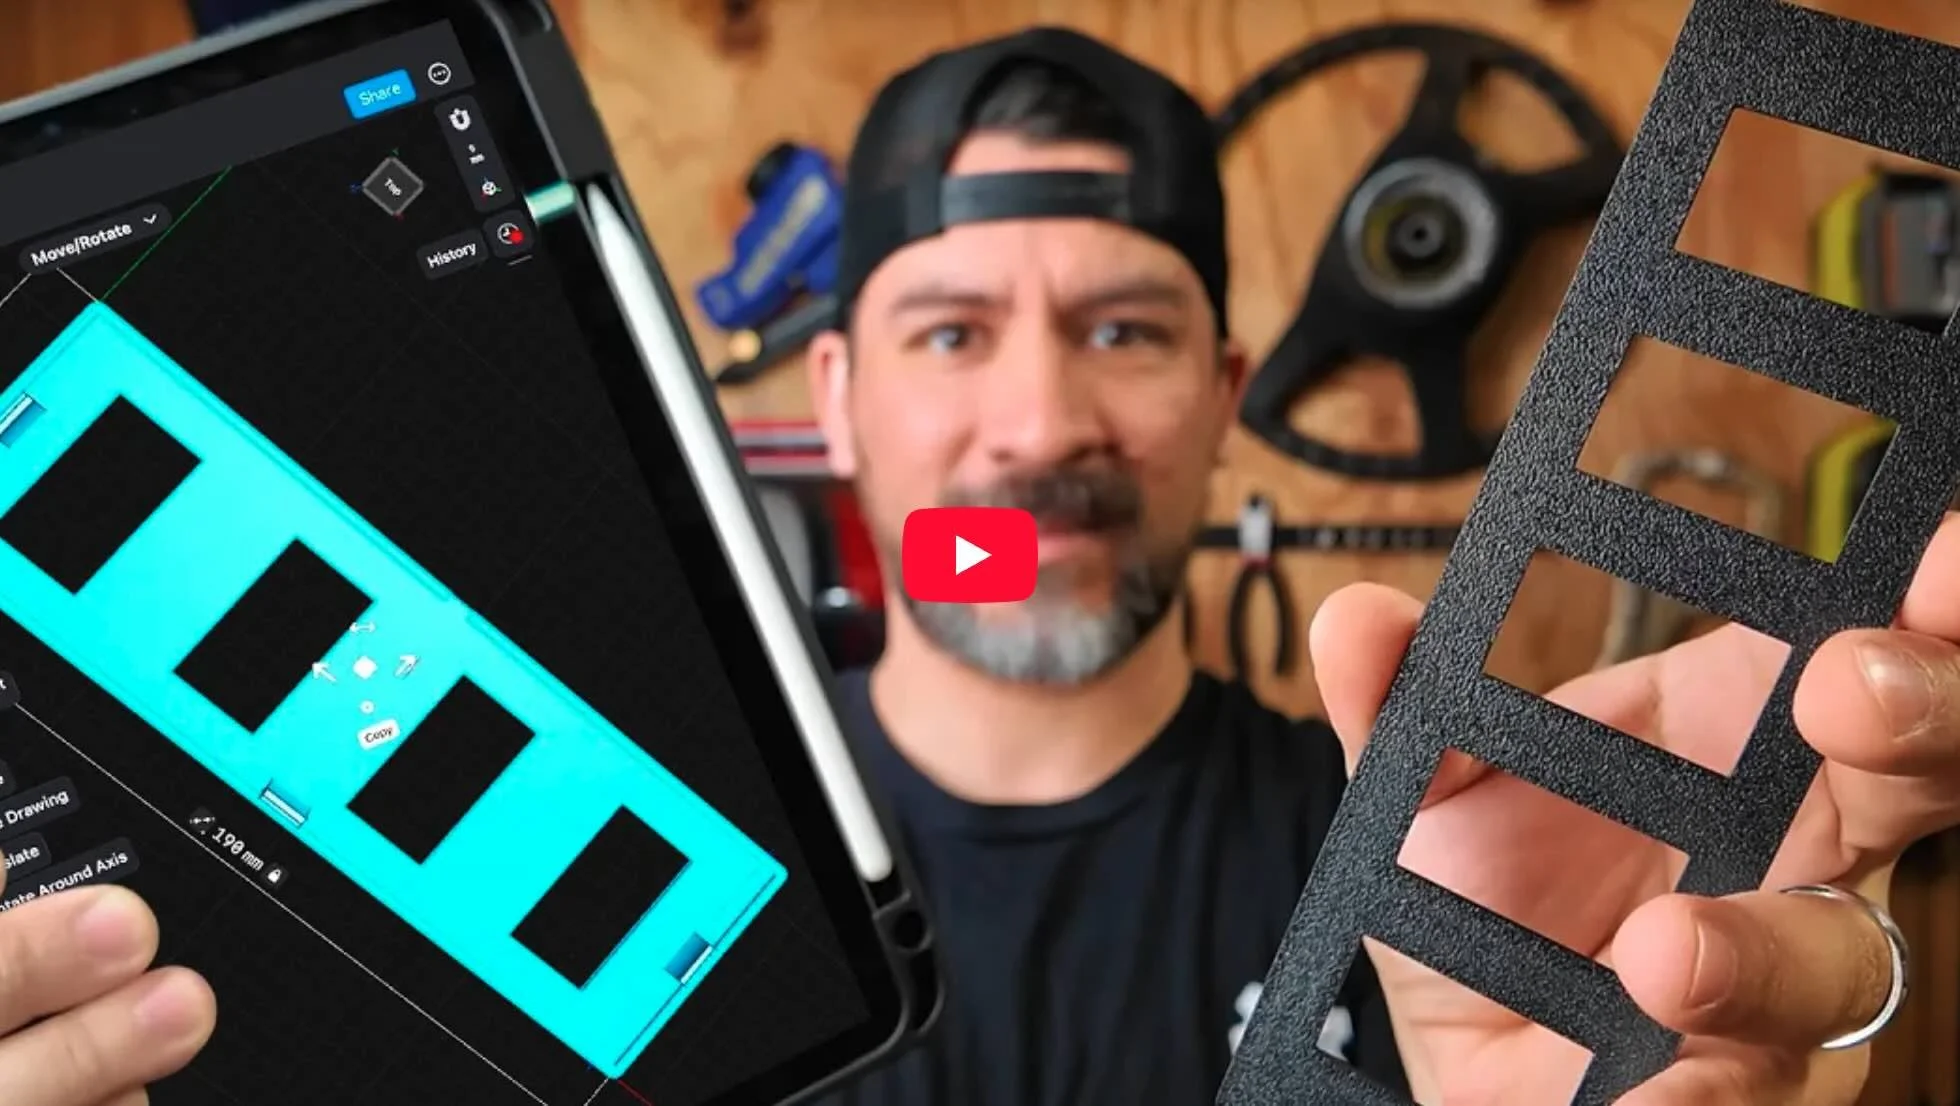
If you want a simple 3d printed car part to start with, wheel cap covers are perfect. Nearly every car has them, and they’re small enough for test runs.
But if you’re ready to make your own custom car parts, check out this full on-demand workshop that teaches every step here.
Find or design your model:
Search online for “wheel cap cover STL” or use our free starter file to download a blank you can import into Shapr3d CAD software.Import into slicer:
Once, the dimensions are updated in CAD, export as an STL, and drag your STL into your slicer (like Bambu Studio).Add your logo or design:
Import an SVG (e.g., BMW, Honda, or your own logo), scale it to fit, and center it on the cap.Set your colors:
Choose your base (e.g., black), accent (white), and secondary color (red).Merge objects:
Select both parts and hit Merge before slicing — this ensures the logo prints directly into the part.Print and install:
The AMS will automatically switch filaments between layers, giving you crisp color transitions and an OEM-level finish.
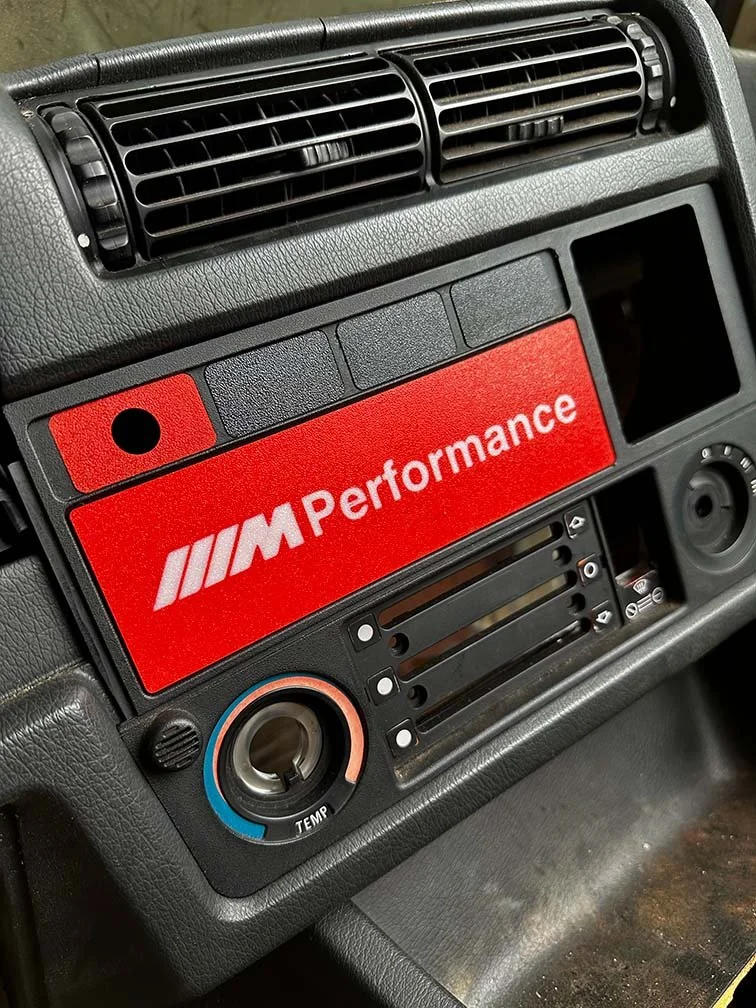
REAL-WORLD RESULTS: ASA MULTICOLOR TESTS
After testing with black + white ASA, the wheel cap came out durable and perfectly aligned.


We also tested:
Red + white radio delete plate for interior contrast
Three-color Aerodisc inspired by Roti-form design
HOW TO ADD COLOR LOGOS OR TEXT TO YOUR 3D PRINTED CAR PART
Adding color to car parts is easy once you understand how slicers treat layers:

Import your STL
Import SVG graphics
Delete unwanted objects
Resize and center on your part
Flip text or logo
Assign colors
Adjust height for proper bleed
Merge the remaining objects and slice
That’s it — your 3d printer with the AMS unit will handle the color switching automatically.
COMMON ISSUES (AND HOW TO FIX THEM)
DESIGN YOUR OWN CAR PARTS FOR MULTICOLOR PRINTING
If you want to skip the trial-and-error with trying to design your own 3D printable car parts, you’ll love this 👇
Design 3d Printed Car Parts That Match Your Exact Build.
One afternoon. No complex software. Parts that fit your build perfect.
Instant Access, Risk Free Money Back Guarantee
MULTICOLOR 3D PRINTING FILAMENT RECAP
FINAL THOUGHTS
Multicolor 3D printing doesn’t just make your parts look better — it makes them stand out as custom, one-off creations that reflect your build’s identity.
From subtle two-tone deletes to full-color aero discs, you can now print parts that look painted straight from the factory — with no paint at all.
LEARN MORE