
iPhone vs Professional 3D Scanner for 3D Printed Car Parts: The FULL Test
If you want to design detailed 3D printed car parts, eventually you’re going to run into one big question… Can you get away with the iPhone in your pocket, or do you really need a professional 3D scanner?
To find out, I tested both on real automotive parts.
I scanned them, rebuilt them in CAD, printed prototypes, and compared the results.
In this guide, I’ll show you exactly what worked, what didn’t, and which option makes the most sense if you want to reverse engineer custom car parts for your ride.
Step 1: Pick a Real Car Part to Scan
For the first test, I used an old ashtray insert. It was the perfect part because the goal wasn’t just to copy it — it was to use the scan as a reference and turn it into a completely new design later.
I tested three scanning methods across an iPhone and Revopoint Metro Y Pro 3d Scanner.
iPhone 14 Pro with Polycam (LiDAR/Photogrammetry)
iPhone 14 Pro with SureScan 3d (front IR scanning)
Revopoint Metro Y Pro professional 3D scanner
🎁 Use affiliate code REVOPRAATB for an additional discount on Revopoint scanners.
This gave me a good mix of phone-based scanning and professional-grade scanning to compare side by side.
And here’s the hardware comparison.
LiDAR / Photogrammetry
Pros: Easy to access, lower cost if you already own the phone, and photogrammetry can create a decent reference scan.
Cons: LiDAR struggles with smaller car parts, scale is not very accurate, and scans usually need manual measuring and resizing.
Front IR Scanning
Pros: Quick to test and uses the phone hardware you already have.
Cons: Harder to see what you are scanning, weak detail capture, and not accurate enough for detailed automotive reverse engineering.
Professional 3D Scanner
Pros: Highest detail, better measurement accuracy, cleaner scans, and works on small parts, medium parts, and larger areas like engine bays.
Cons: Higher upfront cost and more setup than phone-based scanning.
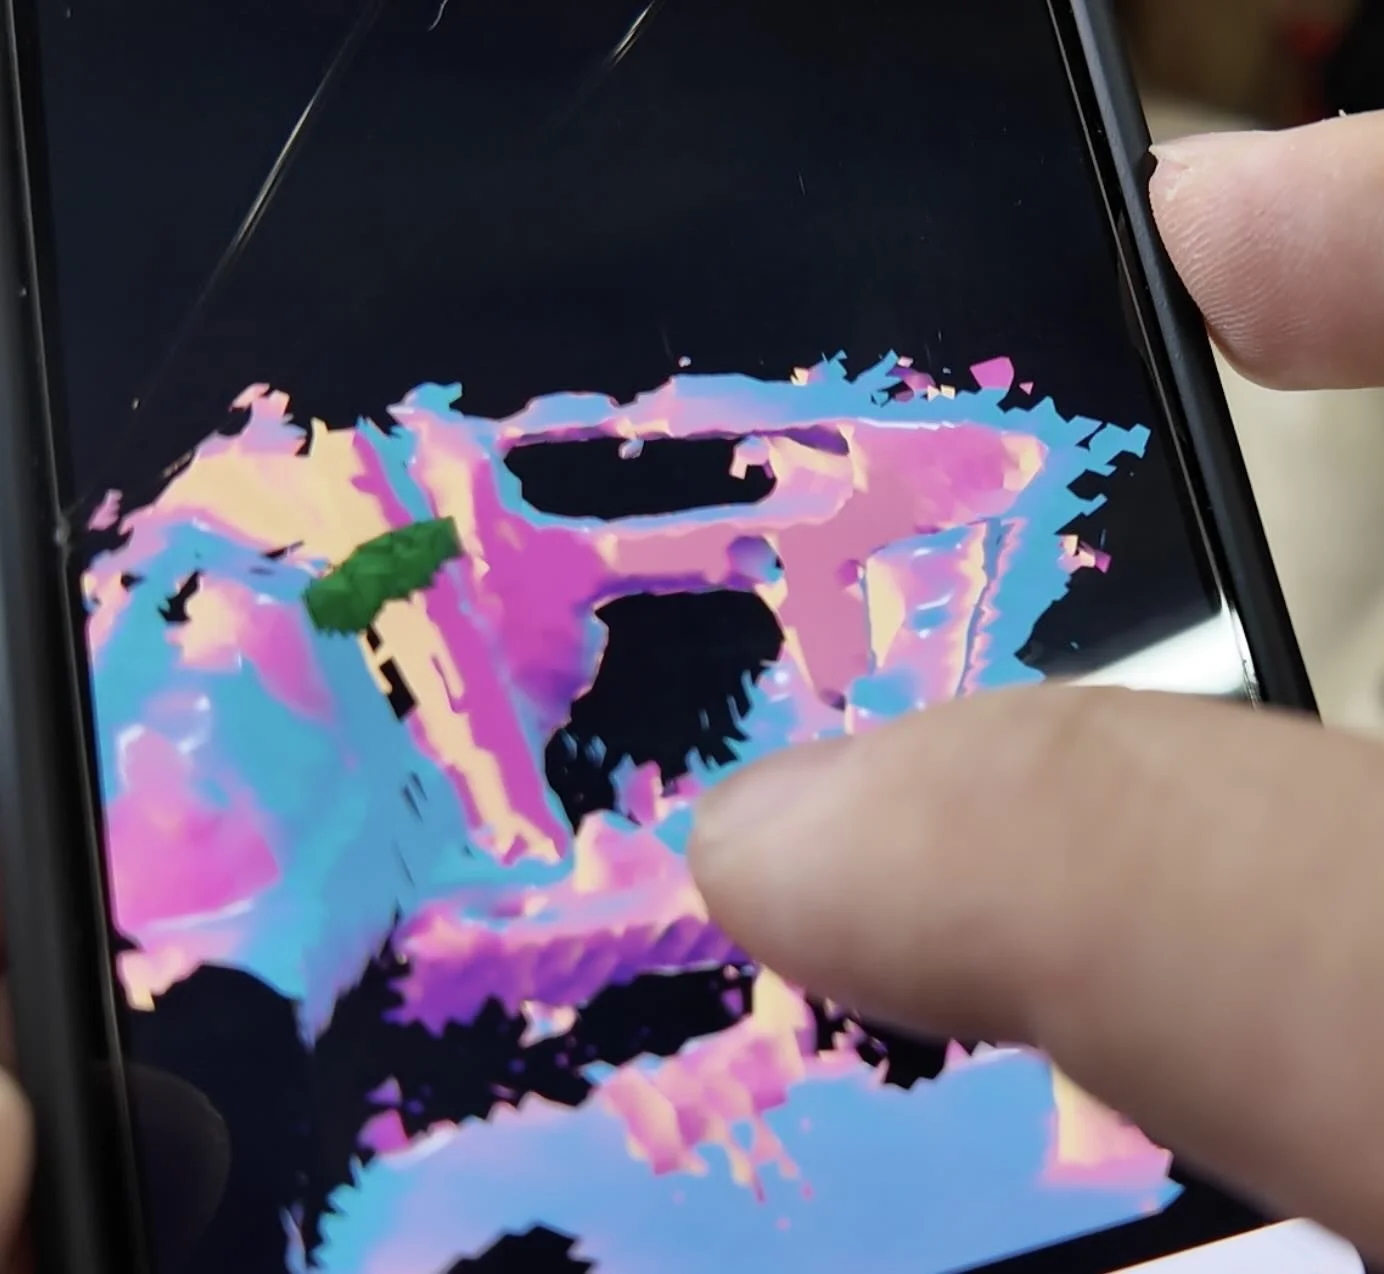
Step 2: Test the iPhone Scanning Methods
The first was Polycam, which can use either LiDAR or photo-based scanning.
I quickly found that LiDAR wasn’t a great fit for smaller car parts. It’s much better for large areas like rooms or interiors than small detailed automotive pieces.
So I switched to photogrammetry mode, where you take photos of the part from different angles and let the app process them into a scan.
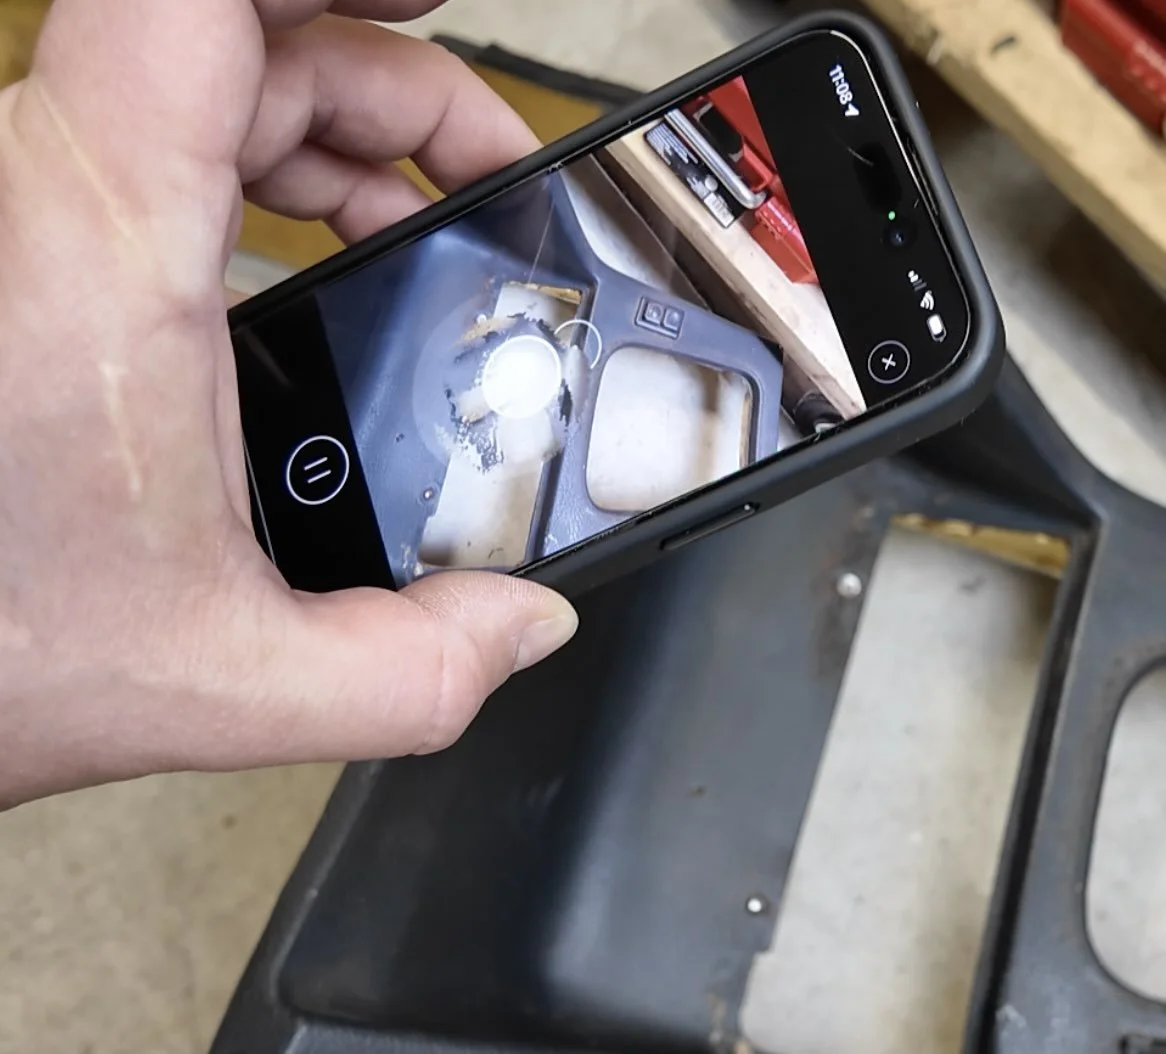

I also tested an app, Surescan 3d that uses the front infrared camera. This method was harder to use because it was more difficult to see exactly what I was capturing while scanning. After repositioning myself, I did get a decent scan, but it still lacked the detail I needed.
What I learned from the iPhone scans:
LiDAR is not ideal for small detailed parts
Photogrammetry can work surprisingly well
Front IR scanning is hit or miss
Phone scans still need manual measuring for accuracy
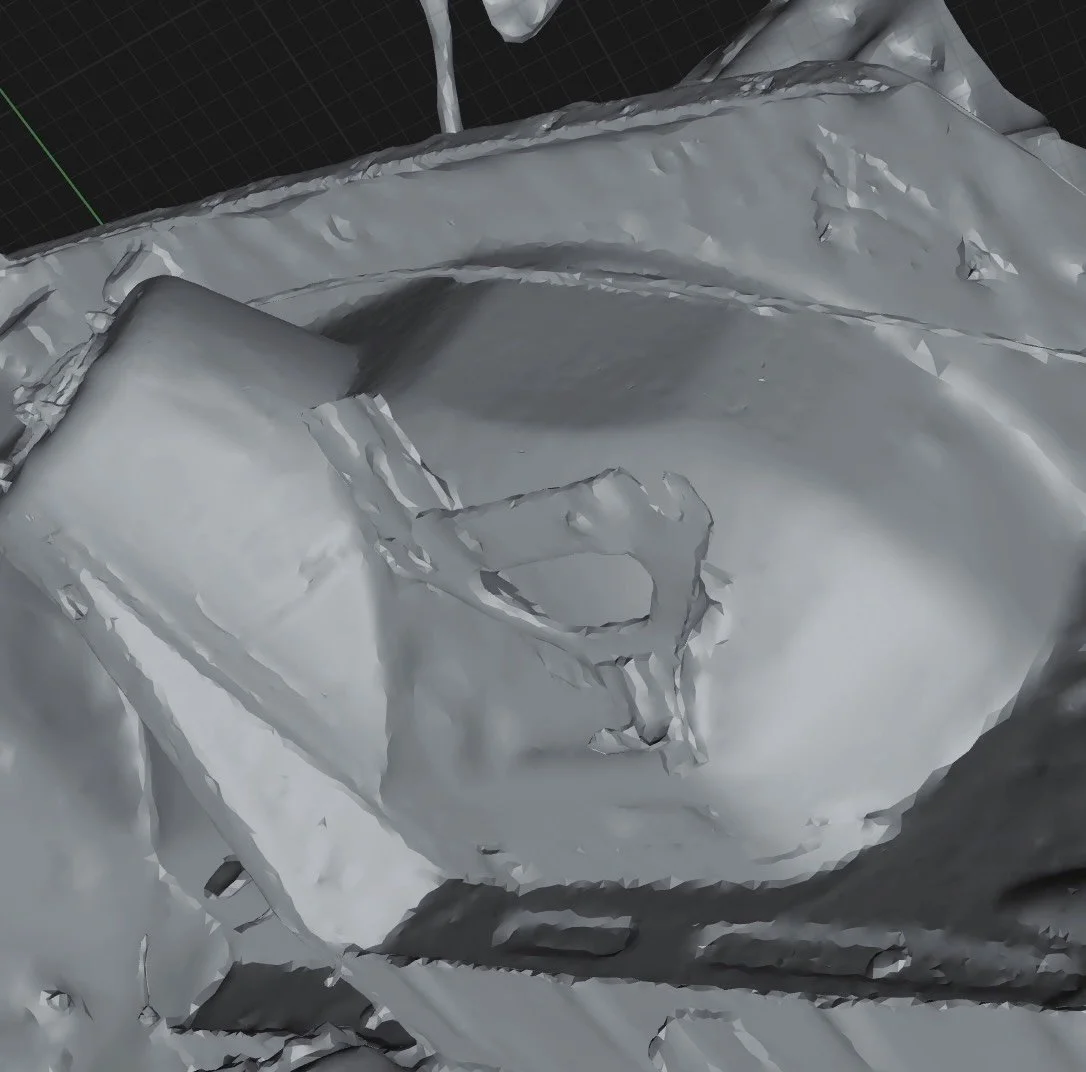
Step 3: Scan the Same Part With a Professional 3D Scanner
Next, I scanned the same ashtray insert with the Revopoint MetroY Pro (use code REVOPRAATB for extra savings).
It comes with 4 different scanning modes:
34 Blue Cross Laser Lines
15 Blue Parallel Laser Lines
1 Blue Single Laser Line
62 Line Blue Full-field Structured Light
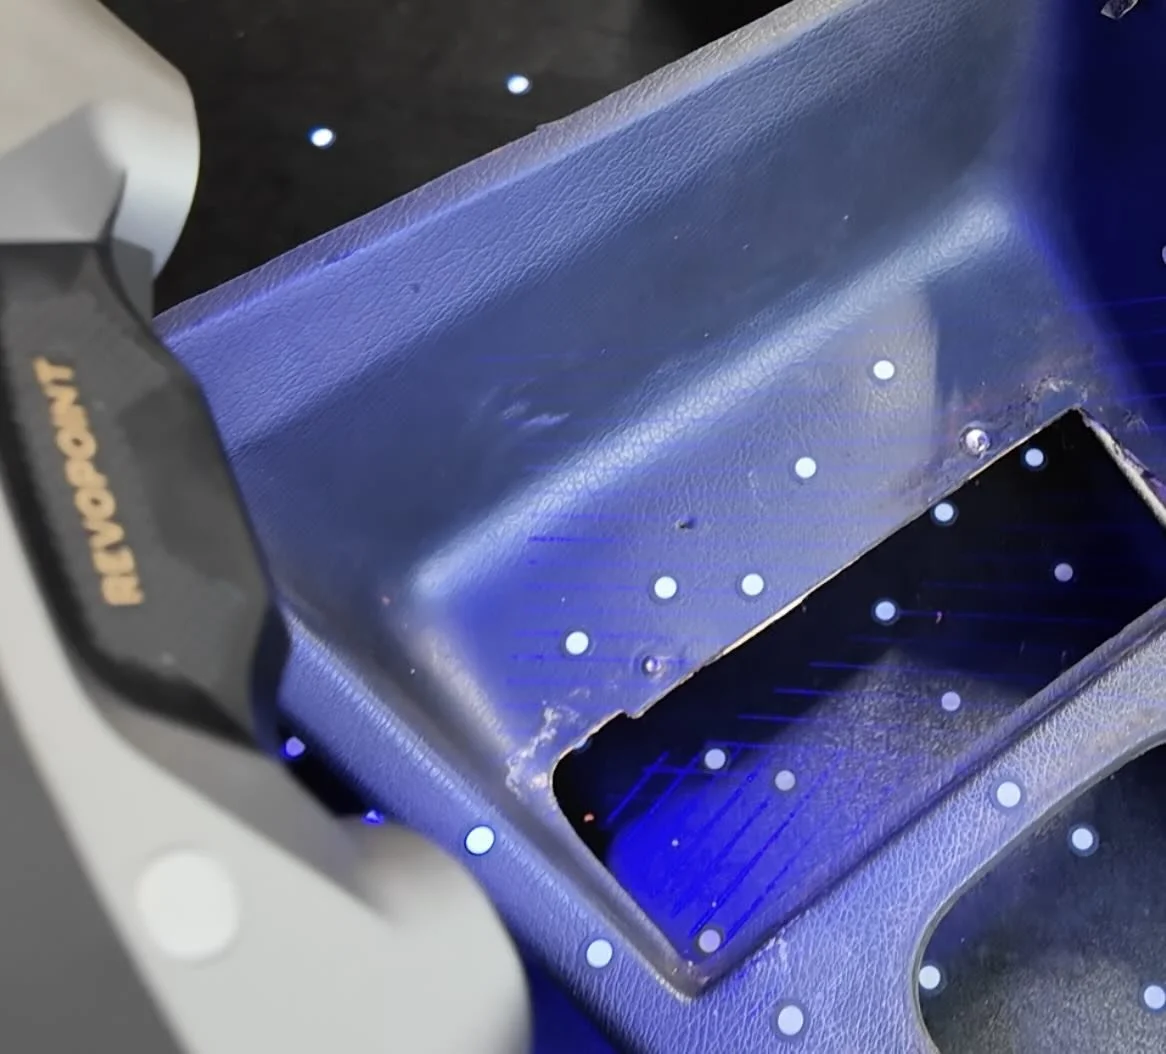
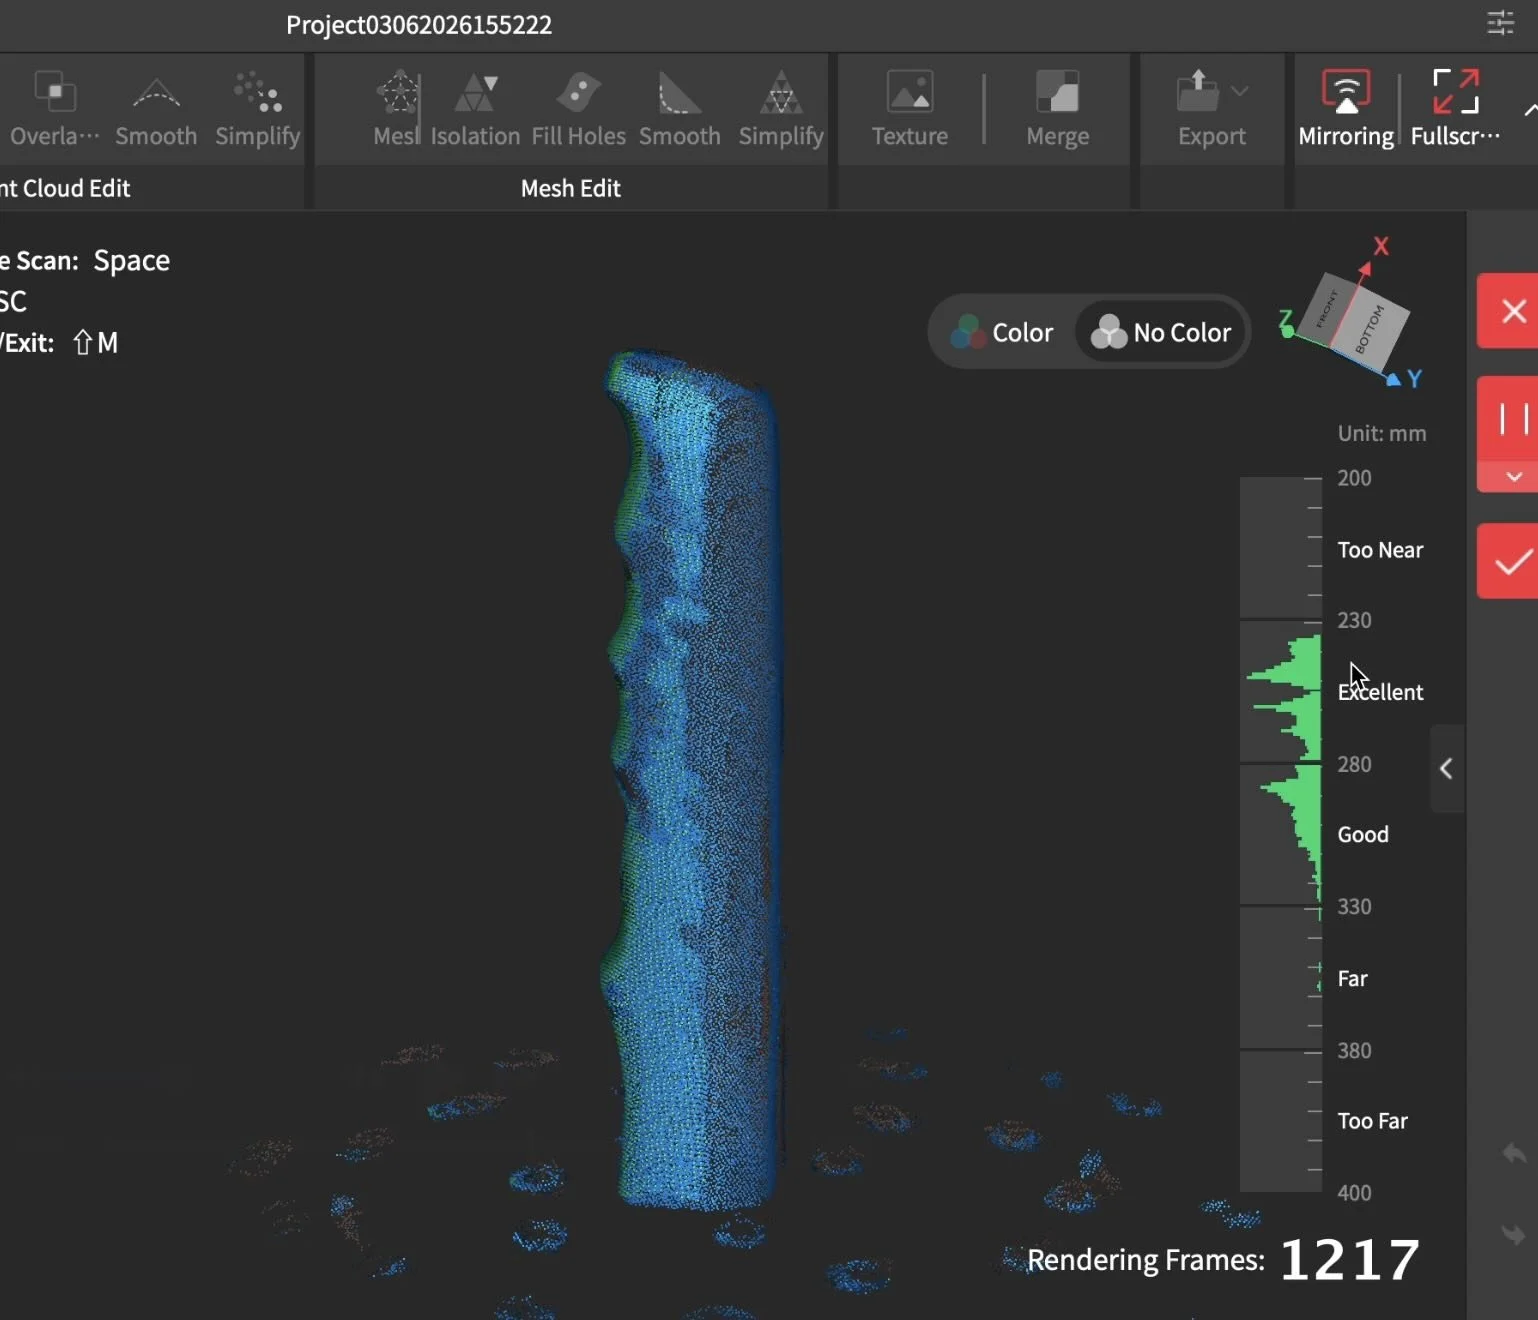
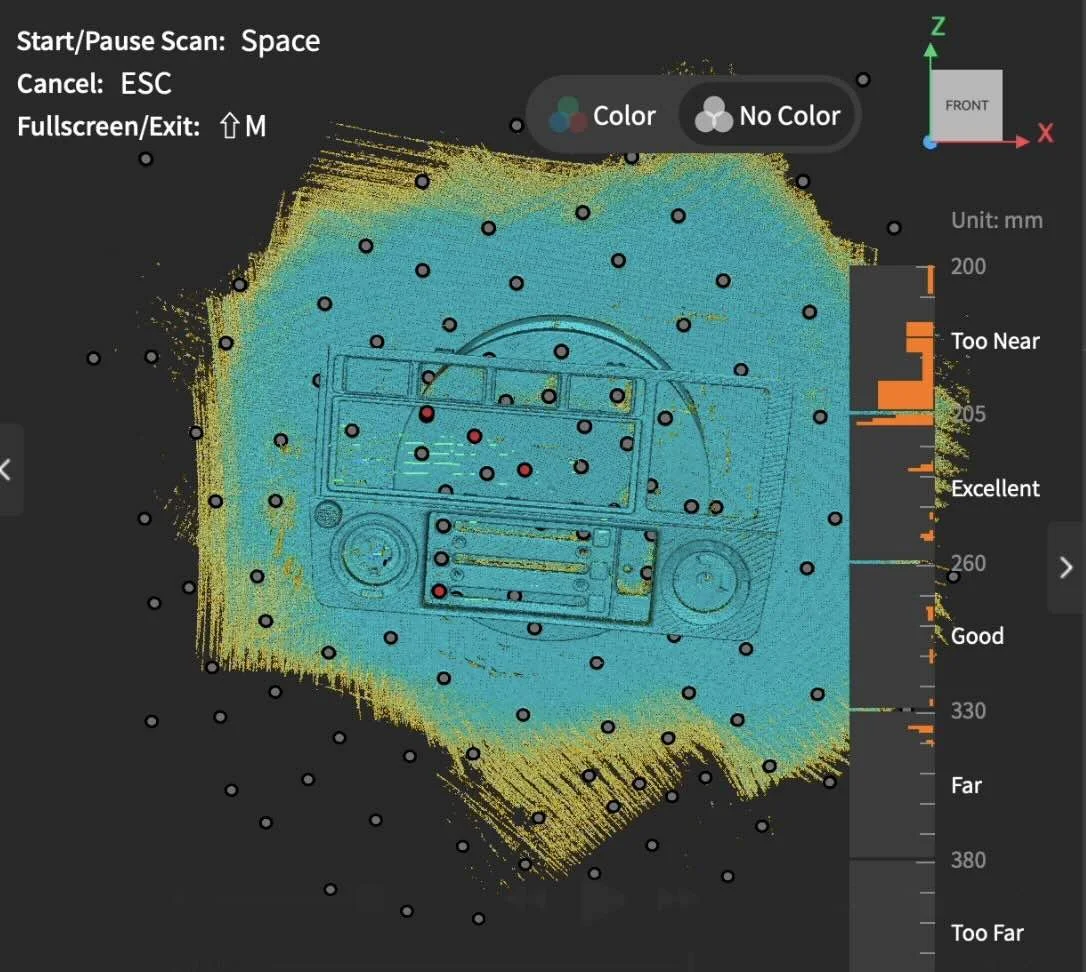
Before starting, the Revopoint MetroY Pro requires placement of tracking dots around the part so the scanner maintains position while scanning.
Then I used the scanner’s 34 blue laser cross-line mode, which captured the part in about a minute.
The difference was obvious right away.
The MetroY Pro scan picked up far more detail, especially around edges, curves, and mounting points.
That matters because when you’re rebuilding a part in CAD, those little details make the difference between “close enough” and “fits like factory.”
After that, I brought the scan into the scan software, converted the point cloud into a mesh, cleaned up the extra geometry, removed background areas like the floor, simplified the file, and exported it as an STL.
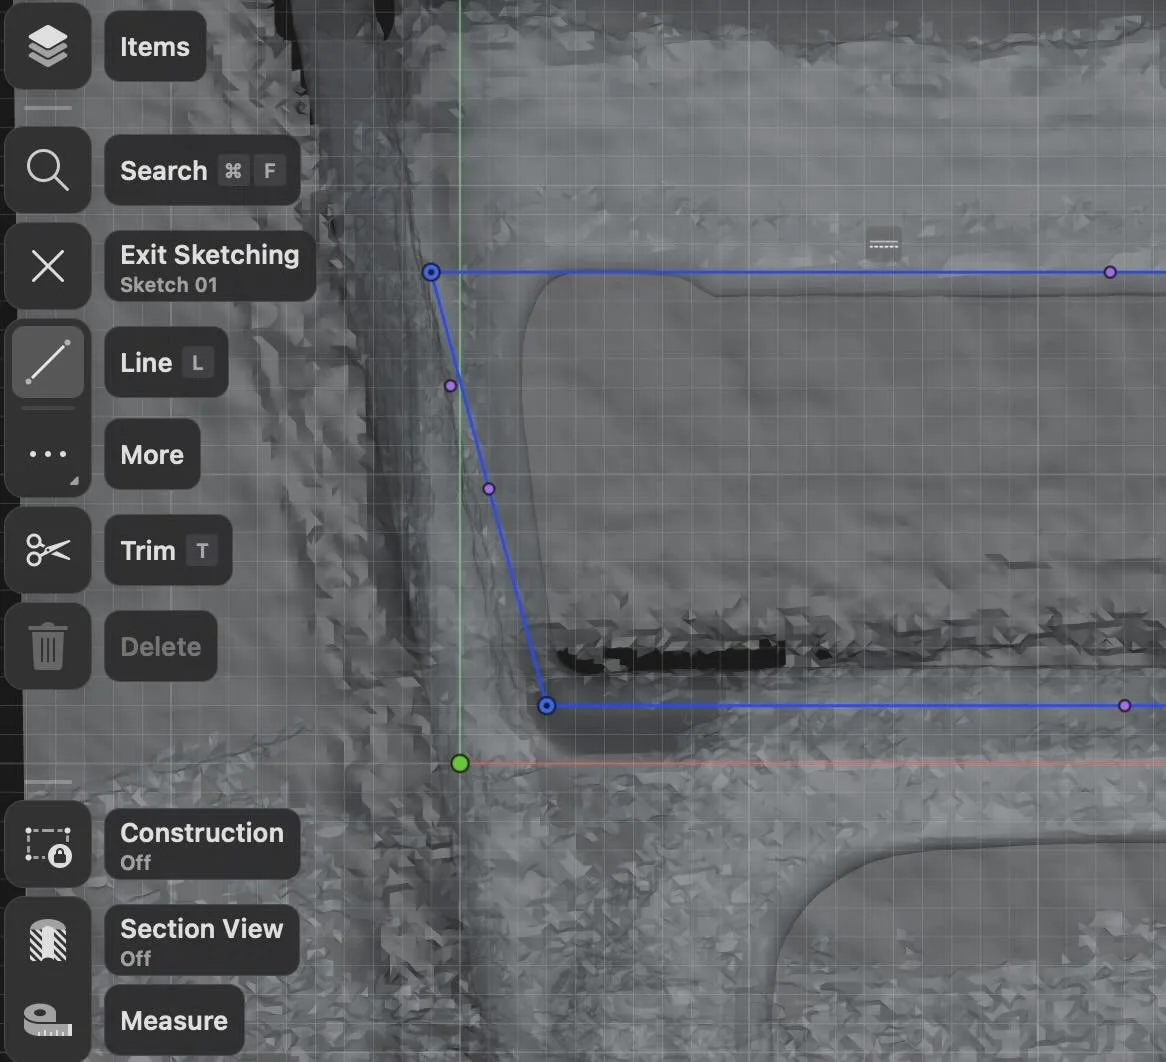
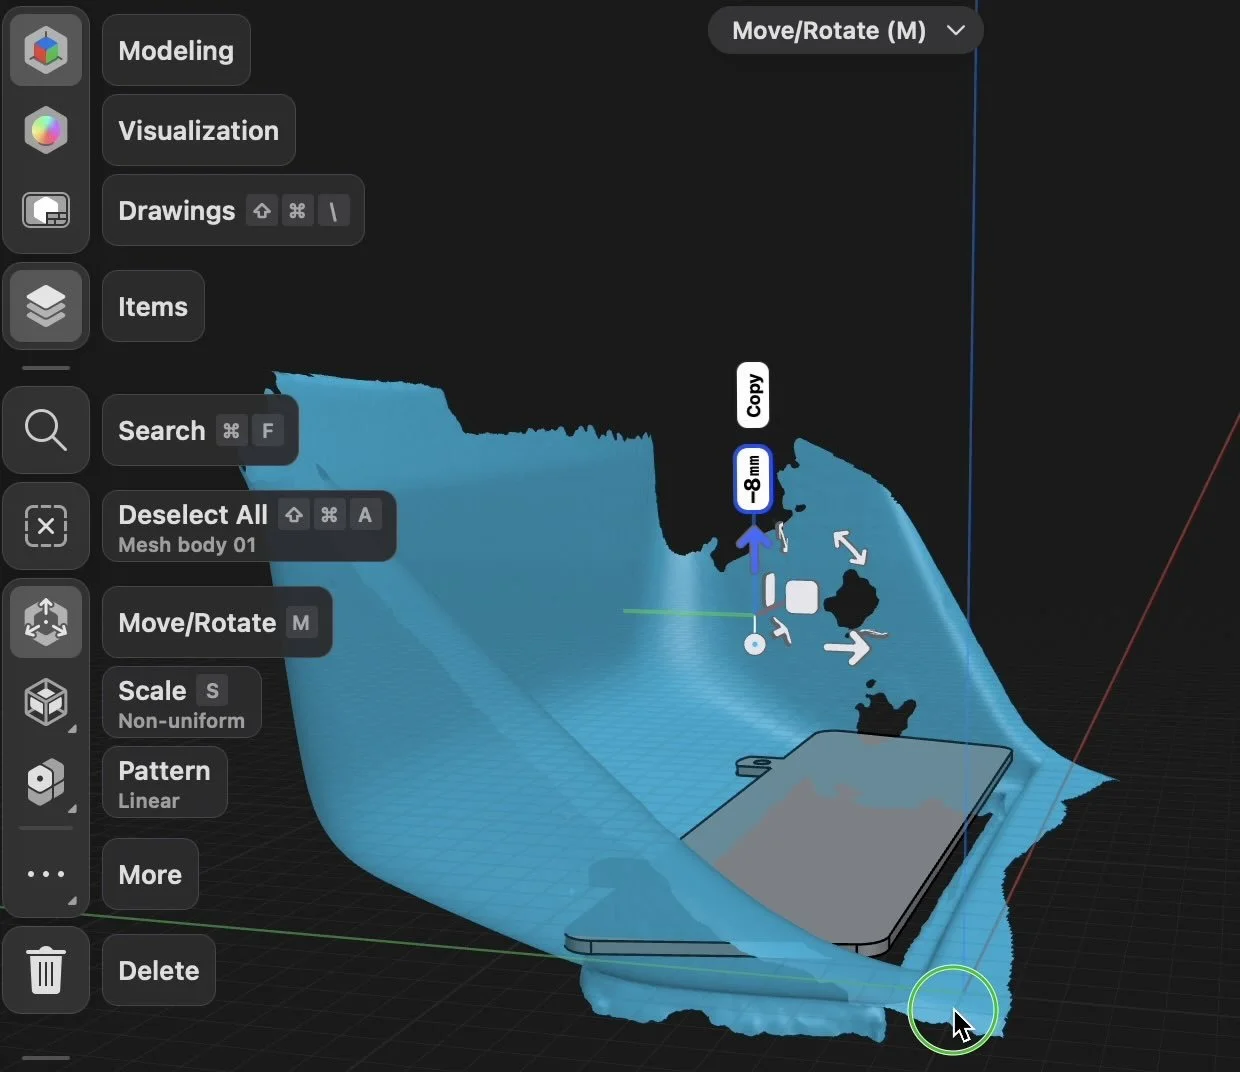
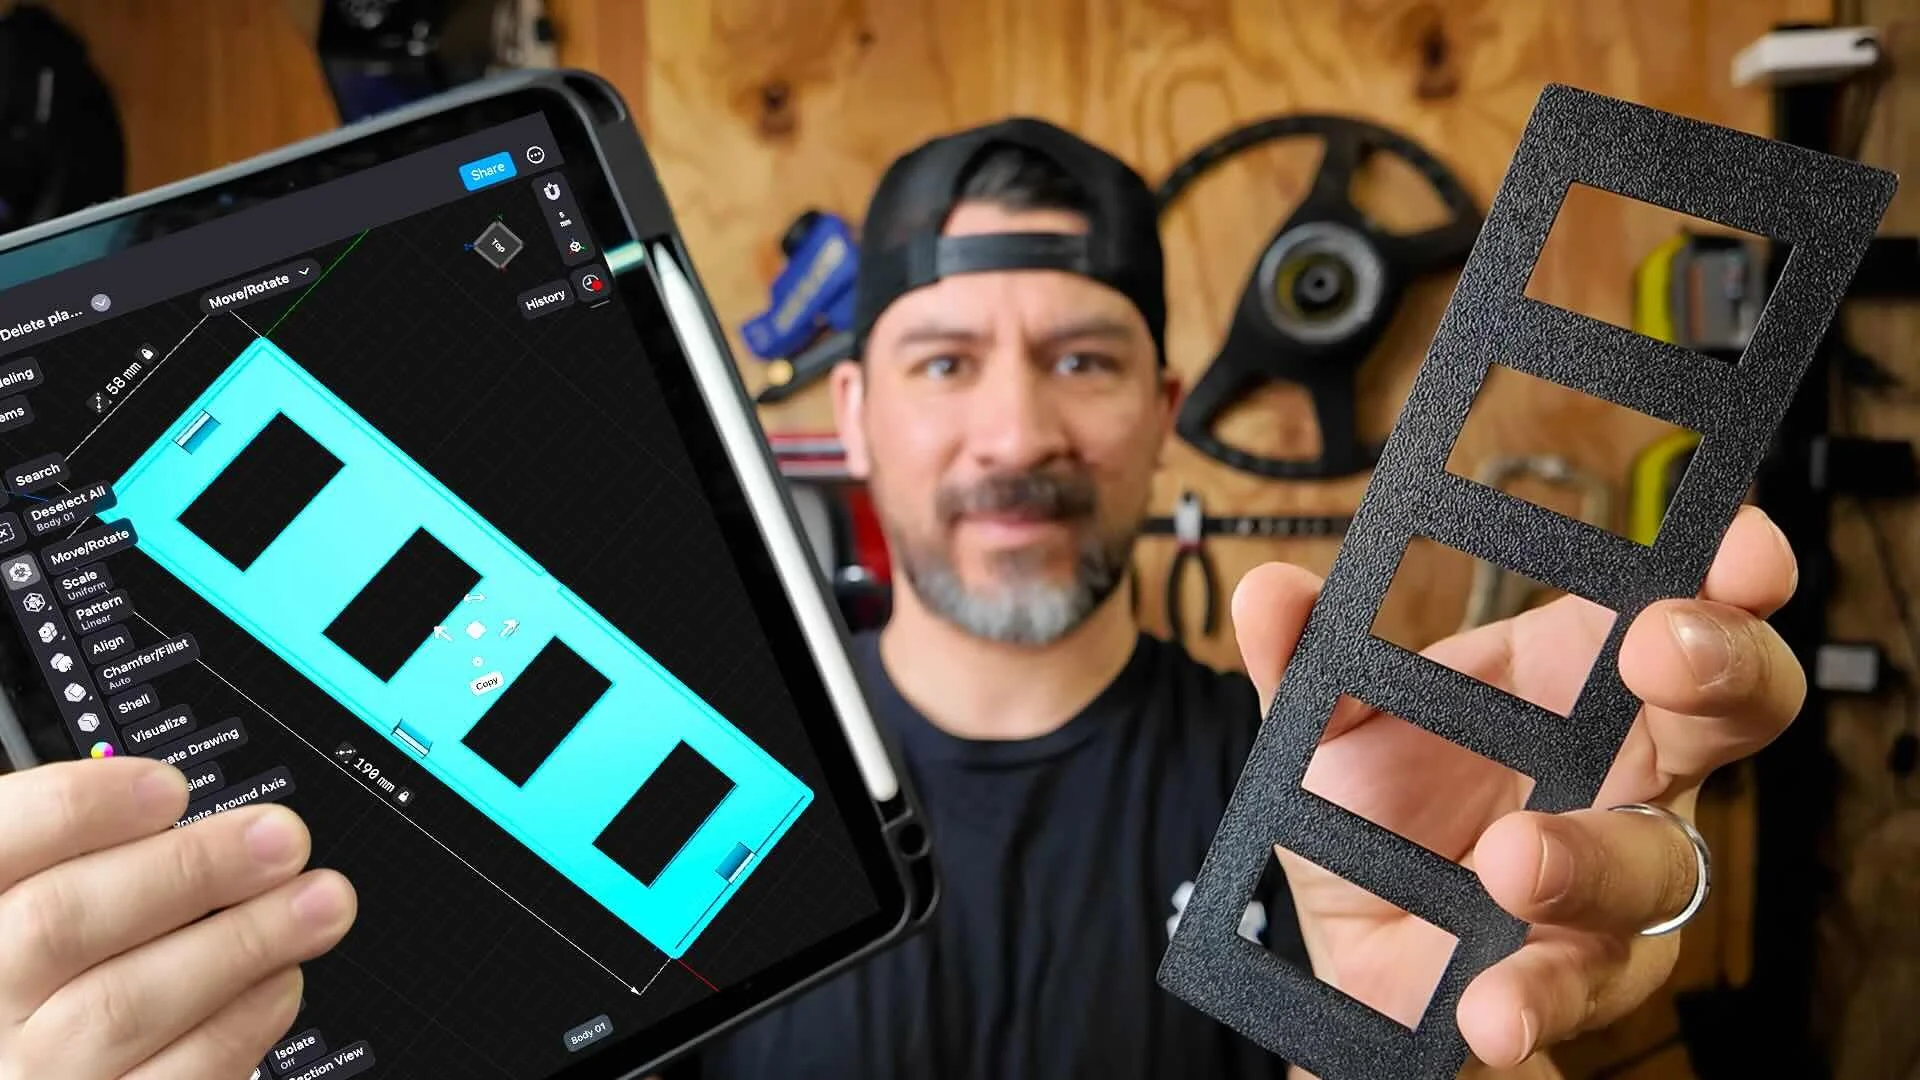
Step 4: Rebuild the Part in CAD and Compare the Results
Once the exported STLs scans were inside Shapr3D, I rebuilt the part using each scan as a reference.
The front IR scan gave me enough to create a rough shape, but I couldn’t clearly identify the mounting points. I was basically estimating part of the design.
The Polycam scan was much cleaner. I could trace the basic shape more easily, and I could see the screw holes well enough to rebuild the mount points too. The downside was that the scale still wasn’t very accurate, so I had to correct that later.

The Revopoint MetroY Pro scan was the cleanest by far. Sketching from it was easier, modifying the design was easier, and the mounting features were much more usable.
It gave me the best starting point for reverse engineering a functional replacement part.
That’s really the key point:
A good 3D scan is usually not the final part. It’s the reference that helps you rebuild the part properly in CAD.
Testing a Scan-to-Print Part and the Difference Gets Even Bigger
To push the test further, I scanned a second part: an E30 e-brake handle.
This time, I wanted to see what would happen if I skipped the full rebuild process and just tried sending the exported STL scan directly to the printer.
The iPhone results were interesting.

The front IR scan couldn’t really capture the part at all.
But Polycam did okay. The finished print had obvious jagged surfaces and needed rescaling again. You could maybe improve the final look with slicer tricks like fuzzy skin, but it still wasn’t ideal.
The Revopoint MetroY Pro, on the other hand, came out nearly identical to the original part.
I used the included automated bluetooth enabled turntable and the 62 Line Blue Full-field Structured Light mode.
The scan had much better detail and shape retention right from the exported STL.

Revopoint scan-to-print on left, Polycam scan-to-print on right
Scanning Larger Car Parts
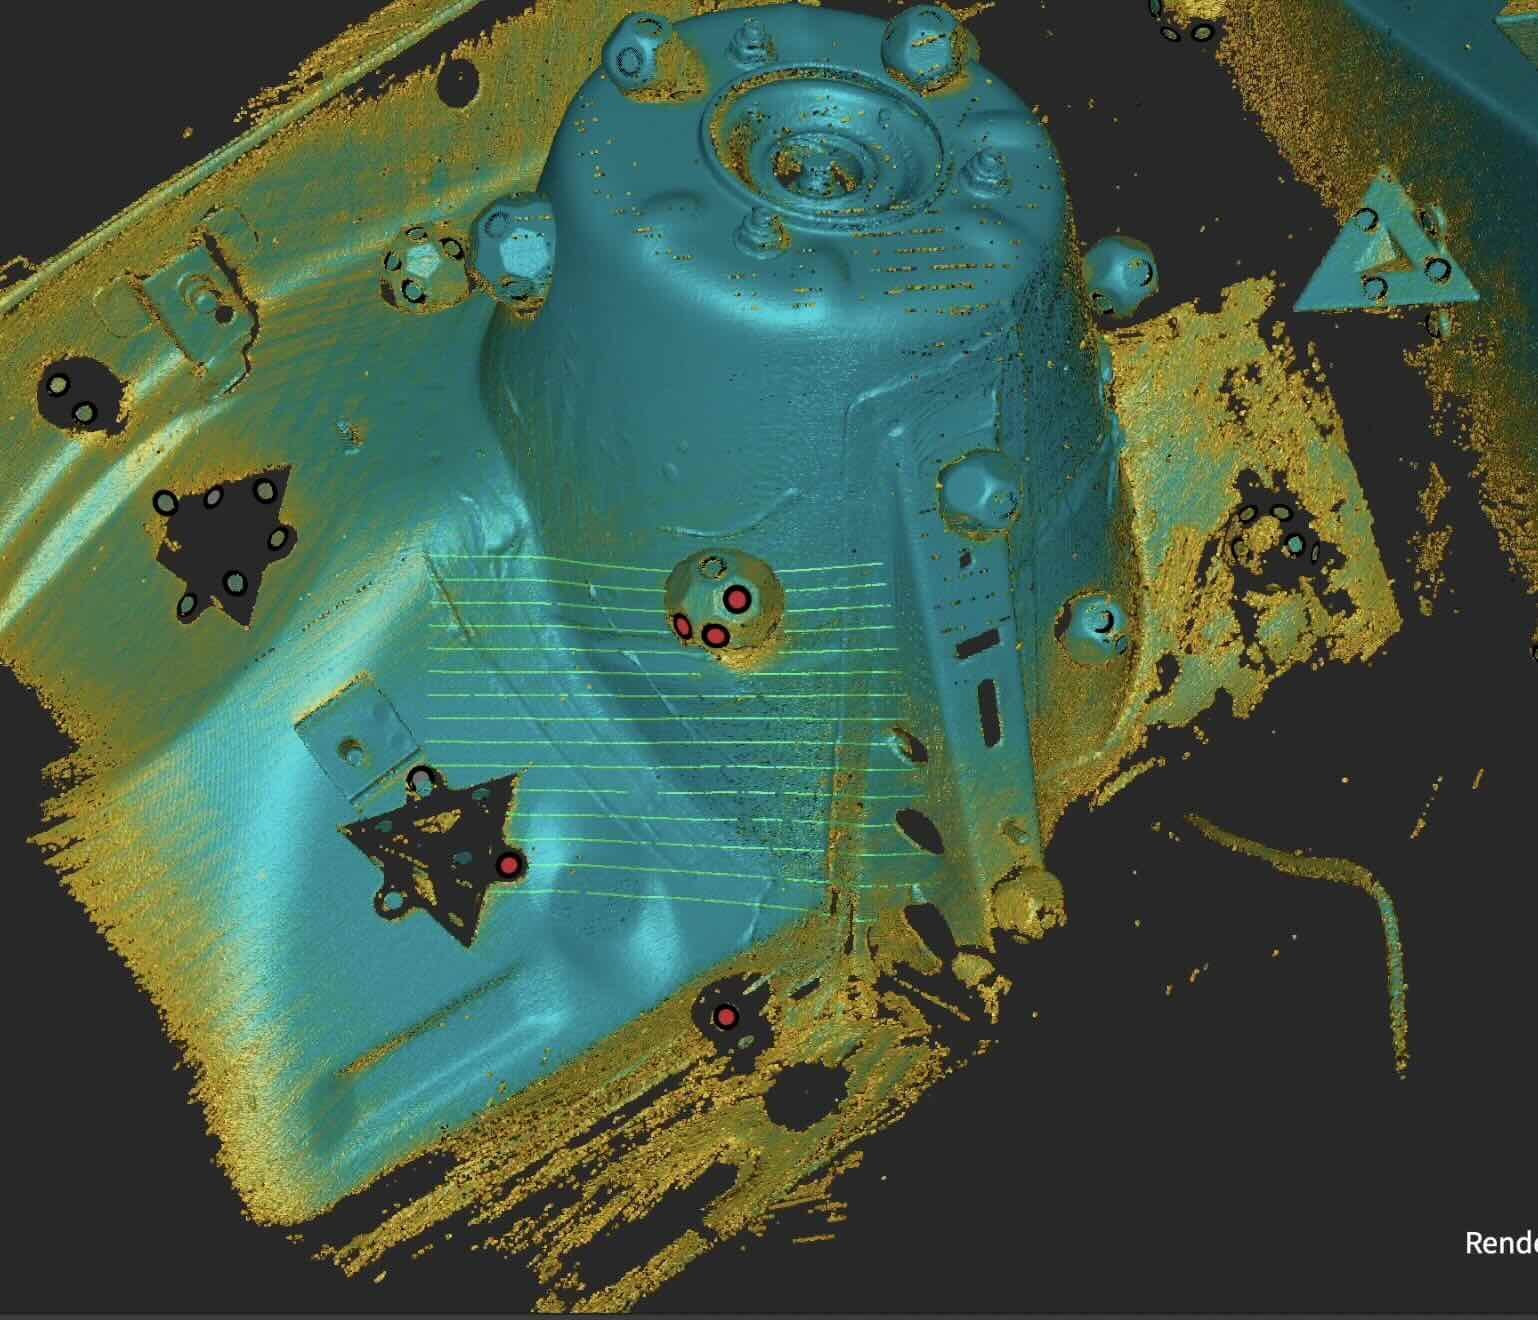
I also tested a much larger and more detailed part — first a larger bezel and then the interior engine bay of our BMW e30 — and the difference became even more obvious.

The 15 Blue Parallel Laser Lines mode of the Revopoint MetroY Pro was able to capture every detail of the bezel along with the clips on the side of the part.
This was critical in being able to reverse engineer the entire part along with all the clips.
And when it came to the engine bay, the 34 Blue Parallel Laser Lines made the scan quick and the Single Blue Parallel Laser line helped capture deeper parts.
It grabbed around mount points and deep into holes as well.
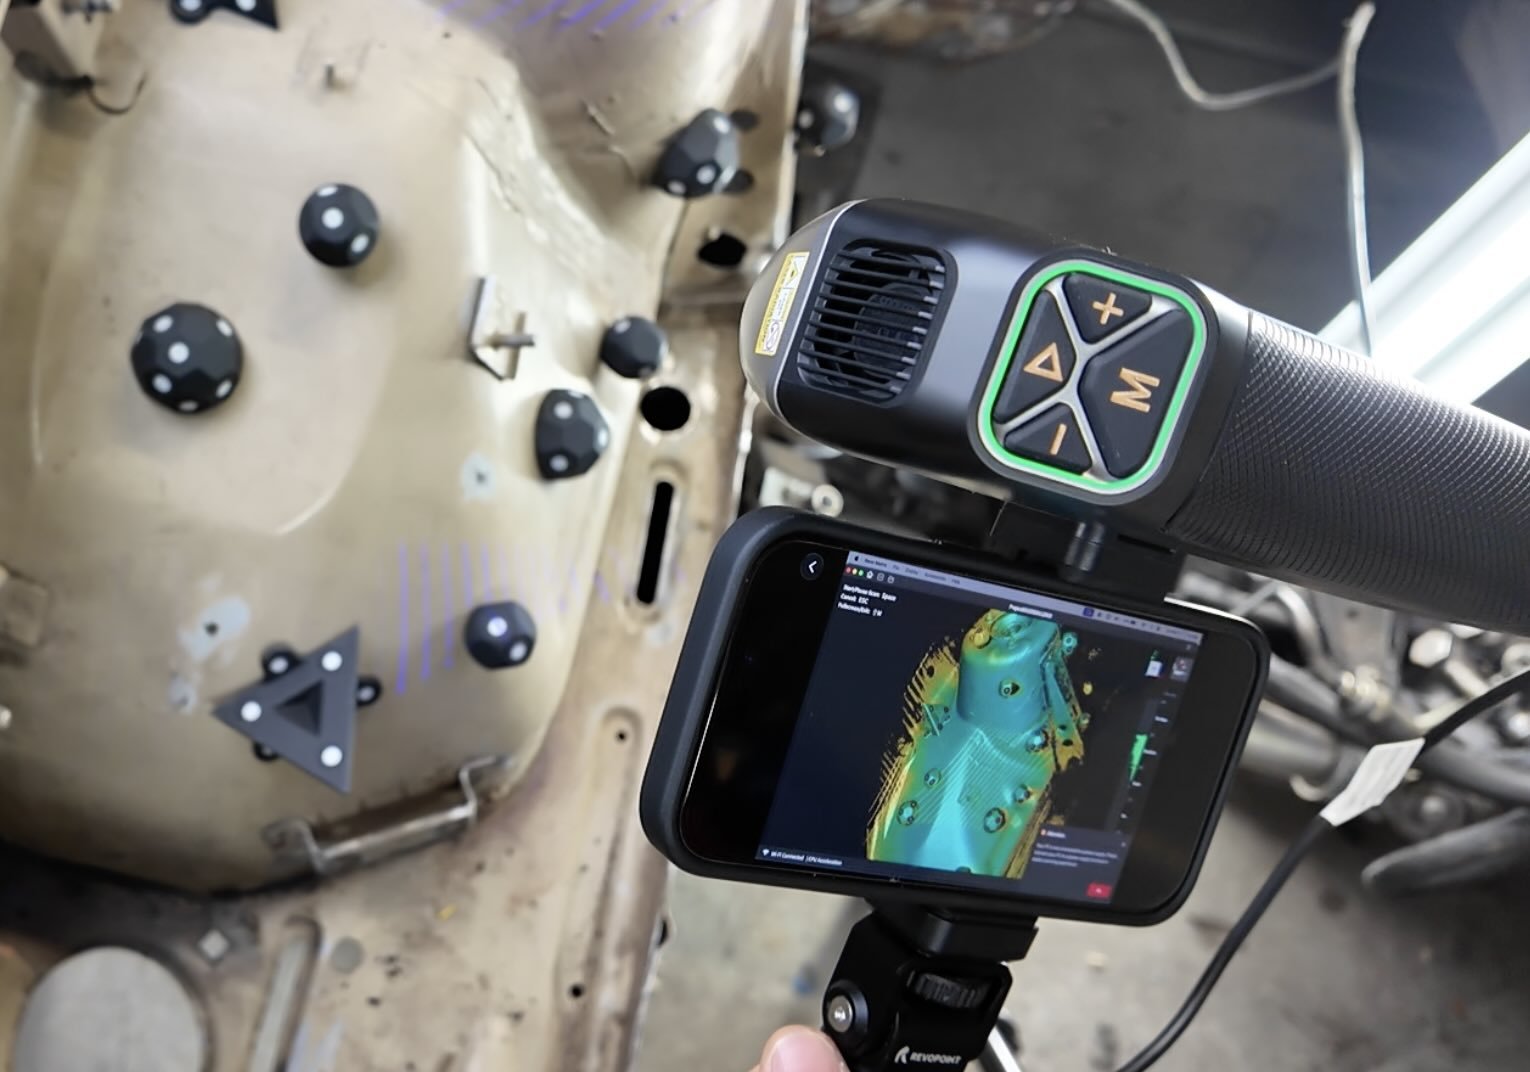
There’s even a remote mirroring app that lets you perform scans wirelessly (with the included battery pack) that allows you to see the scanning results on the screen of your iPhone to the Revopoint scanning software.
THE RESULTS
With all of the different scanning modes available on the Revopoint MetroY Pro any car part I scanned was usable for reverse engineering.
For kicks I gave the iPhone Polycam LiDAR a try on the engine bay, but it wasn’t usable and the photogrammatry mode was no where near as detailed as the Revopoint.
Most builders get stuck on reverse engineering a scan. That’s where the workshop comes in.
It comes with a reverse scanning module and a 3d printing car parts guide. Most builders finish their first custom car part design in just one afternoon ⤵️
Design 3d Printed Car Parts That Match Your Exact Build.
One afternoon. No complex software. Parts that fit your build perfect.
This workshop finally made designing 3d printed car parts feel doable. I had a replacement part ready for my project car in a few hours.
Instant Access, Risk Free Money Back Guarantee