
3 WAYS TO DESIGN 3D PRINTED CAR PARTS FROM SLICER TO SHAPR3D CAD
Every project car eventually hits the same wall: you need a part that is discontinued, impossible to find, or way too expensive for what it is.
That’s when I turned to 3D printing…
But the biggest hurdle isn't the printer—it's the design. So how do you go from a broken plastic clip to a factory-looking 3d printed part that actually fits your ride?
1. THE QUICK EDIT (3D PRINTING SLICER TWEAKS)
If you find a file online (like on Printables or Thingiverse) that is almost perfect, you can edit it right in your slicer (Bambu Studio, PrusaSlicer, etc.) without having to open CAD just yet.
Example: I found a BMW E30 Tweeter Pod design by EME Motors, but the clips were a bit weak and I needed a cutout for the tweeter.
You can hop into your 3d printer slicer software like Bambu Studio or Orca Slicer and make some simple modifications:
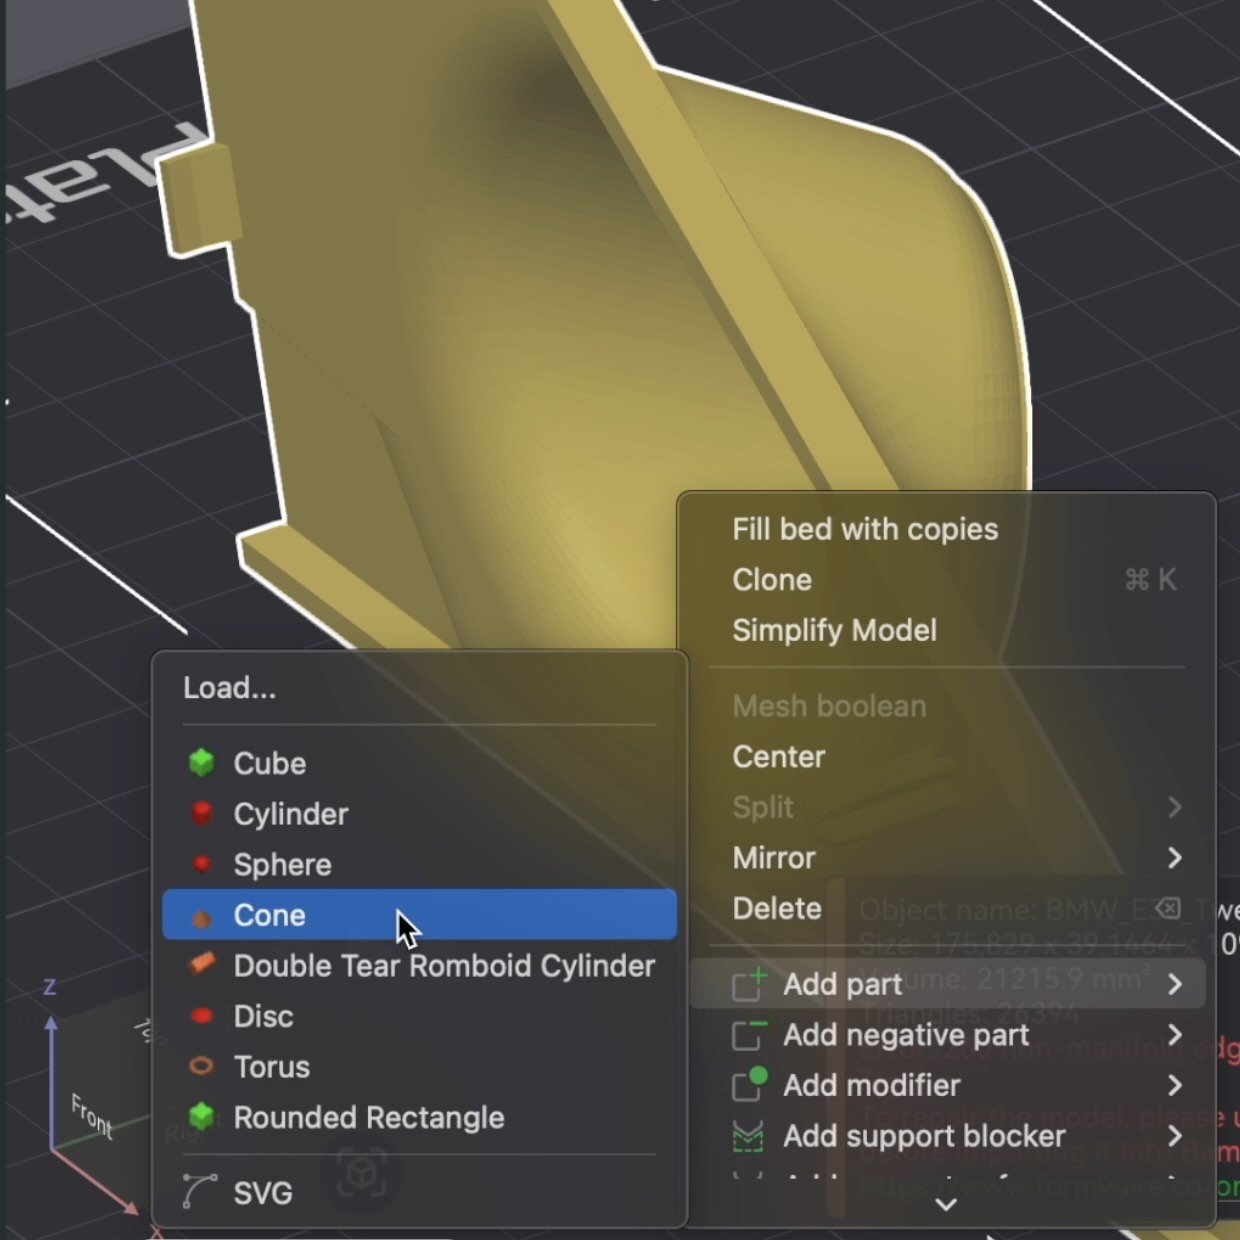
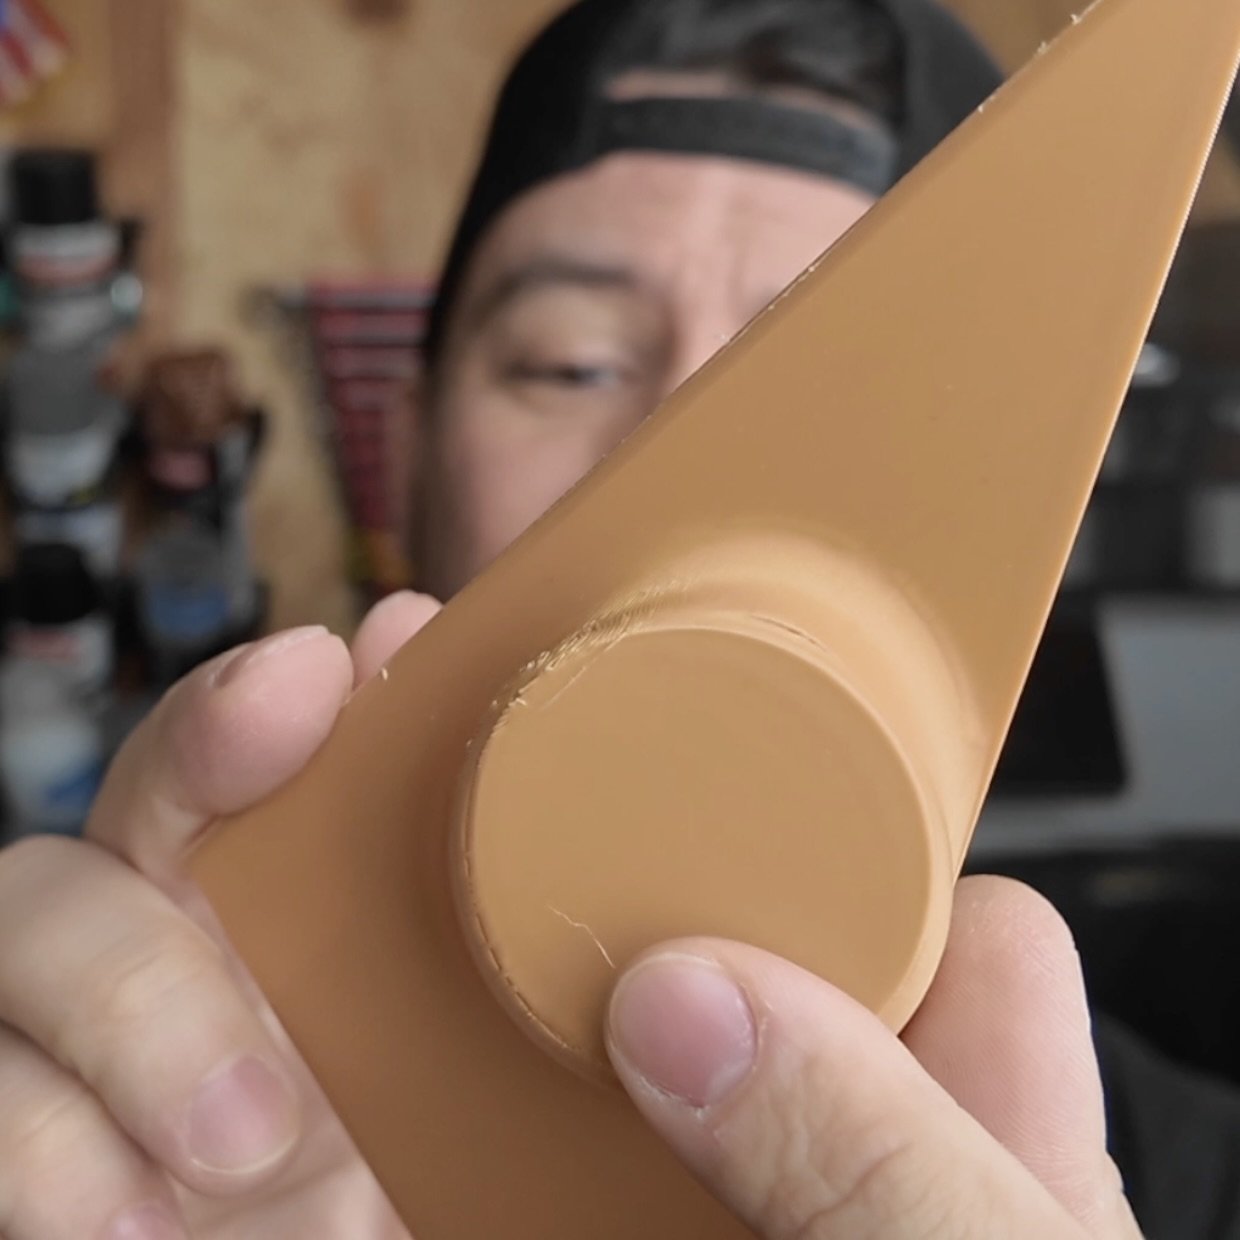
Strengthening Clips: Right-click the model -> Add Part -> Cone. By placing a small cone at the base of a clip, you increase the surface area and layer adhesion. No more snapped tabs.
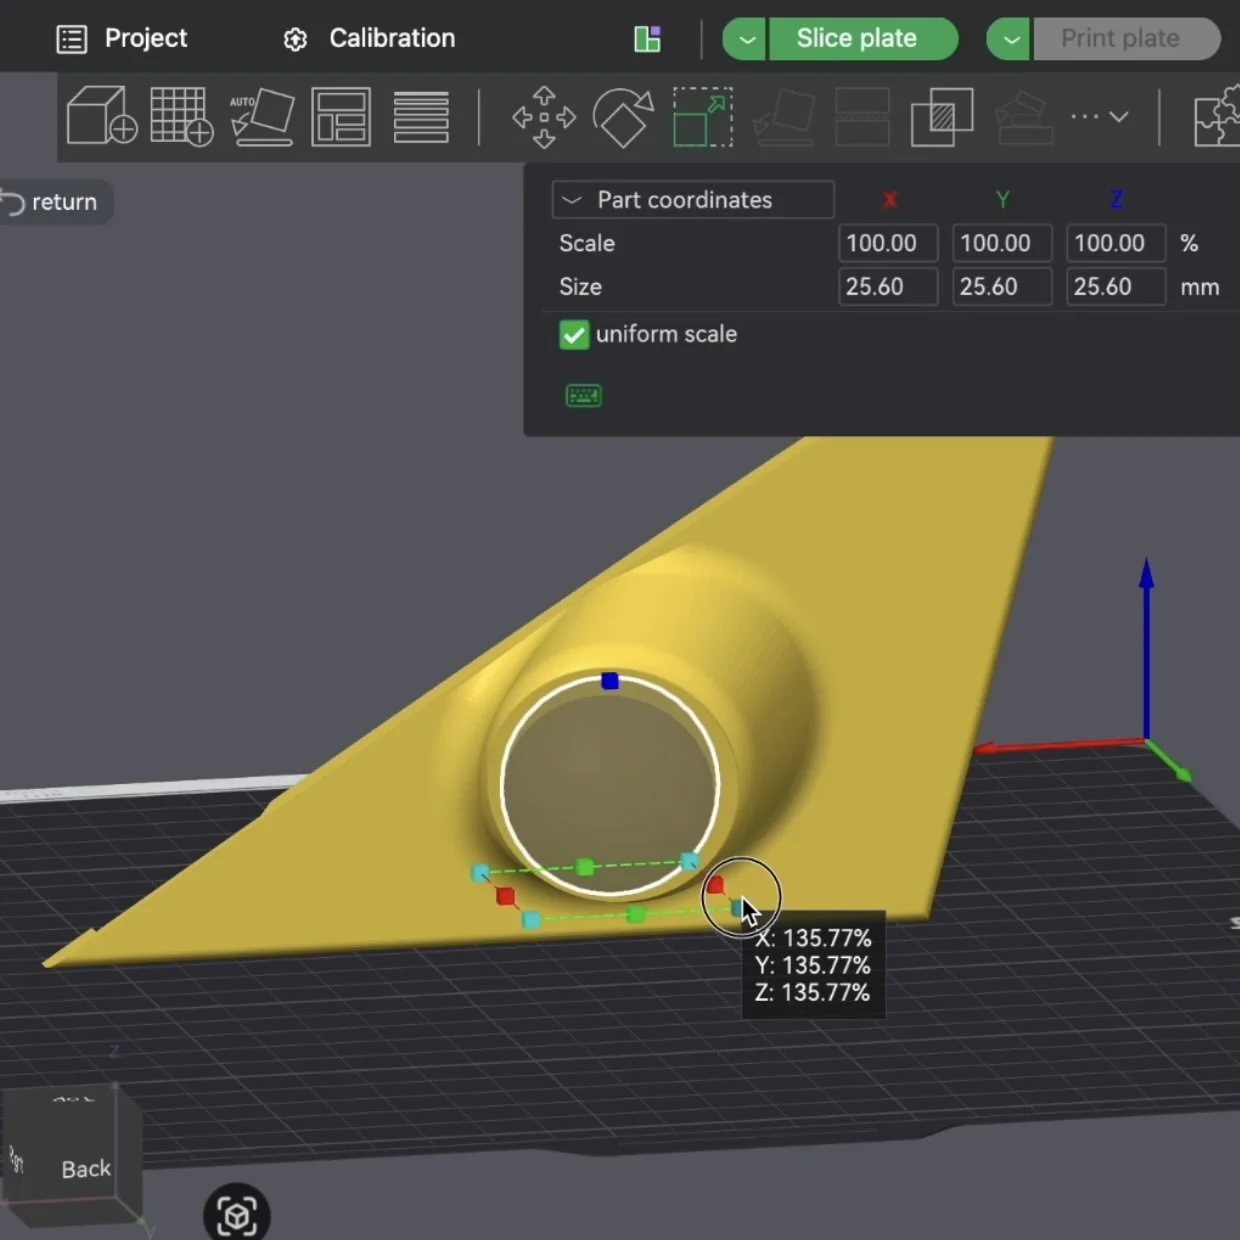
Adding Cutouts: Add a Negative Part (like a sphere or cylinder). This acts as a "hole puncher," removing material where you need it.
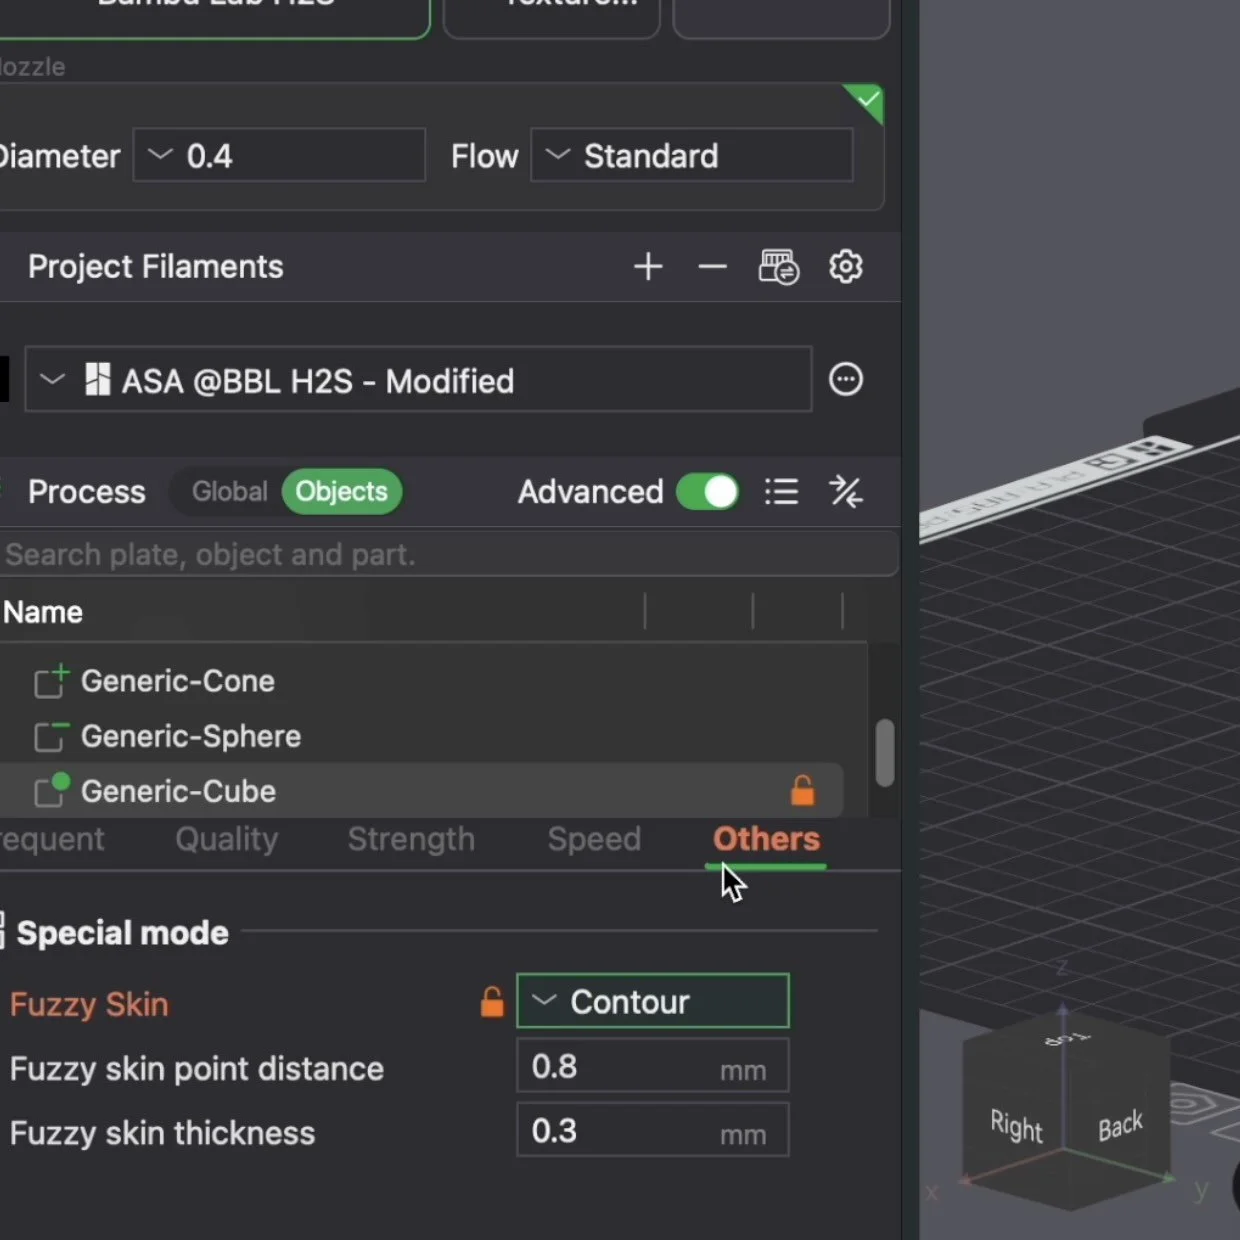
The "Fuzzy Skin" Hack: Want that OEM textured plastic look? Use a Modifier Cube over the exterior faces and turn on Fuzzy Skin. It hides layer lines and looks like a factory molded part.
💡 PRO TIP: Print your car part in cheap PLA first to test fitment. Once you know your part fits, swap to the slightly higher cost ASA for the final version.
2. SIMPLE CAD (THE 1-DAY METHOD)
If the part doesn't exist or you want to heavily modify a car part design you found online—like a relay cover or a custom bracket—you’ll need CAD.
But you don't need a degree in engineering to do it.
The Toolset:
Digital Calipers: Essential for grabbing sub-millimeter measurements.
Shaper3D: My favorite CAD software because it’s intuitive and works on an iPad with an Apple Pencil.
The Process:
Measure & Sketch it on paper: Draw the part from different angles and write down your measurements taken with the digital caliper tool.
Sketch in Shaper3D: Use the line and circle tools to recreate the 2D footprint.
Extrude: Pull the 2D shape into 3D.
Detailing: For my relay cover, I sketched a BMW logo and extruded it by 2 mm. This makes the logo "pop" or "recess" for a professional finish.
3. 3D SCANNING (FOR MORE COMPLEX CAR PARTS)
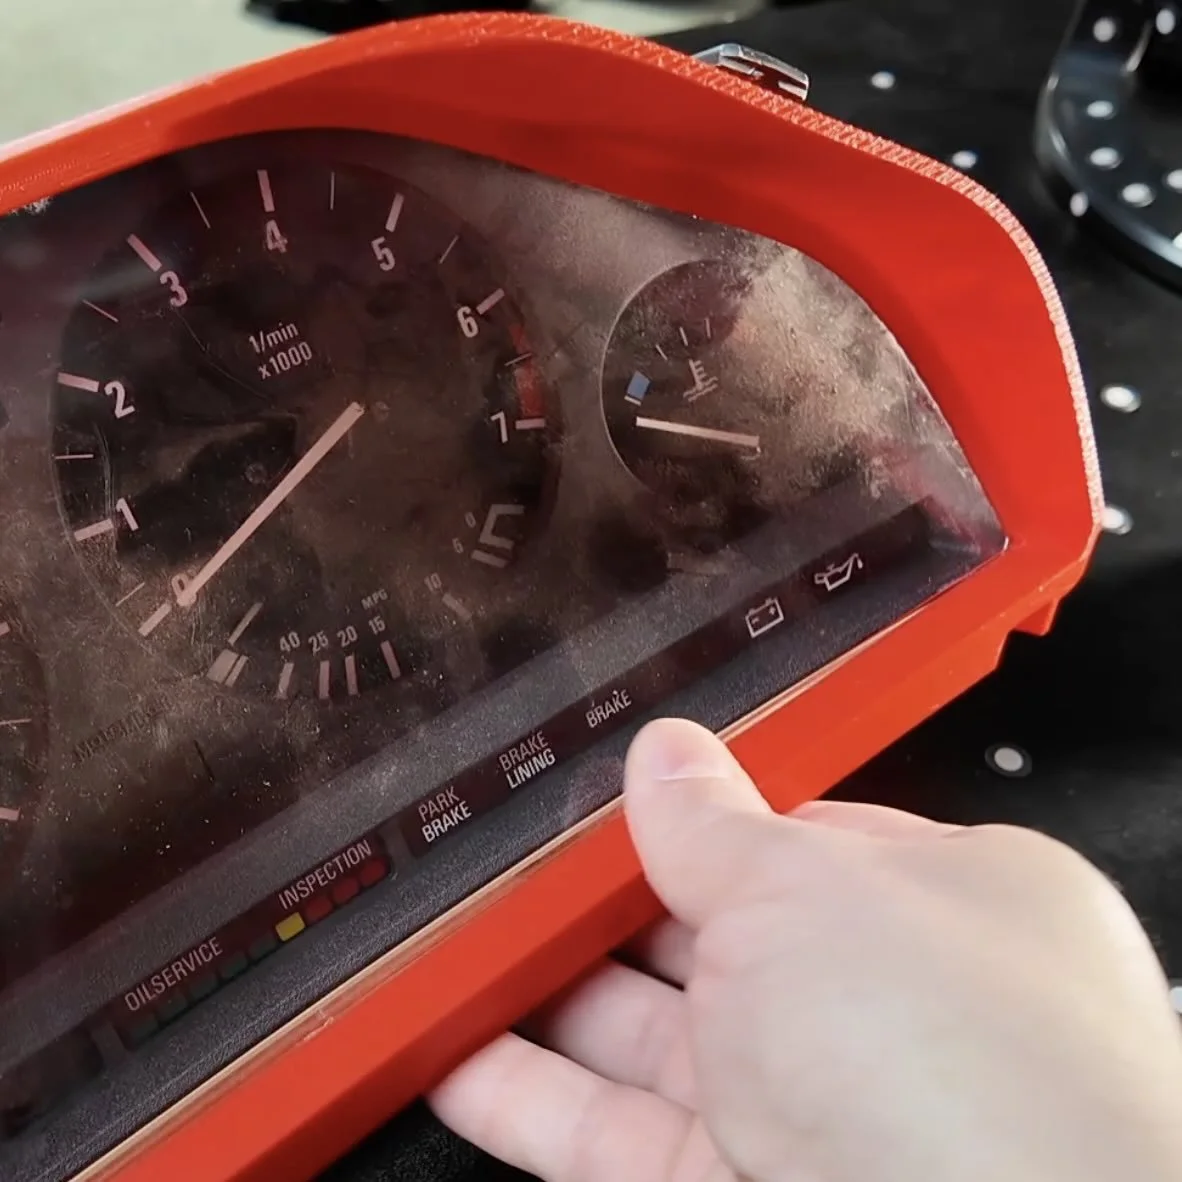
Some parts, like a gauge cluster bezels, have complex curves that are a nightmare to measure by hand.
This is where 3D scanning can save weeks of trial and error. You can then use the 3d scan to help you reverse engineer the part in CAD.
The Workflow:
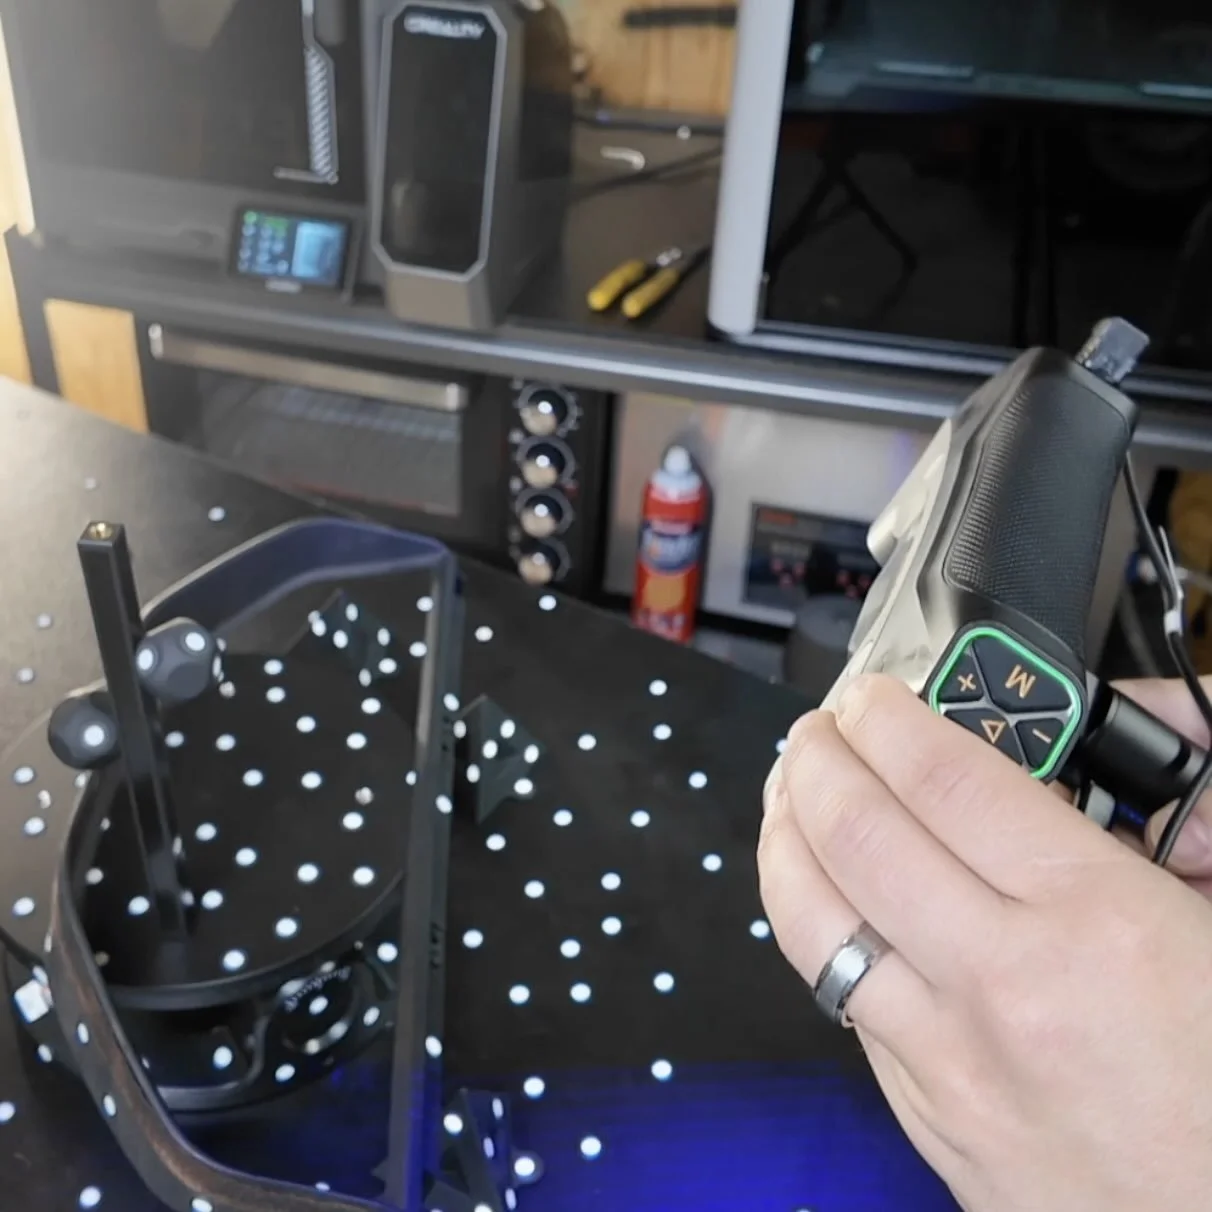
Purchase: a capable 3d scanner like the Revopoint MetroY Pro Series.
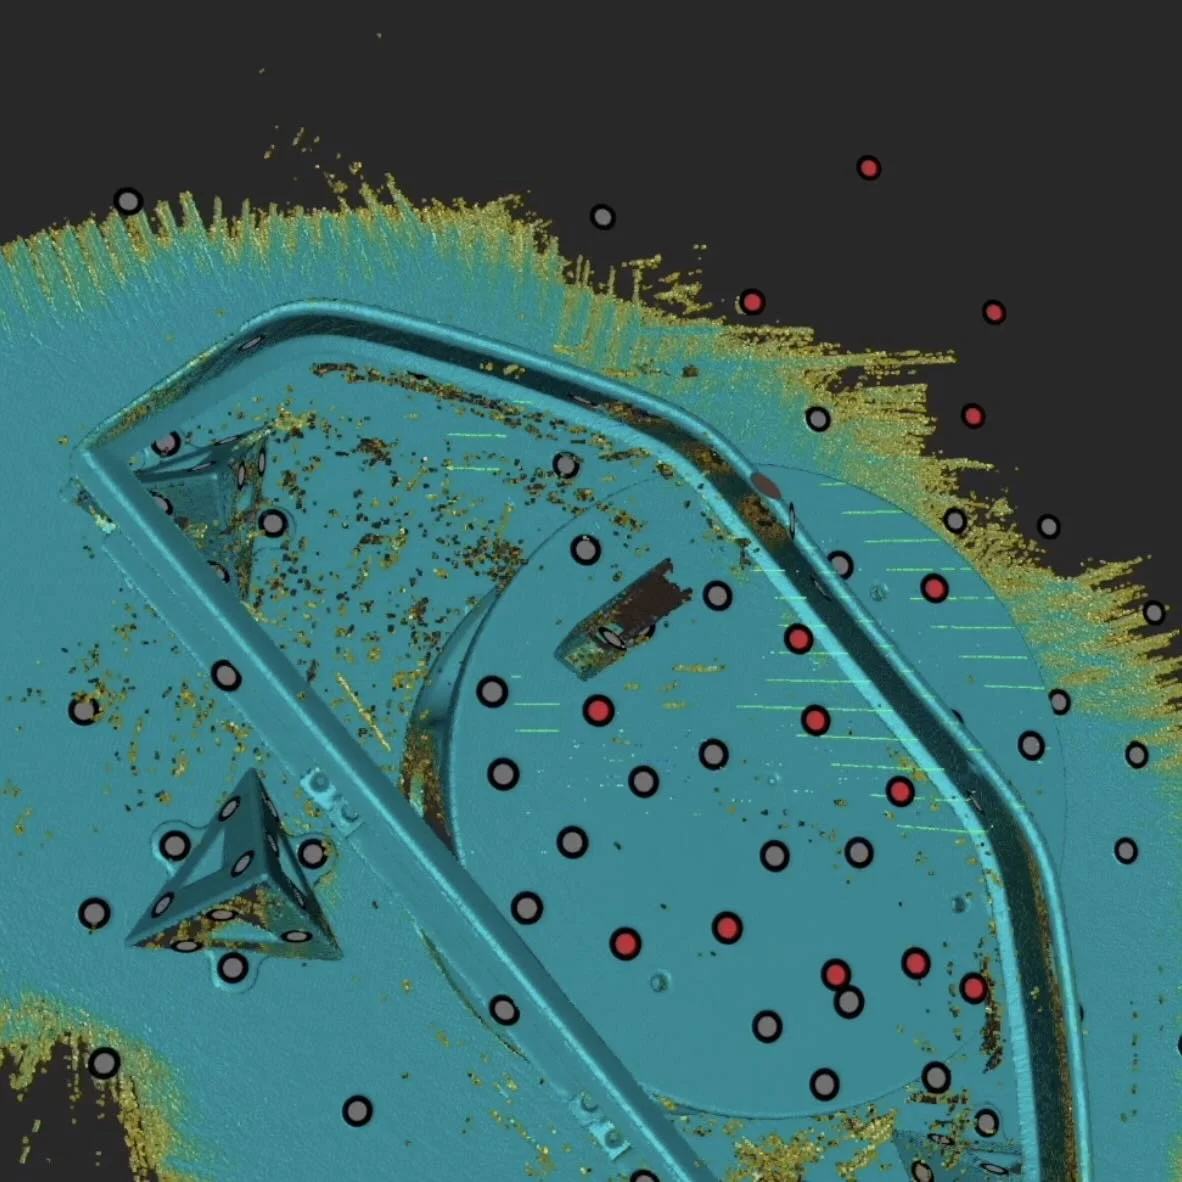
Scanning: Use tracking dots on the part so the scanner doesn't lose its place. (Or spray your part with 3d scanning spray). Use the Revo Metro One-Click to prep the scan and export as an STL.
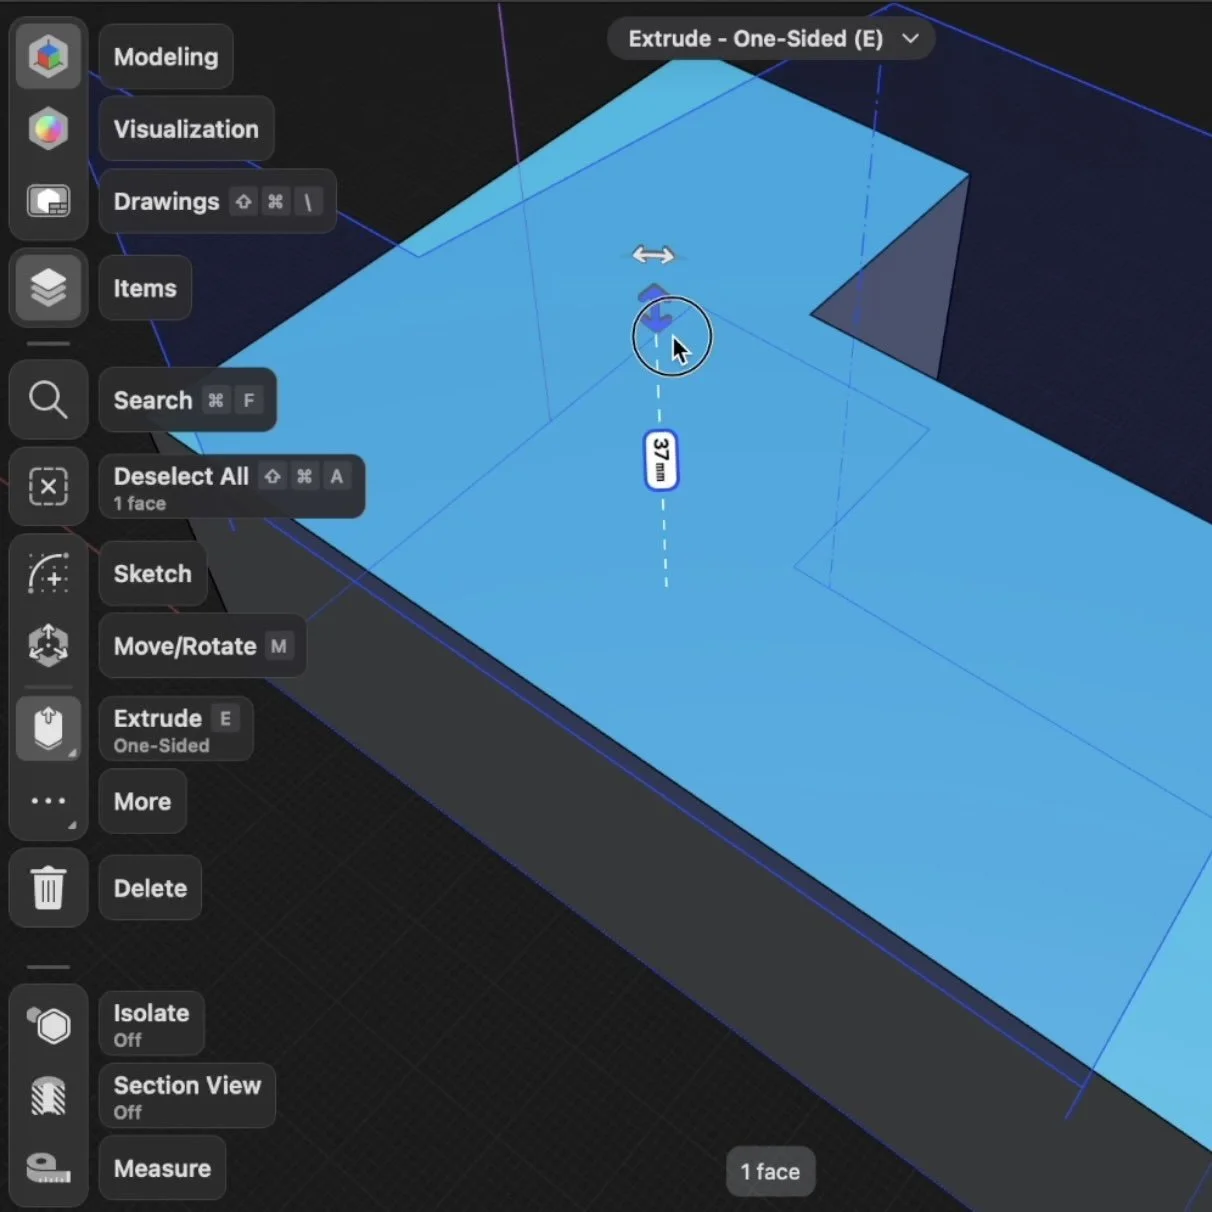
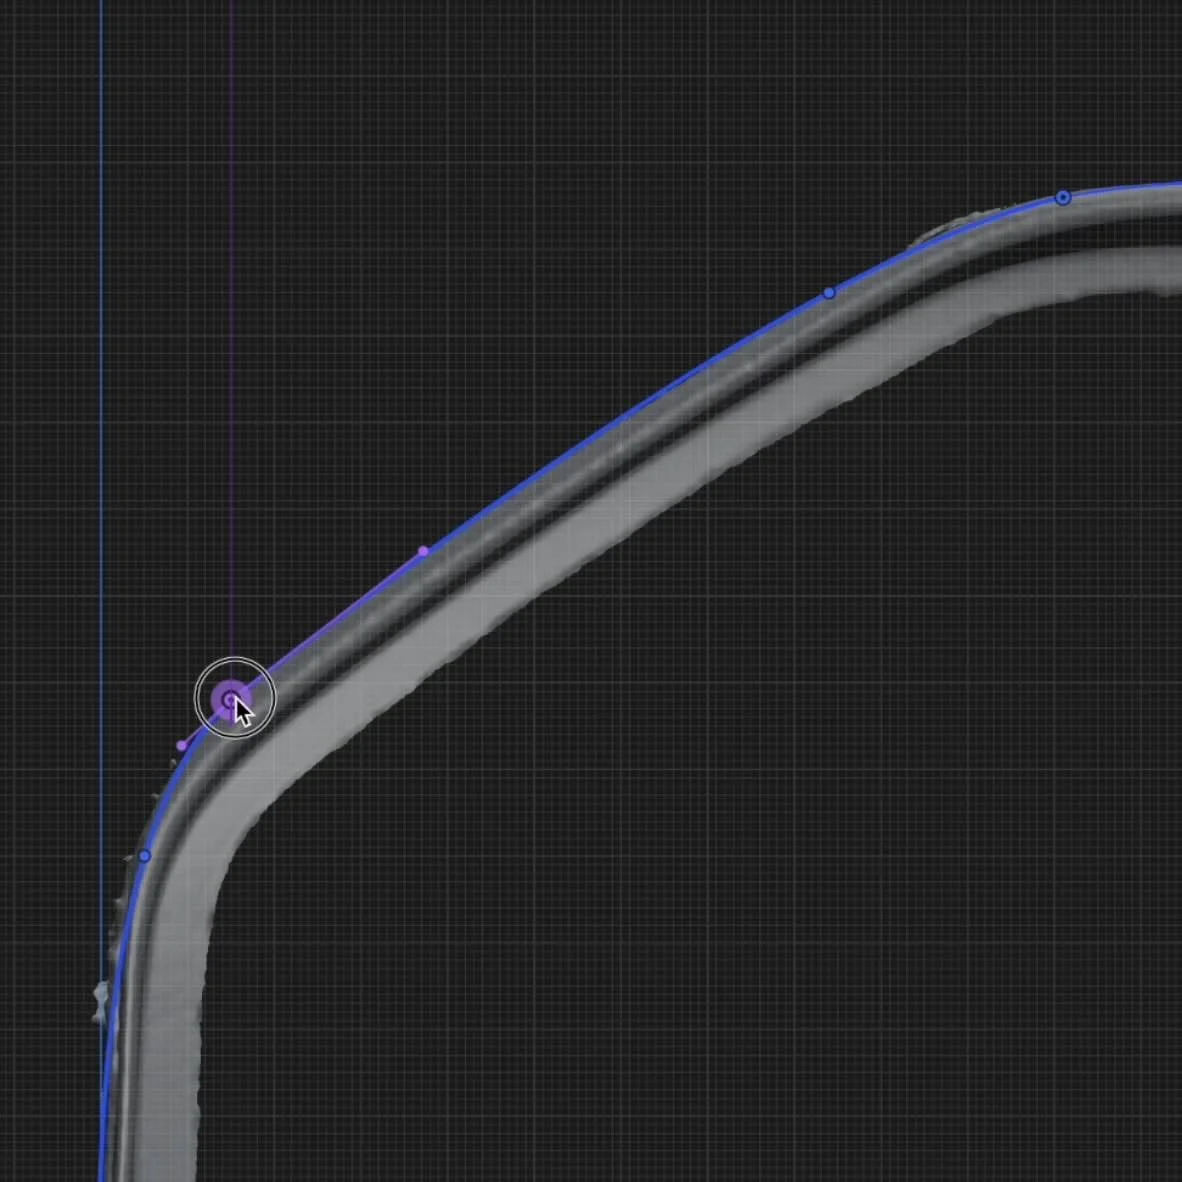
Import to CAD: Drop the scan (STL) into Shaper3D. You aren't "editing" the scan; you are using it as a 3D template to draw over. So make it transparent.
The Sketch Tool: Create the basic shapes.
The Spline Tool: Use this to match the organic curves of the part.
The Mirror Tool: Don't work twice as hard. Design one half of the part perfectly, then mirror it across the center axis for perfect symmetry.
The Extrude Tool: Select your shapes and extrude to add or remove shapes.
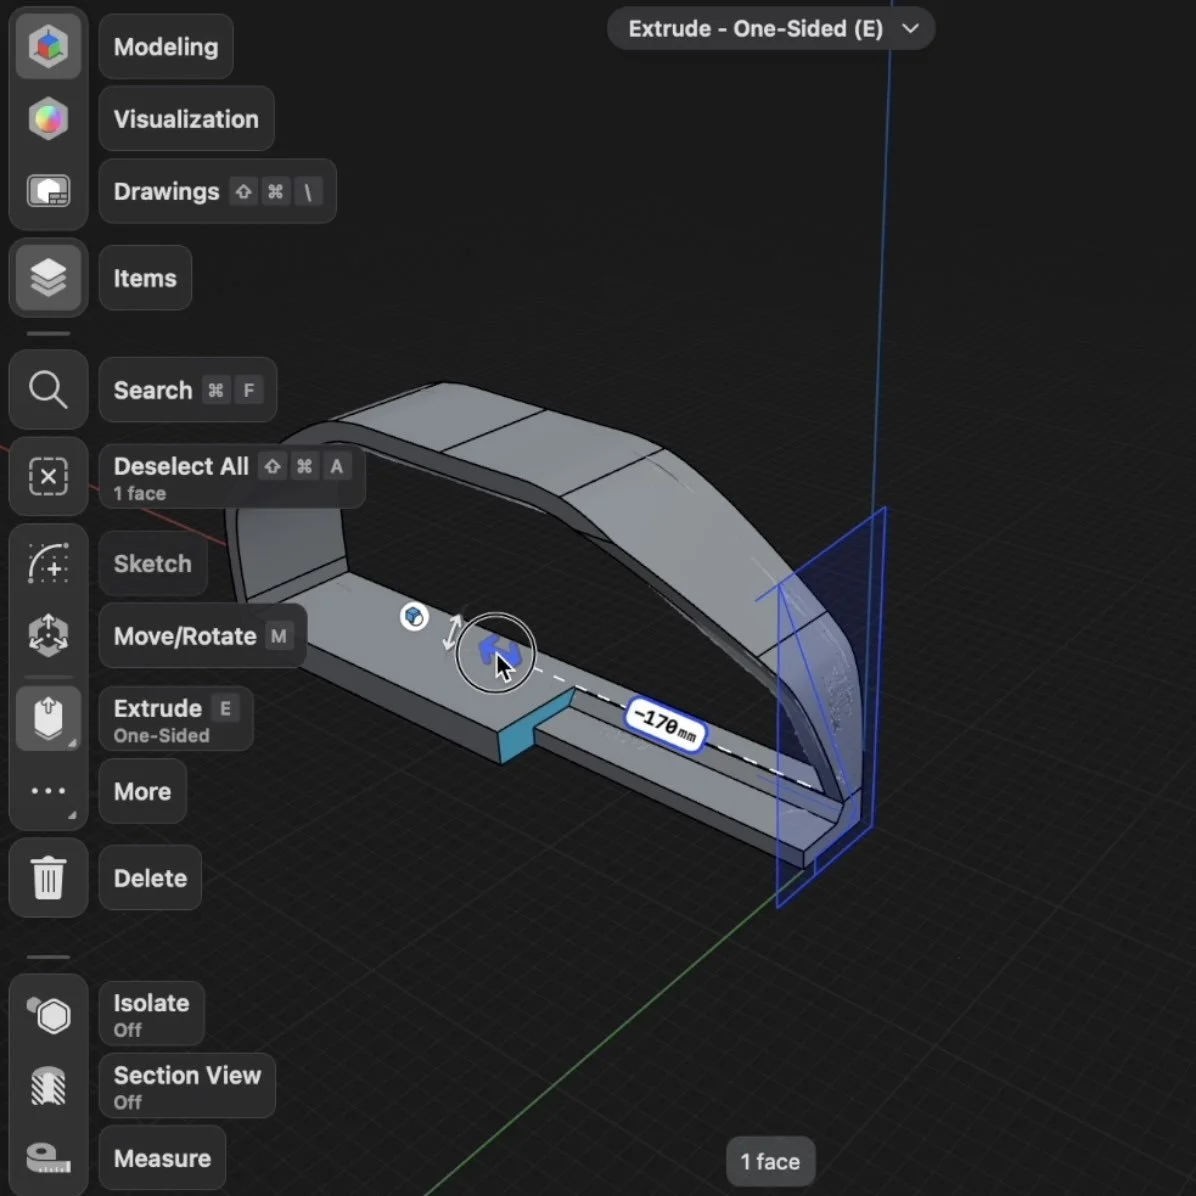
The Result: A part that matches the slight curvature of the dashboard perfectly the first time.
Most builders get stuck on reverse engineering a scan. That’s where the workshop comes in.
The workshop includes a reverse scanning module, a 3d printing car parts guide, and life time access to update drops. Most builders finish their first custom car part design in just one afternoon ⤵️
Design 3d Printed Car Parts That Match Your Exact Build.
One afternoon. No complex software. Parts that fit your build perfect.
Instant Access, Risk Free Money Back Guarantee