
HOW TO 3D SCAN CAR PARTS—FULL BLUEPRINT FOR BUILDERS | 2026

So you want to start 3d scanning your own car parts, but you’re not sure which scanner to buy or how to turn your scan into a 3d printed car part?
Here's the exact steps you’ll need:
Pick the right scanner (budget, mid, high-end)
Prep the part so your scan doesn't fail
Pick the correct scan mode for the job
Clean up the scanned data
Reverse engineer the part and export a printable STL
SO HOW DOES 3D SCANNING CAR PARTS REALLY WORK?
3D scanning isn’t a direct "scan-to-print" method.
A lot of new builders get stuck expecting that, but instead think of a 3D scanner as a high-precision digital measuring tool.
Its one job: turn a physical part into a usable 3d model.
In it’s simplest form, the scanner shines light (infrared or laser) onto the part. That light bounces back into sensors, which collect millions of digital dots called a point cloud.
Software then fuses those dots into a mesh — a surface made of tiny shapes that can be exported and used in CAD to reverse engineer your part.
Think of reverse engineering like tracing a drawing with another sheet of paper.
You're not editing the scan. You're using the scan as a template to sketch a new, clean part on top of it.
WHAT 3D SCANNER DO YOU NEED FOR CAR PARTS?
Here’s a 3d scanning car parts selector tool to help you pick your first 3d scanner.
💡 PRO TIP: Don't get bogged down by resolution and accuracy numbers. Most modern scanners have plenty of resolution to capture fine details like casting marks.
If you just want to test scanning without making a large purchase yet, use Polycam with your phone to practice.
But be aware, phone scanning isn't close to a dedicated handheld scanner. You'll spend 2x the time in cleanup and resizing the scan.
BUDGET SCANNERS STILL WORK — YOU JUST HAVE TO BE PATIENT…
If you want more accuracy, then go for a dedicated scanner.
A Creality Ferret Pro on sale can scan most small to medium car parts.
We've used one for our BMW e30 build on ebrake handles, trunk tool holders, radio delete plates, and interior trim.

💡 PRO TIP: You'll need scanning spray more often, and bigger reflective parts may require a second or third pass.
HOW TO PREP A CAR PART FOR SCANNING
This is where 99% of failed scans come from.
Success happens before you hit the scan button.
If the scanner loses "tracking" — meaning it loses its place in 3D space — your scan is done. You'll have to restart.
USE TRACKING MARKERS
Place reflective target stickers on and around the part in a random, non-symmetrical pattern. Symmetry confuses the scanner and it can lose tracking mid-scan.
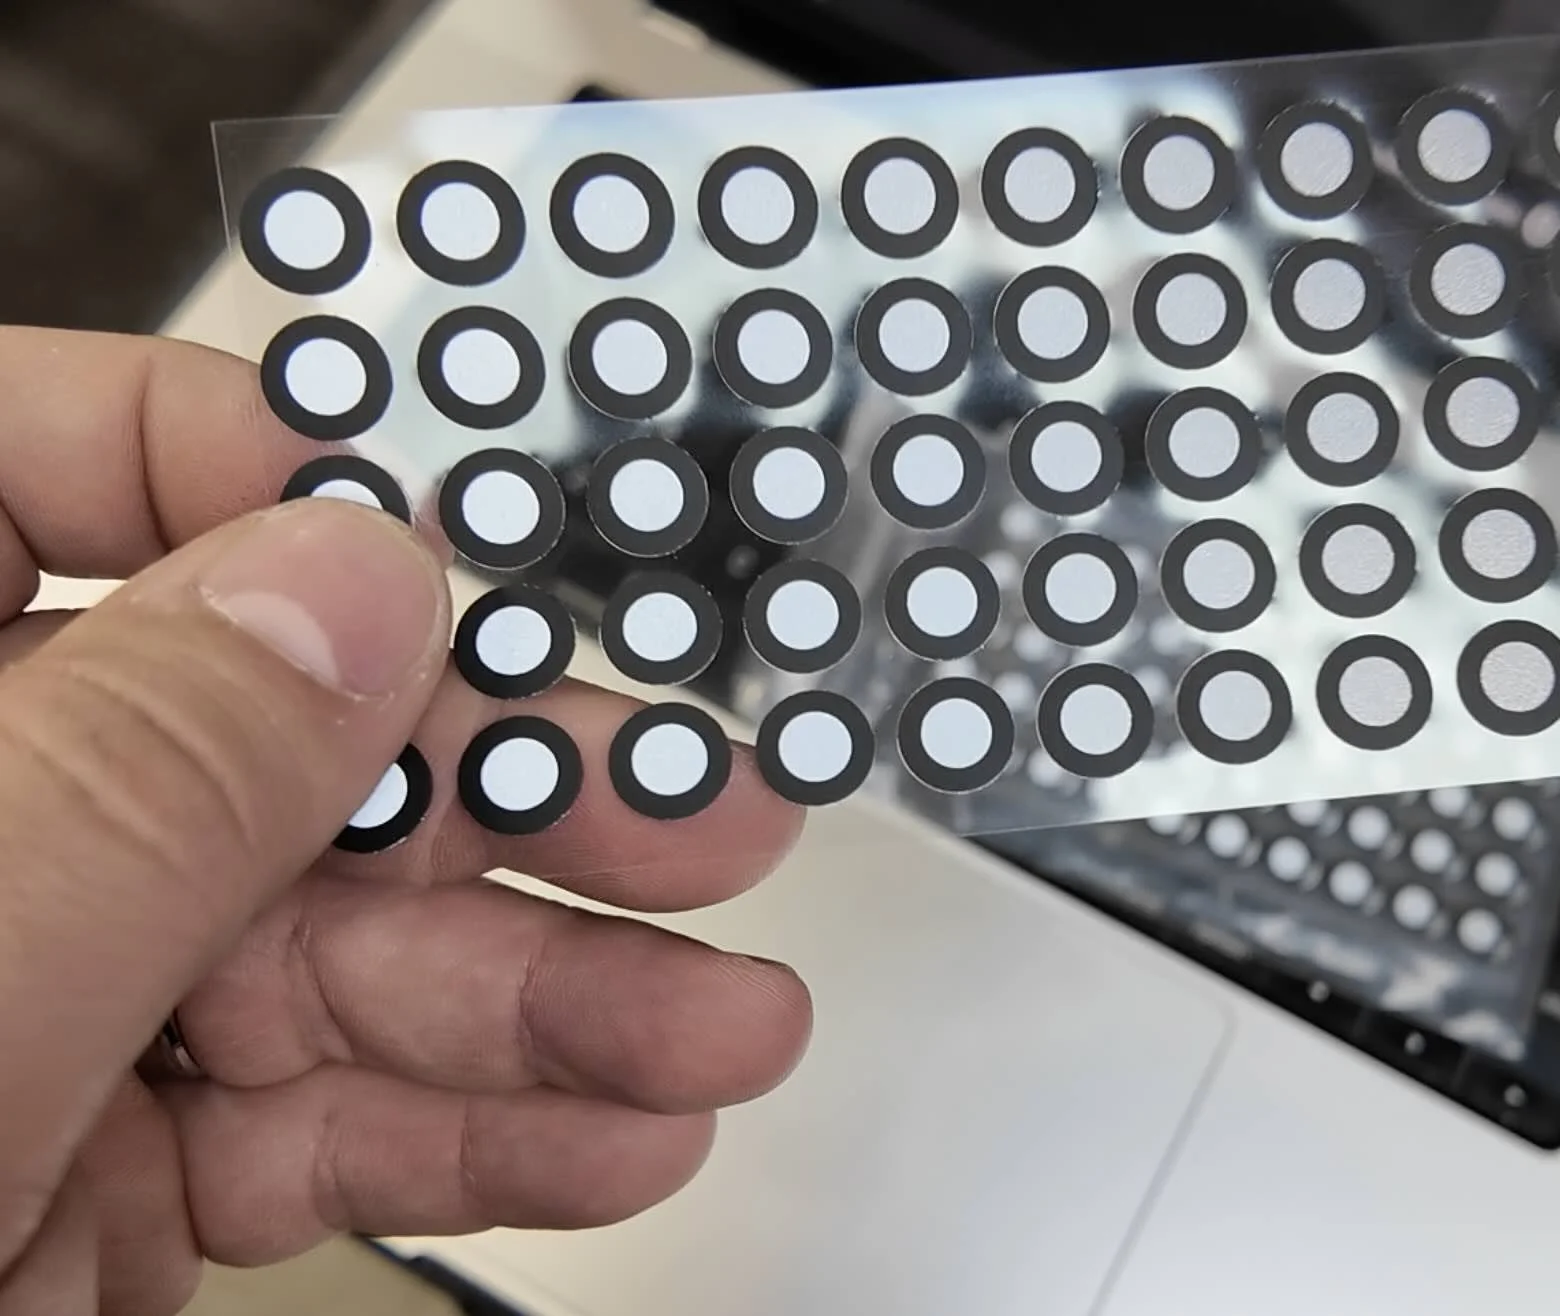
For metal parts, use magnetic markers. They’re easier to come off and don’t leave sticker residue.
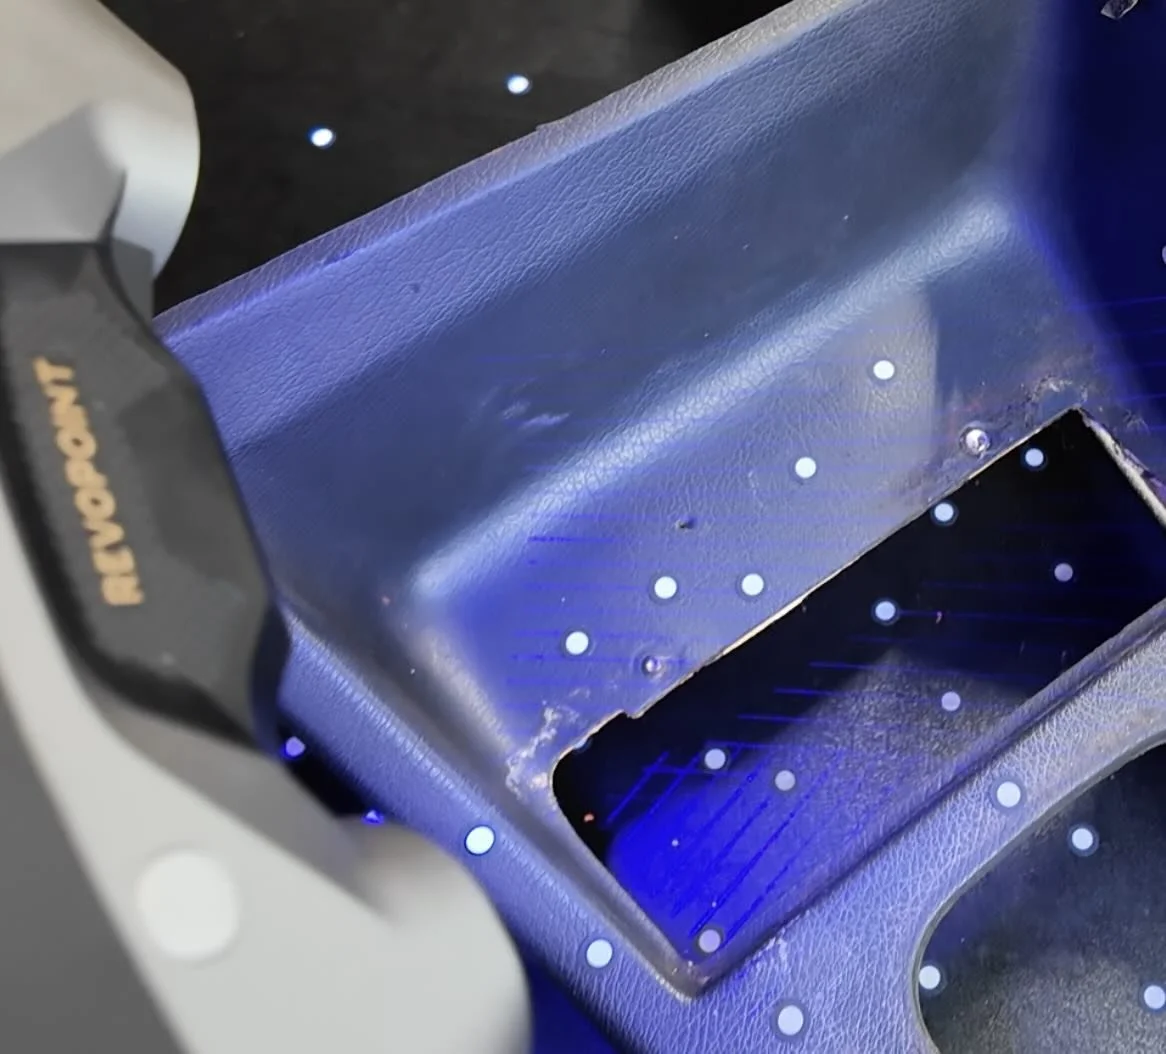
THE REFLECTIVE PROBLEM
IR scanners can't see chrome, gloss black plastic, or clear coat very well. A few fixes:
3D scanning spray — disappears in a few hours, no residue. The clean option.
Baby powder — dirt cheap, works the same, just messier.
Dry Shampoo — also helps provide a matte scanning finish, not as messy as baby powder.
Blue Laser 3D Scanner — Instead of purchasing the Creality Ferret Pro, go for the Revopoint POP 4: 5-in-1 3D Scanner with Blue Laser & Infrared Light use affiliate code REVOPRAATB for an additional discount.
LIGHTING + ENVIRONMENT
Small parts: Use a turntable for complex parts (a kitchen lazy susan works fine).
Large parts: Lay down a black underlay scattered with markers.
Avoid direct shadows on the part. Overhead diffused lighting is ideal.
BEST 3D SCANNING MODE FOR CAR PARTS
Each 3d scanner has features and modes that work better than others depending on a few variables. Here’s a quick chart to figure out which scanner mode is best.
Entry-level scanners
High-end scanners
Workhorse mode
Precision mode
Secret weapon
HOW TO CAPTURE A CLEAN SCAN
Once prep is done, scanning itself is pretty boring (which is the goal).
Move like a cinematographer. Slow. Steady. Intentional.

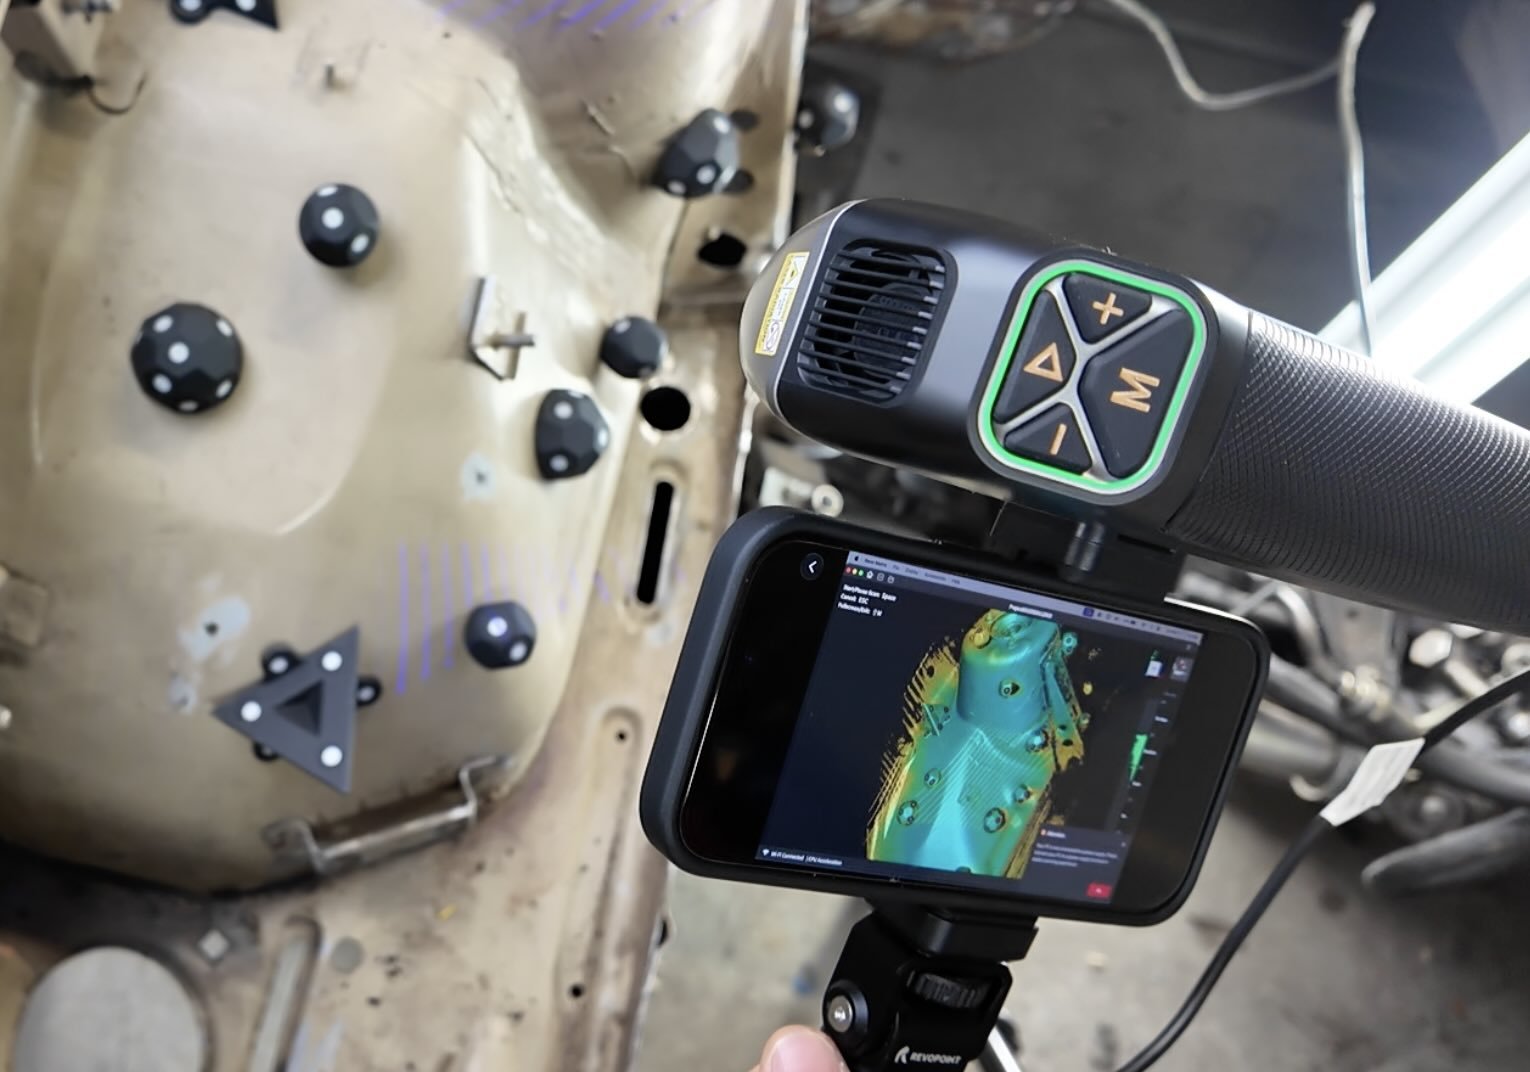
Color indicator every scanning app uses:
🟢 GREEN — perfect distance, capturing clean data
🔴 RED — too close or moving too fast
🔵 BLUE — too far away
If you lose tracking: don't panic. Point the scanner back at a section you already scanned. The software will re-localize.
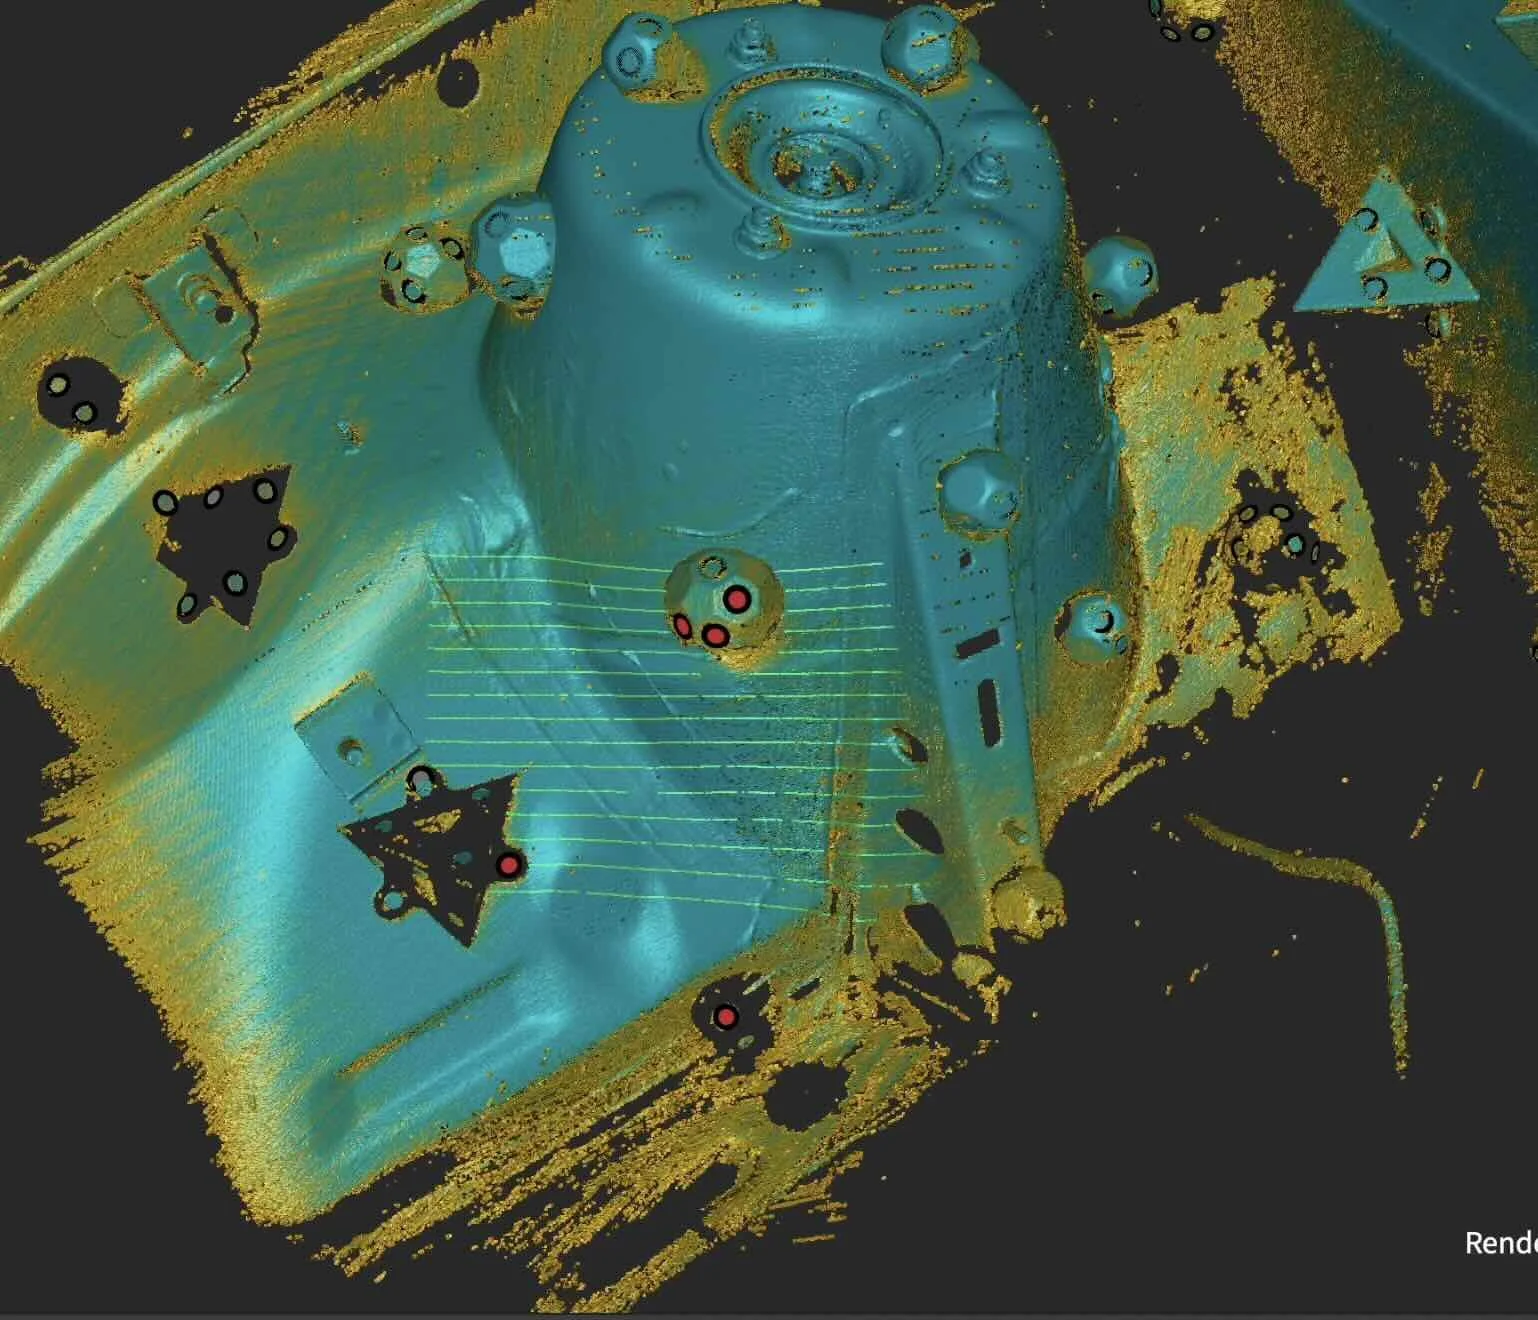
HOW TO TURN A POINT CLOUD INTO A 3D PRINTABLE MESH
When you finish scanning, you don't have a 3D model yet. You have a point cloud — millions of floating dots.
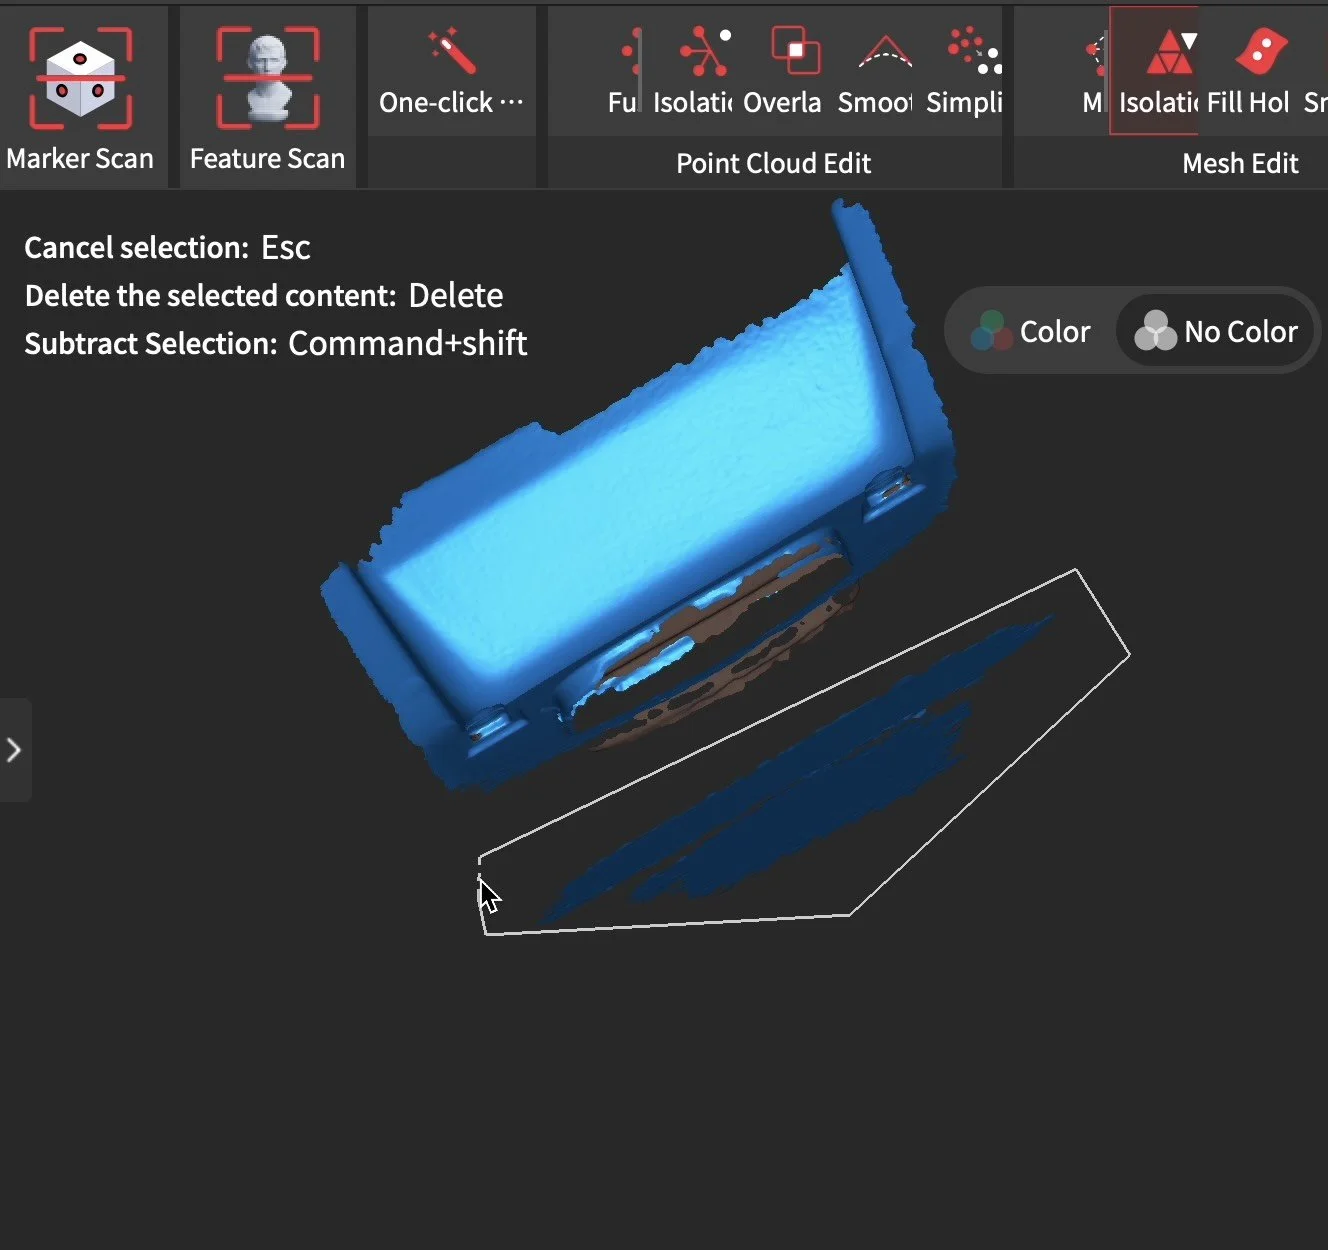
One-Click Process — Auto-fuse point cloud into a mesh. Always start here.
Delete Noise — Lasso out the floor, turntable, your hand.
Optimize — Tidy-up pass and remove redundant data.
Manual Fusion — If one-click isn't clean enough, fuse again with smaller point distance.
Hole Filling — Patches missed spots. Flat fill is clutch for printable bottom surfaces.
Smoothing — Reduces noise. Careful — too much rounds off sharp edges.
Simplify — Drops triangle count. Run at 40-60% for most car parts.
HOW TO EXPORT A SCAN FOR REVERSE ENGINEERING
Once your mesh is clean and watertight (no holes), export as an STL.
Import that STL into Shapr3D, Fusion 360, or Onshape.
I prefer Shaper3D because it’s intuitive and works on an iPad with an Apple Pencil.

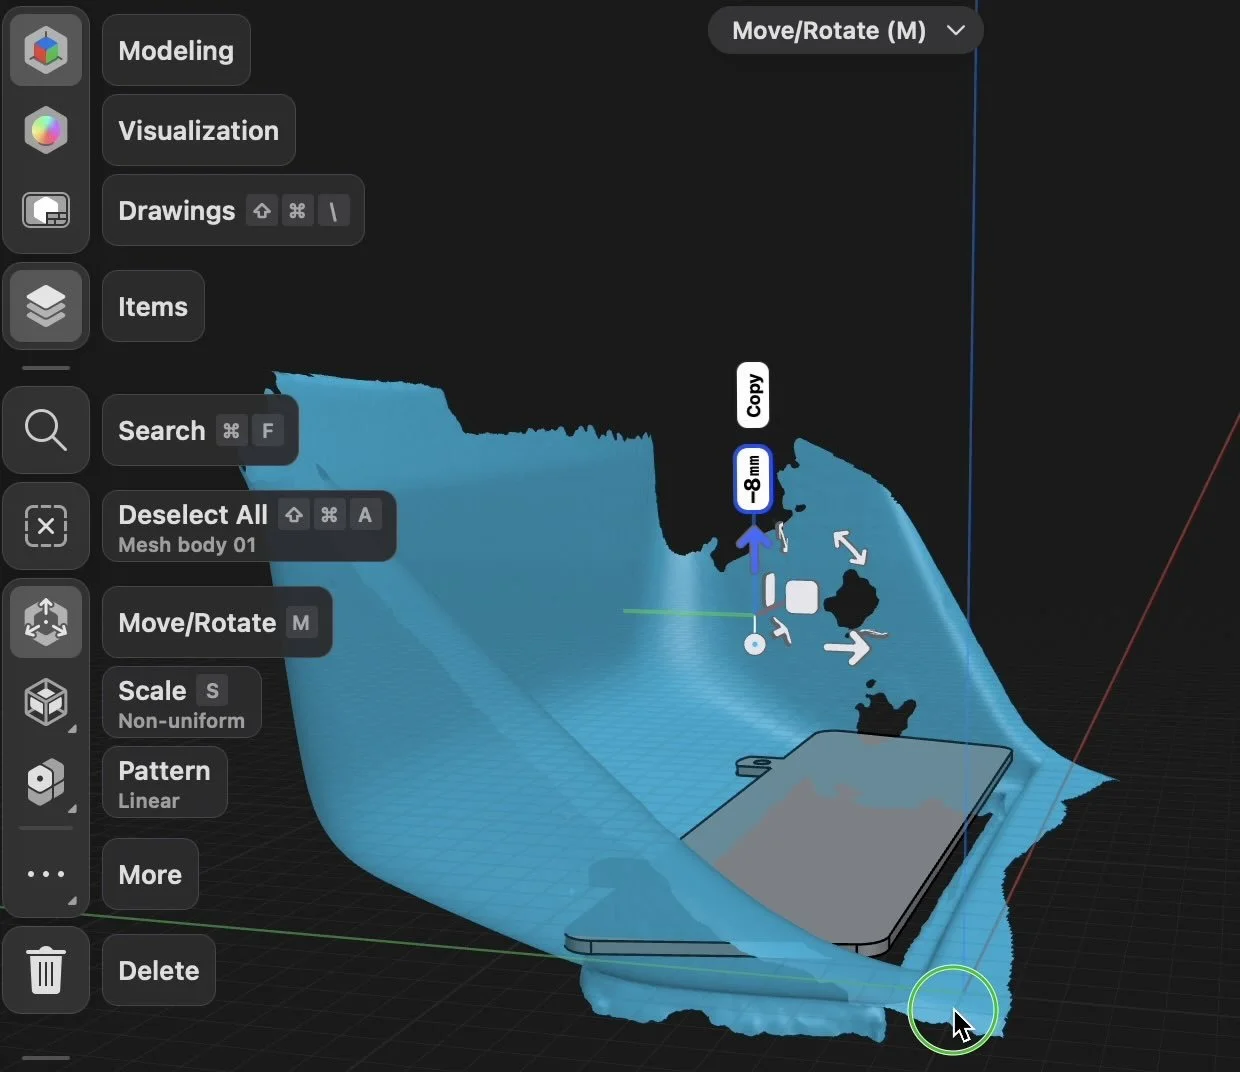
Important: you are NOT editing the scan. You're using it as a template to sketch a brand new, clean part on top of it. The scan locks dimensions. Your CAD sketch becomes the actual printable, editable model.
HOW LONG DOES 3D SCANNING A CAR PART TAKE?
For a typical interior part like a radio delete plate or gauge bezel:
Prep (markers + spray): 5-10 minutes
Scanning: 5-15 minutes
Cleanup + mesh: 15-30 minutes (depending on computer hardware)
Export to STL: 1-15 minutes (depending on computer hardware)
CAN YOU 3D SCAN A CAR PART AND PRINT IT?
Normally no. A 3D scanner captures geometry — it doesn't produce a ready to print STL.
You'll get a mesh that's too noisy and unstructured to print reliably.
The correct workflow is scan → clean mesh → import into CAD → reverse engineer a clean model → export STL → print. The scan is your reference, not your final file.
HOW ACCURATE DOES A 3D SCANNER NEED TO BE FOR CAR PARTS?
For most interior parts — trim pieces, delete plates, bezels, brackets — 0.1mm accuracy is more than sufficient.
Entry-level scanners like the Ferret Pro operate in that range.
Sub-0.05mm accuracy only matters for tight-tolerance mechanical components like engine brackets with press-fit specs.
I HAVE A 3D SCAN, HOW DO I REVERSE ENGINEER IT?
Going from a scan to a print ready part for your build will need some work. That’s where the workshop comes in.
Design 3d Printed Car Parts That Match Your Exact Build.
One afternoon. No complex software. Parts that fit your build perfect.
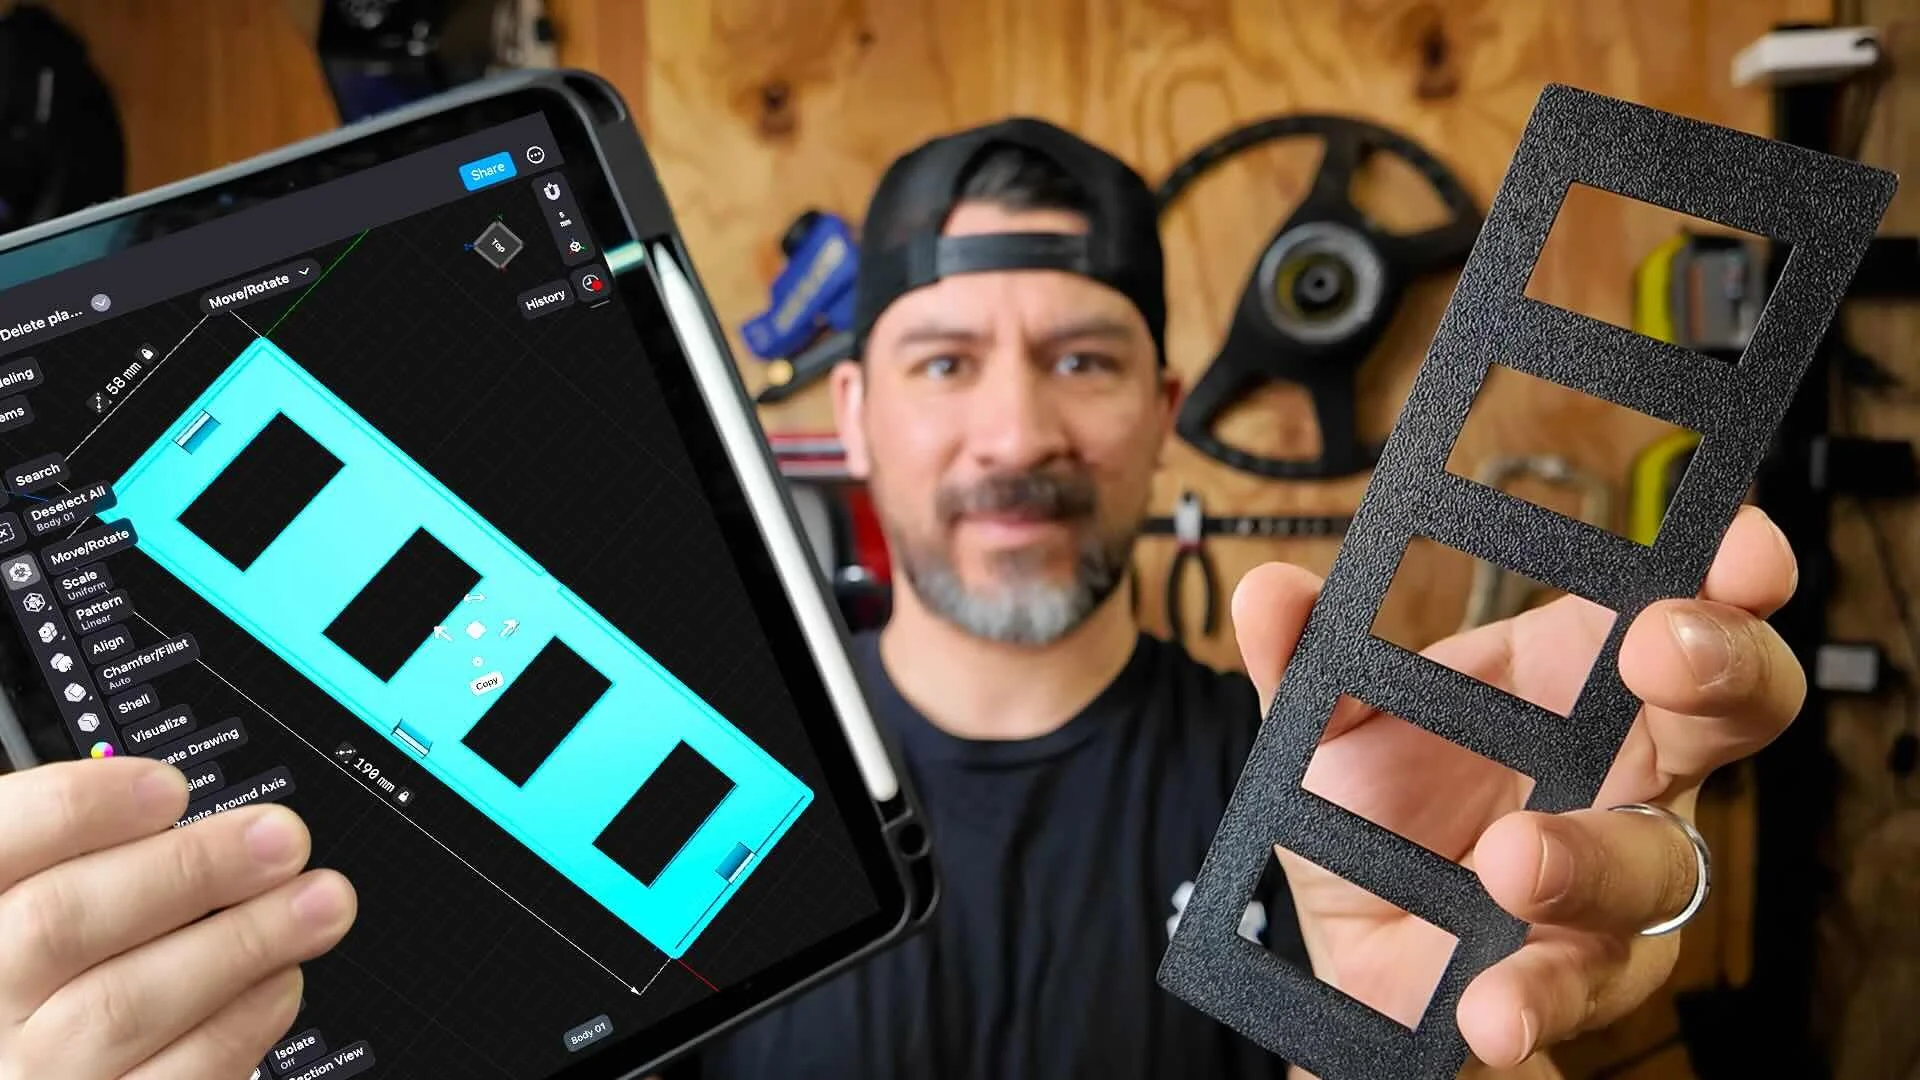
This workshop finally made designing 3d printed car parts feel doable. I had a replacement part ready for my project car in a few hours.
Instant Access, Risk Free Money Back Guarantee