
HOW TO DESIGN AND 3D PRINT CAR PARTS WITH SHAPR3D
START SIMPLE
The best way to get started is with a very basic design.
We picked a spark plug wire separator click from our BMW e30 project car to recreate.

Next, pick your software. We recommend Shapr3D with an iPad and Apple pencil.
The interface is very simple to pick up and the auto selection of tools really helps beginners just getting started with CAD software.

If you don’t have an iPad, no worries. You can use the desktop version of Shapr3D and best of all there’s a free version too.
If you don’t want to use Shapr3D you can check out these other CAD software options too:
| Software | Ease of Use | Platform | Best For | Details |
|---|---|---|---|---|
| Shapr3D | ★★★★★ | iPad, Mac, PC | Beginners & intermediate designers | Touch-friendly, super intuitive. Free version w/export resolution and other limitations. |
| TinkerCAD | ★★★★☆ | Web-based | Beginners & quick prints | Free web based drag-and-drop style, but limited features. Great for simple designs. |
| Fusion 360 | ★★★☆☆ | PC & Mac | Intermediate to advanced users | Free limited personal use version, very powerful but takes time to learn. Cloud-based. |
| FreeCAD | ★★☆☆☆ | PC, Mac, Linux | Engineers & power users | Fully free open-source, but not very beginner-friendly. |
| SketchUp Free | ★★★☆☆ | Web-based | Architecture & general modeling | Decent for shapes, but not made for mechanical parts. |
💡 Designing parts is where most people get stuck
Measurements, sketches, and clips can be designed to actually hold.
In my 1-Day Car Part Design Workshop, I’ll walk you step by step through the entire process so you can go from idea → working part in a single day.
MEASURE AND DRAW FIRST
Buy yourself a caliper measuring tool and start taking measurements of the part you wish to recreate.
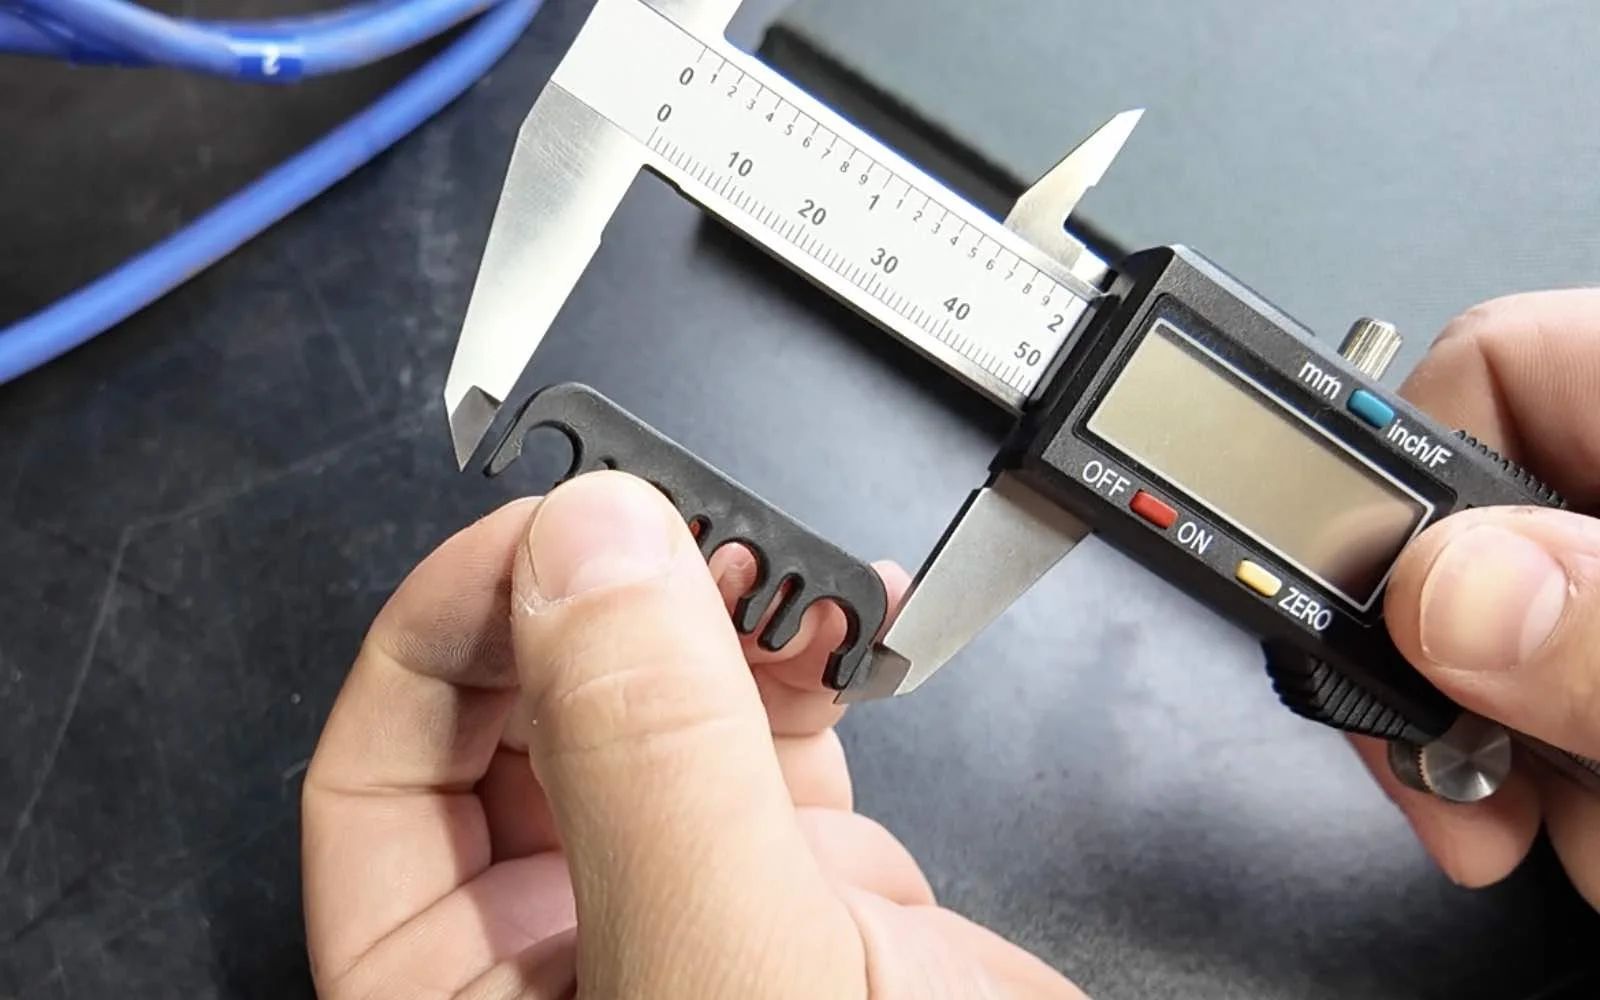
Length
Width
Depth
Inner diameter of the spark plug wire holders
Distance between holders
This next step will save you tons of time when you start sketching in Shapr3d, draw it out…

STEP 1: SKETCH THE SHAPE
Start by switching to the Top View in Shapr3D.
SHAPR3D RECTANGLE TOOL:
Tap on Sketch
Select the Rectangle Tool
Draw your rectangle freely on the canvas
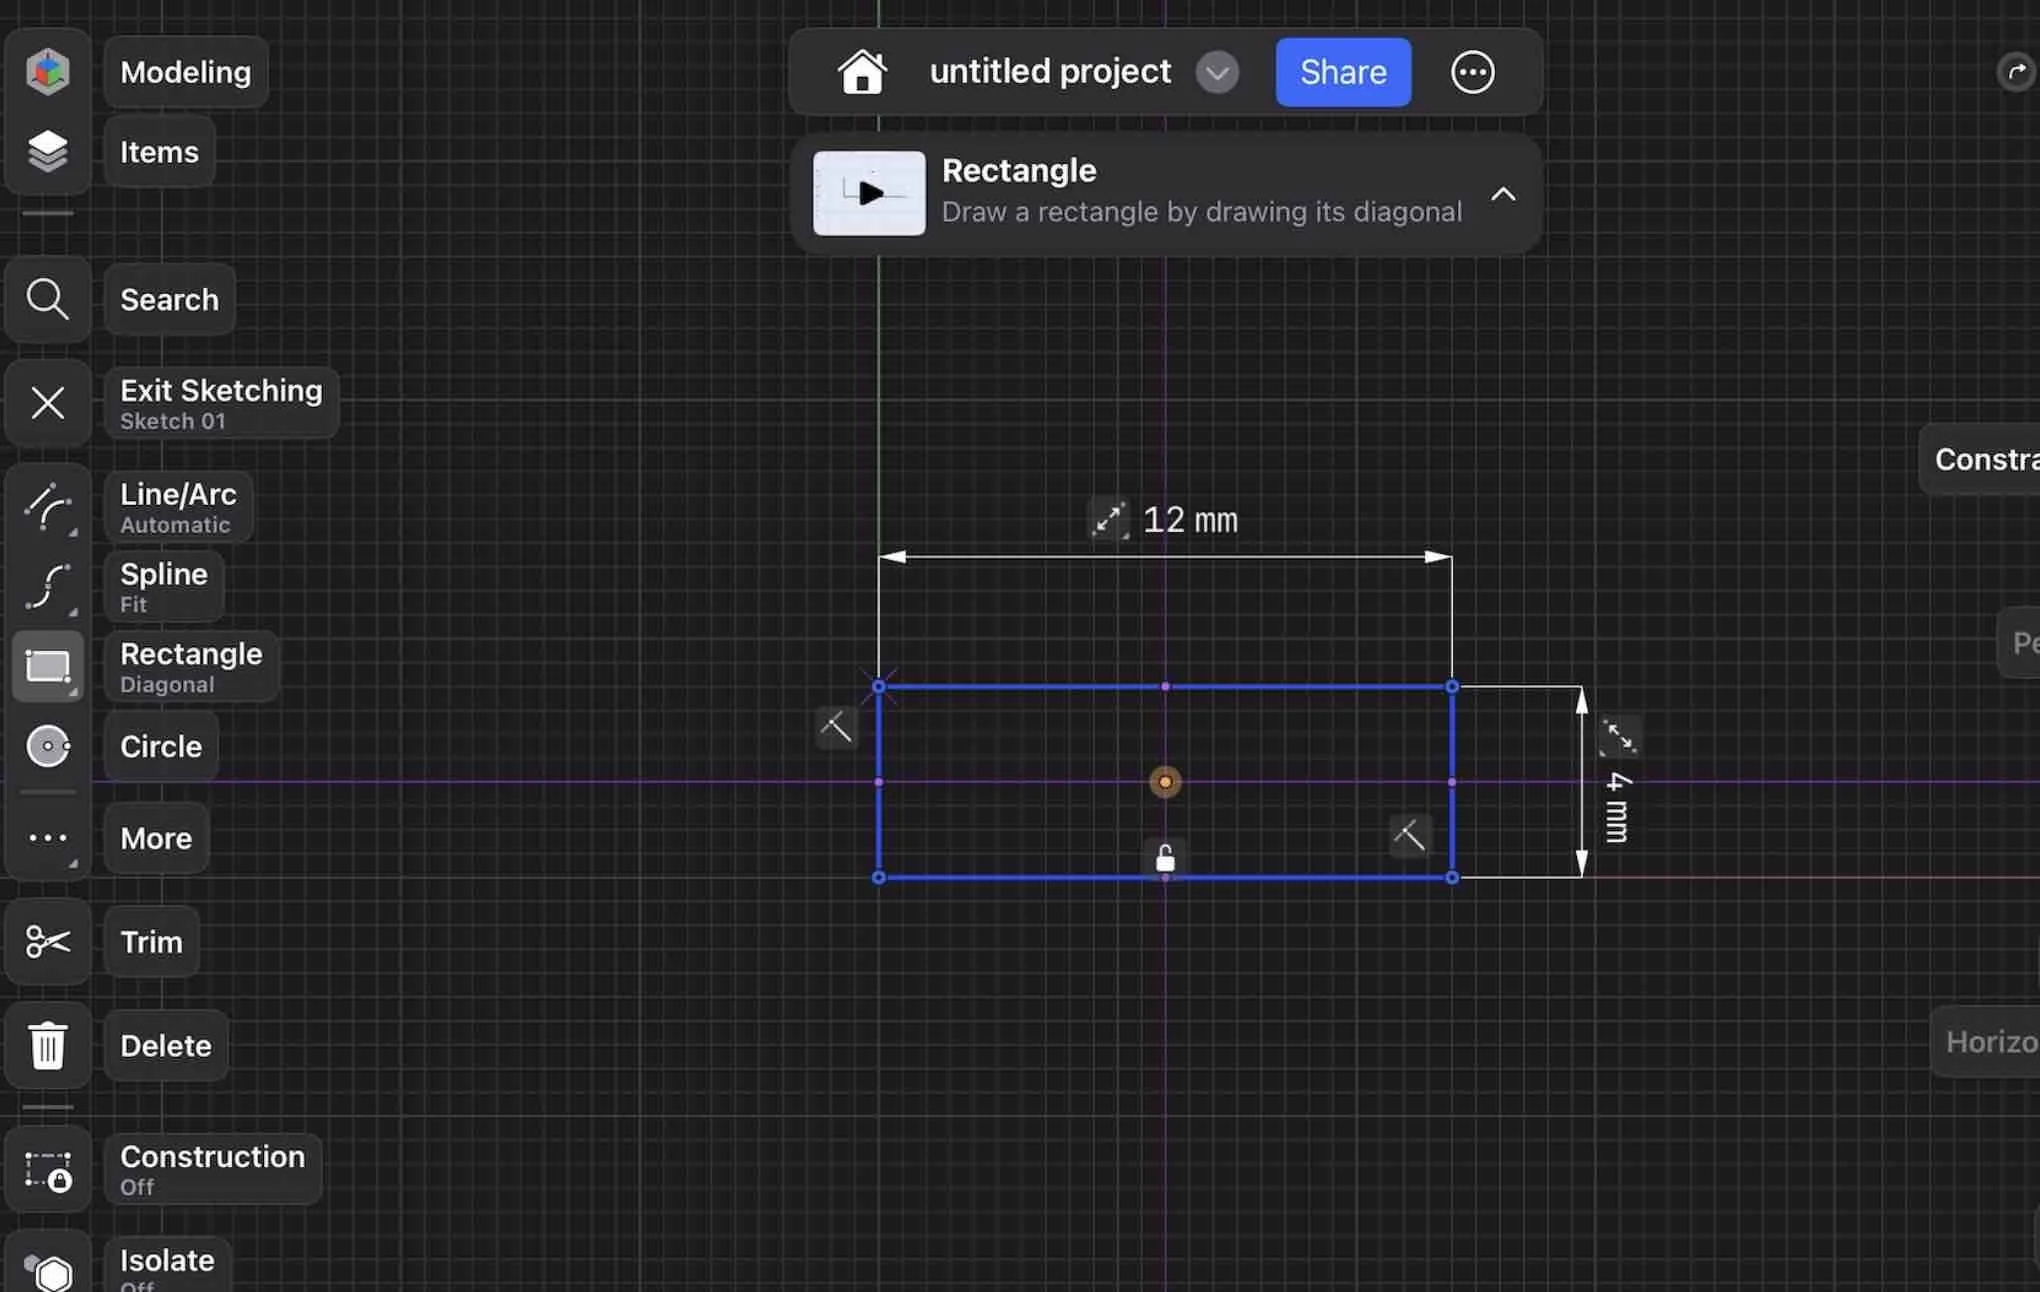
No need to get the size perfect right away—Shapr3D makes it easy to adjust later.
✏️ TIP: Click on each side of the rectangle and manually enter the exact dimensions. This ensures your part matches the physical measurements you need.
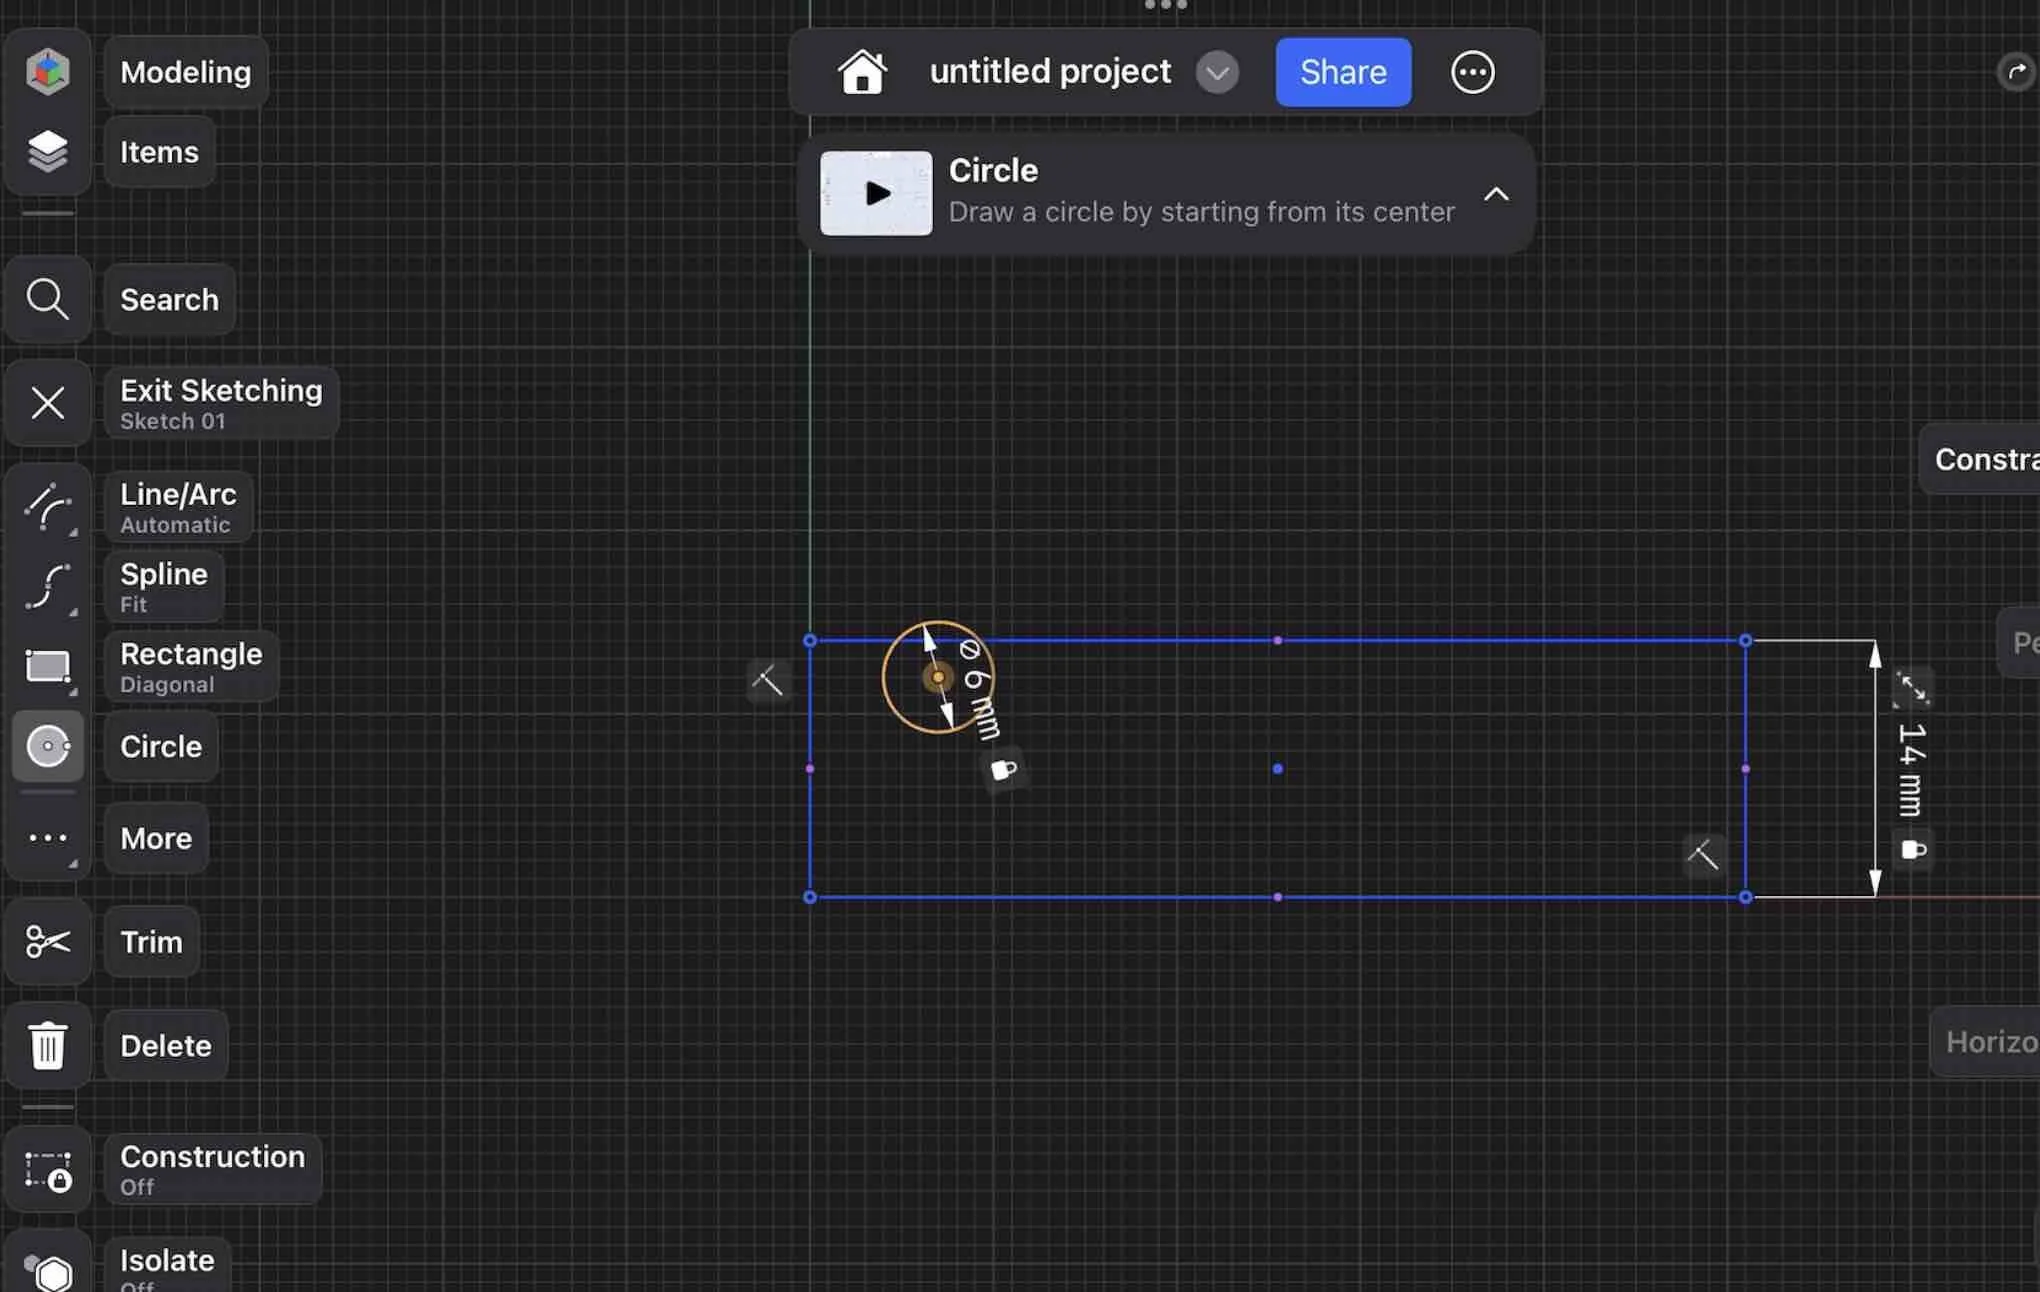
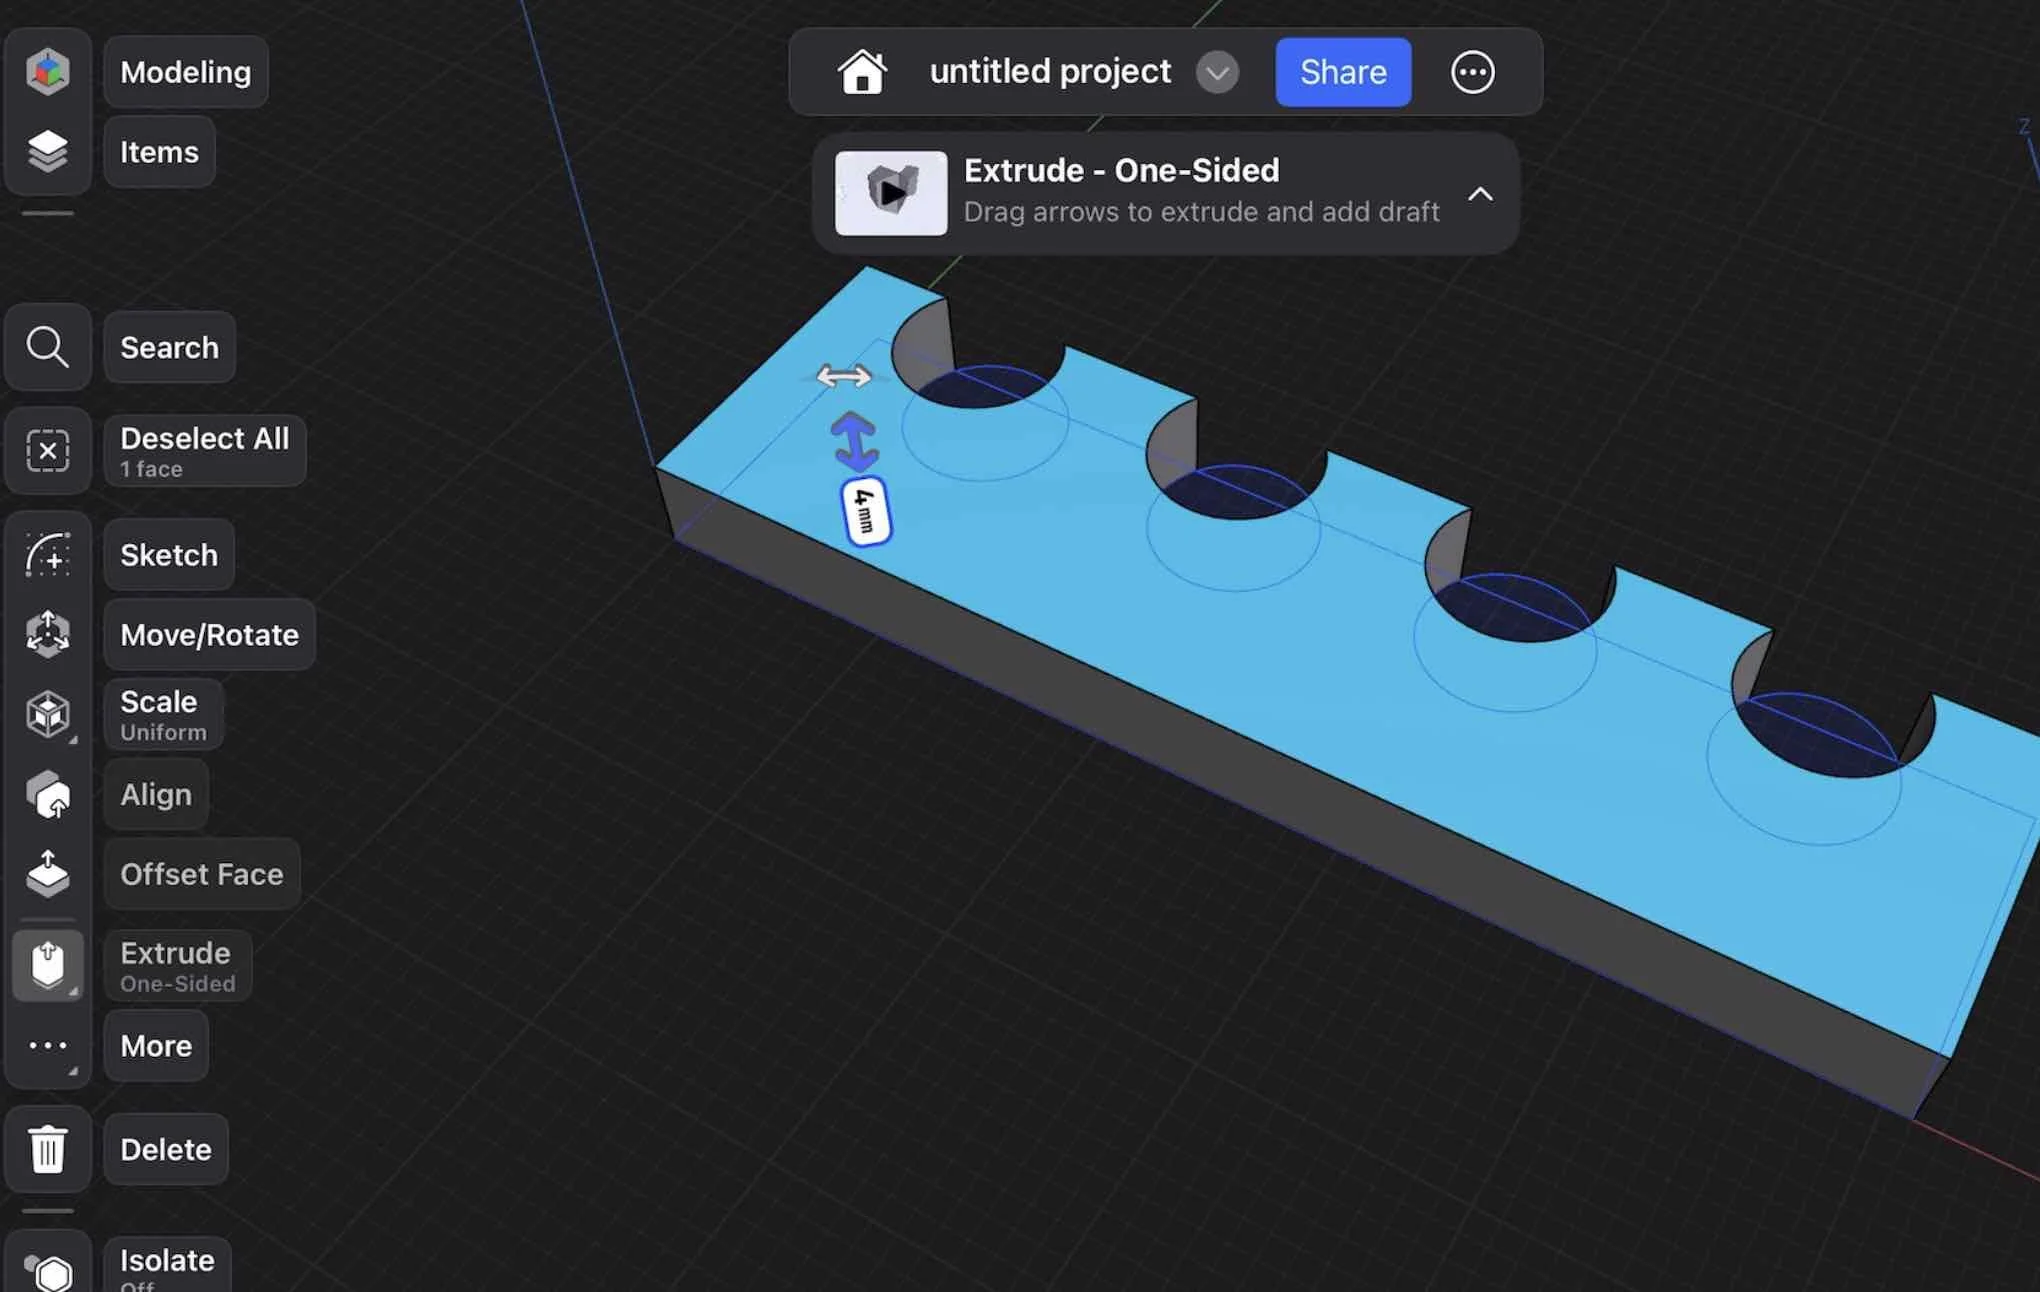
Step 2: Add the Cable Holes
Next, let’s add the circular holes where your cables will run through.
SHAPR3D CIRCLE TOOL:
Select the Circle Tool
Draw one circle inside the rectangle
Click on the circle to set the diameter based on your sketch
Now here’s where Shapr3D really starts to shine.
✅ BONUS – SHAPR3D PATTERN
Exit Sketch Mode
Select the circle you just made
Hit Pattern
Enter the number of holes you want (e.g., 3)
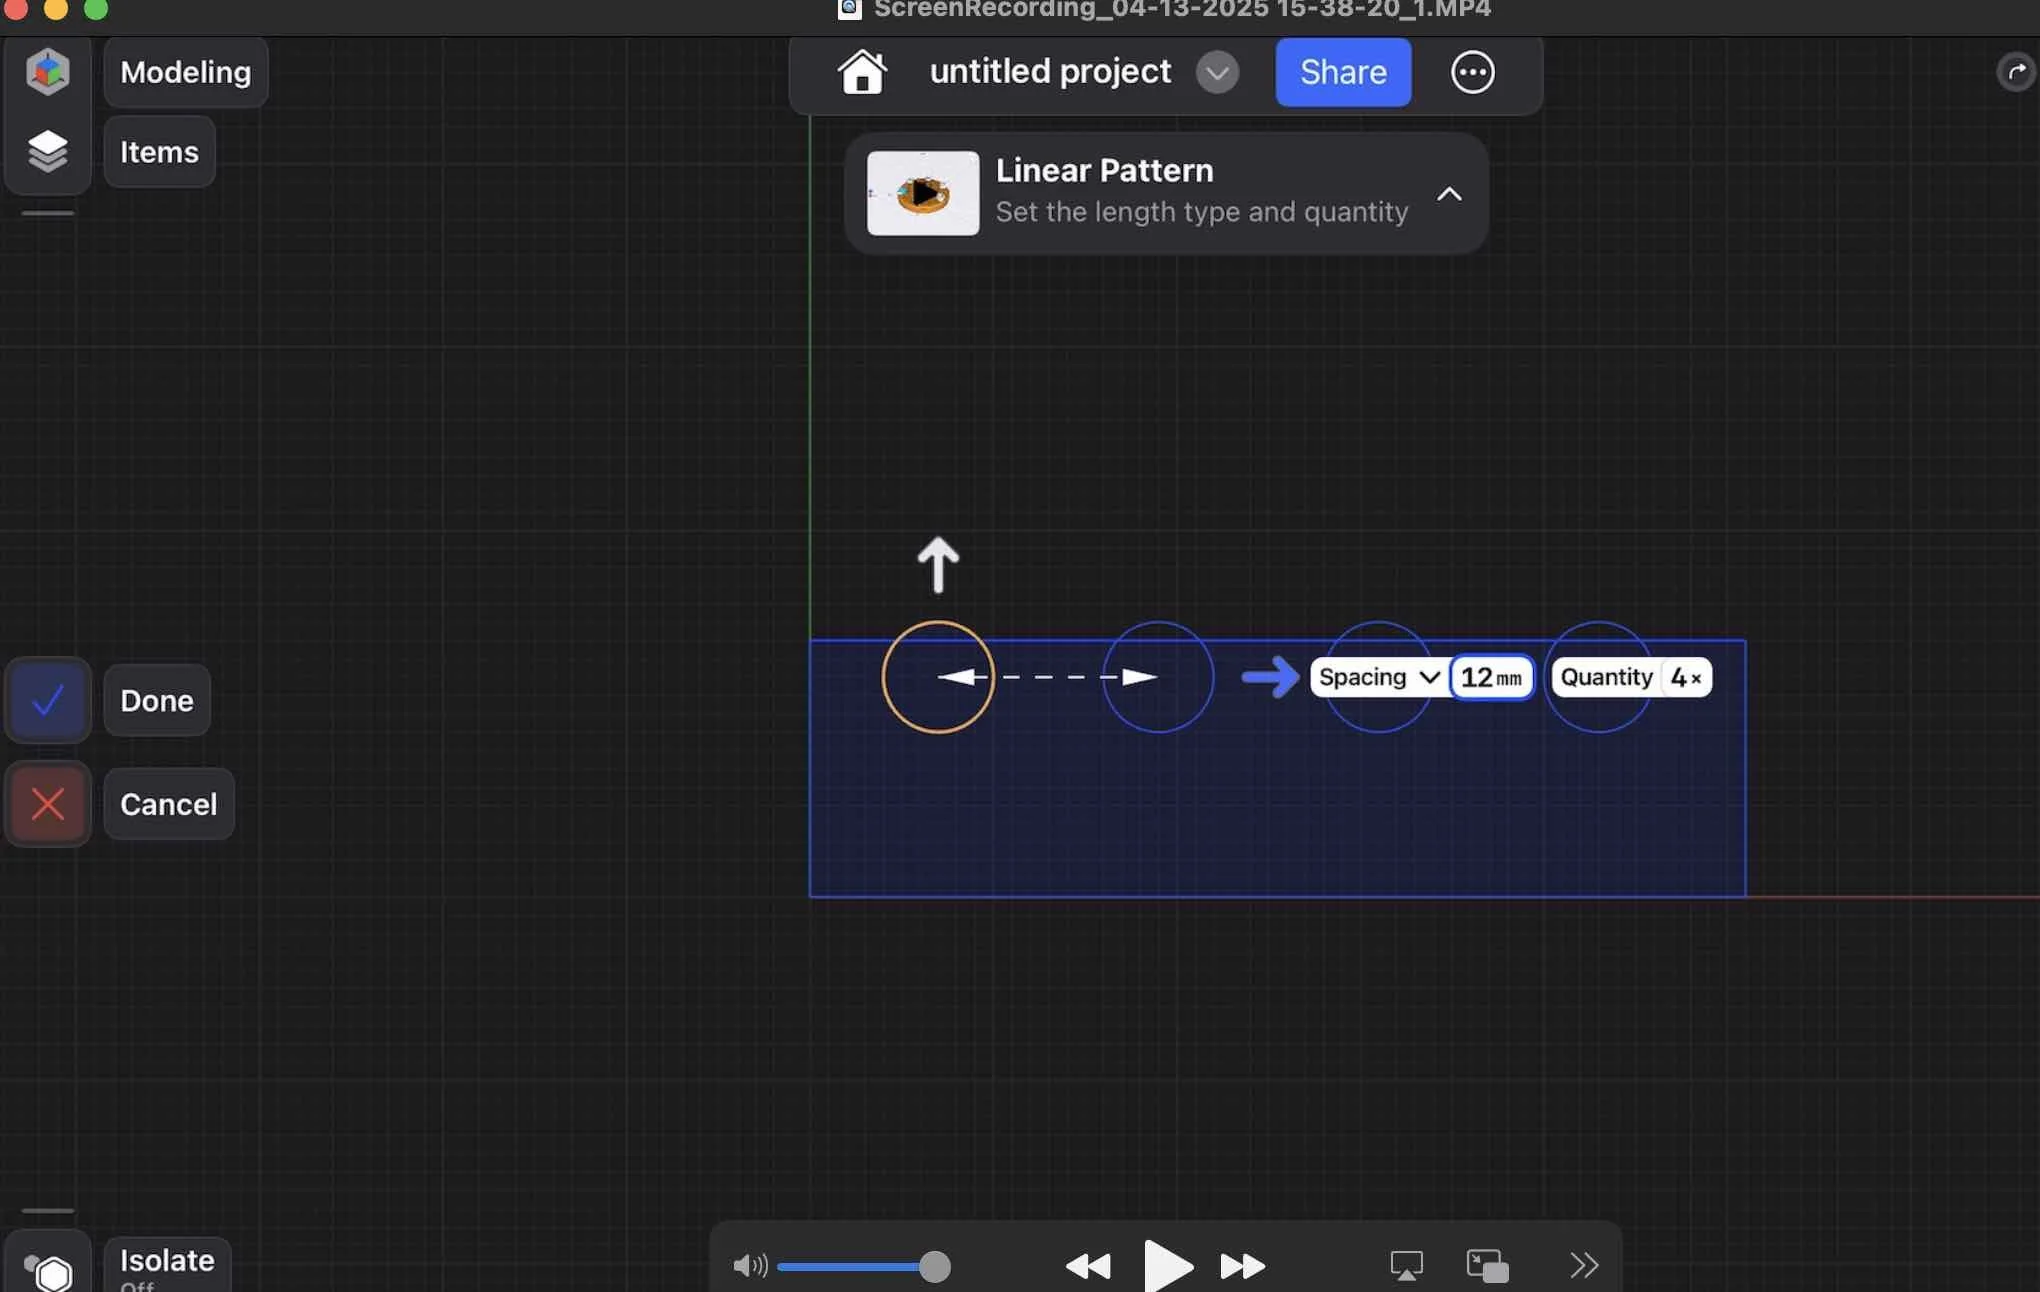
Shapr3D duplicates the circles evenly—and the best part… If you change the size or position of the original circle, all the copies update automatically.
STEP 3: EXTRUDE CLIP
With your 2D sketch done, it’s time to bring it to life.
SHAPR3D EXTRUDE TOOL:
Select the main rectangle
The Extrude Tool should auto-activate
Drag the rectangle up or down to set your desired height
Just like that, you've got a 3D version of your cable clip.
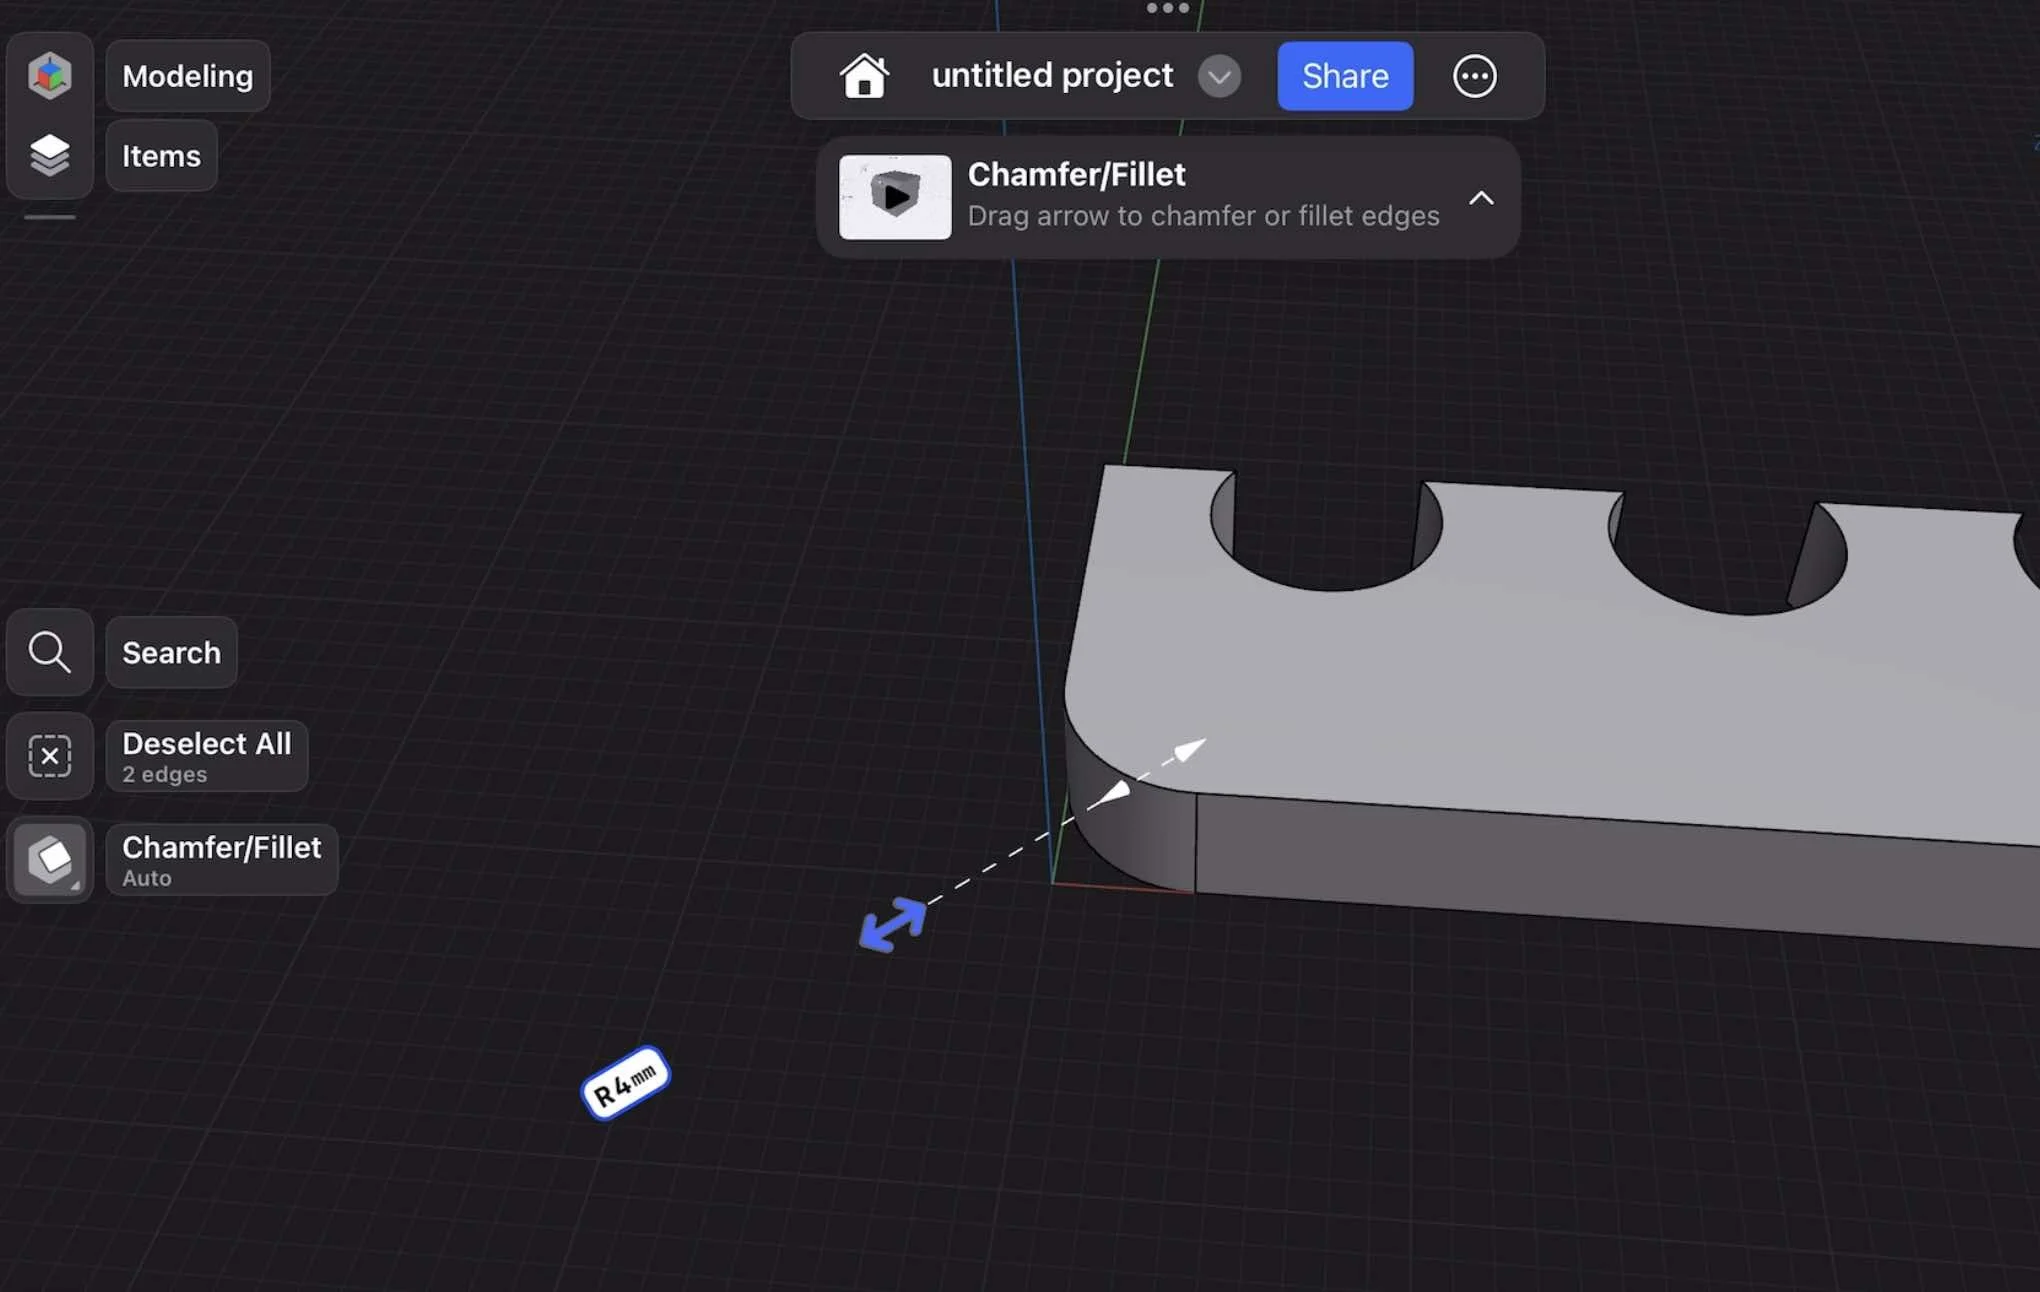
STEP 4: ROUNDED EDGES
To give your clip a polished, pro look, round off the corners.
SHAPR3D FILLET TOOL:
Select the corners (hold Shift to select multiples)
Use the Fillet Tool to round the edges to your liking

STEP 5: ADJUST WITH HISTORY MODE
Worried your cable holes are too close to the edge? No problem.
SHAPR3D HISTORY PANE:
Open the History Pane
Find your original circle
Adjust its position

All the duplicated circles will move with it, and your 3D model updates instantly. No rework needed.
STEP 6: EXPORT TO STL
Now you're ready to bring your model into the real world.

SHAPR3D TOOL:
Go to Export
Choose STL Format
Send it to your slicer or 3D printer software
STEP 5: TEST FIT
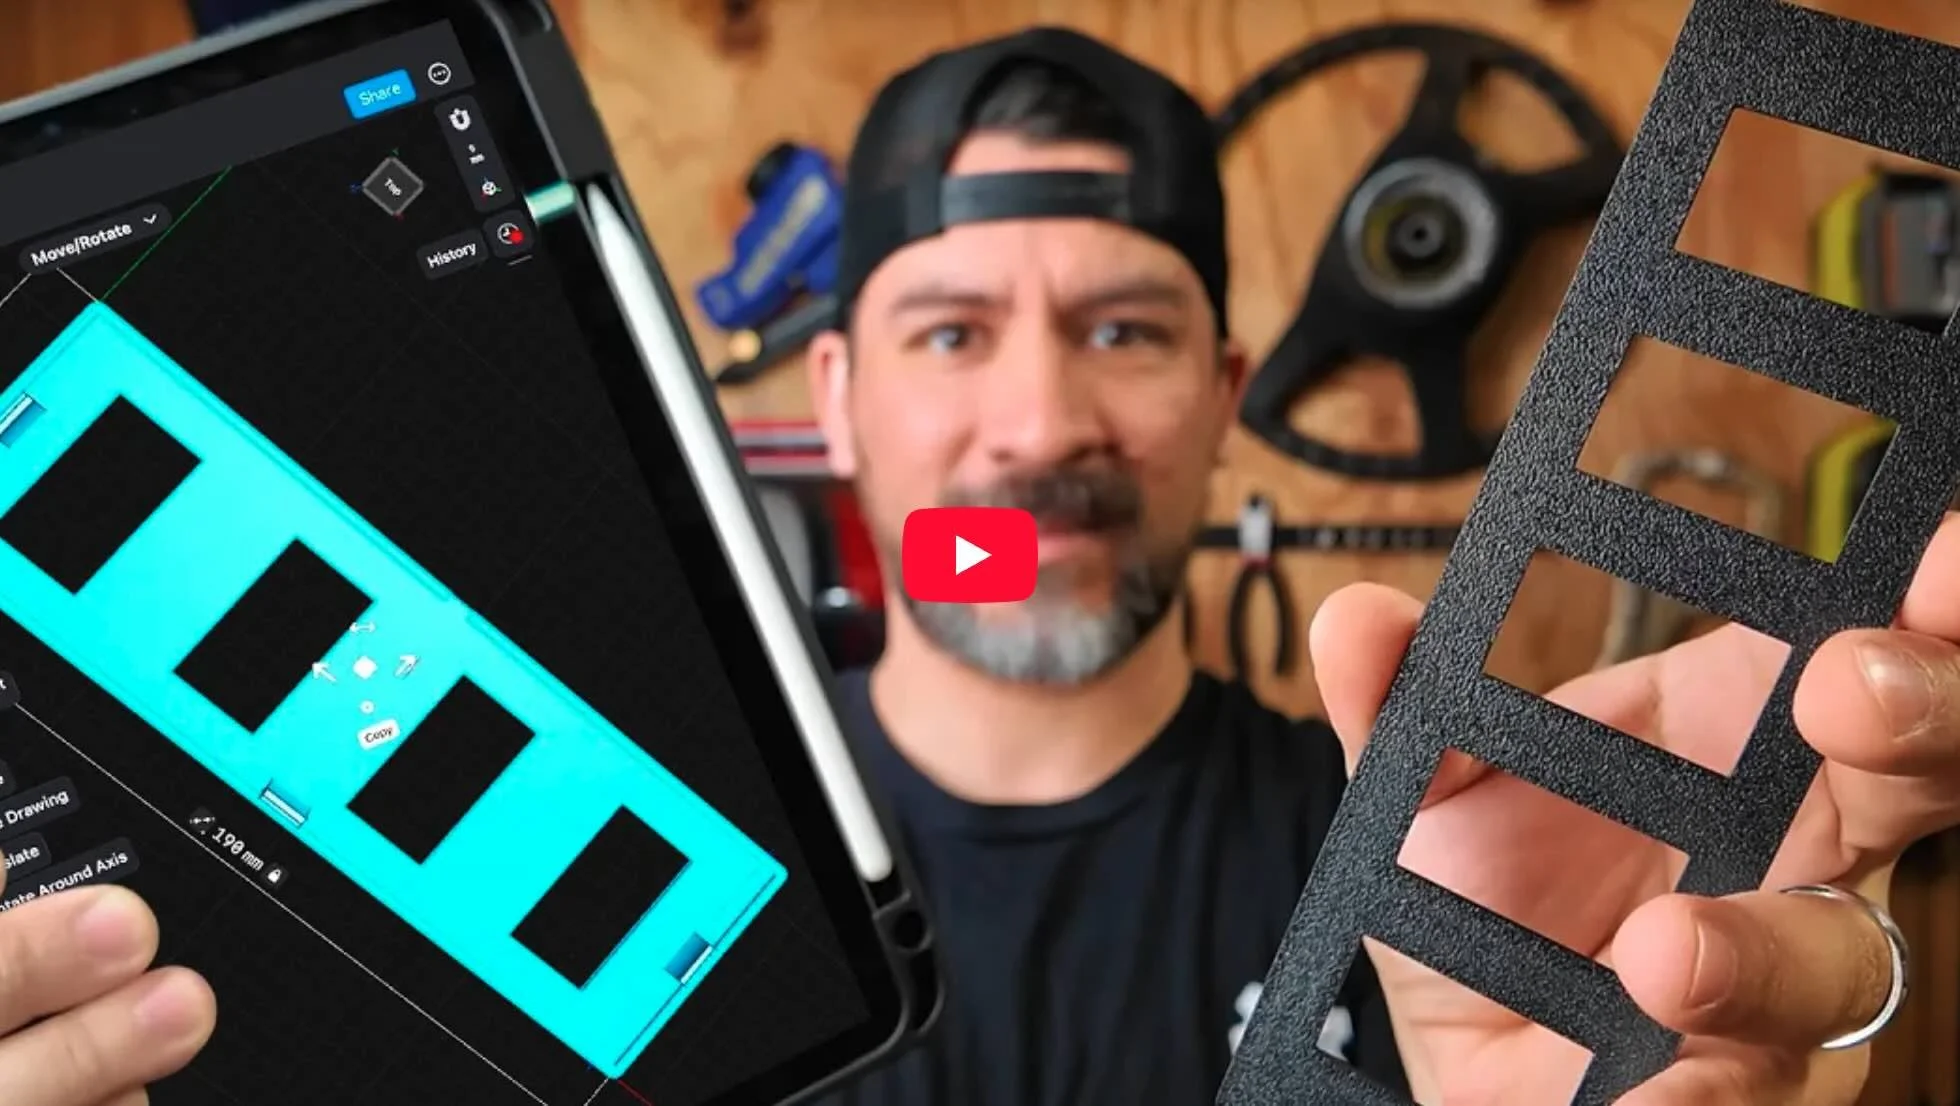
Here’s our first print. Let’s check the fit:


Boom. Fits just right. But keep in mind—printers can be finicky.
If the size is slightly off, tweak it in the slicing software or go back to Shapr3D and adjust the scale.
Now that you have the basics covered, you can move onto reverse engineering any part you find online. The workshop below covers the entire process.
Design 3d Printed Car Parts That Match Your Exact Build.
One afternoon. No complex software. Parts that fit your build perfect.
Instant Access, Risk Free Money Back Guarantee