
HOW TO MAKE 3D PRINTED CAR PARTS NOT LOOK 3D PRINTED
So you printed a part for your car, it fits, it works… but the second anyone looks at it, they know exactly what it is — a 3D print.
The layer lines are visible and the part doesn't match anything around it. Now you're wondering if you have to sand the thing for two hours just to get it close to acceptable.
You don't. Not if you approach it the right way from the start.
Here's what we’re going to cover:
Use a 3D effect build plate that transfers an OEM+ pattern directly to your part during the print.
Know the adhesion fix when switching to a smoother 3d effect decorative plate.
Split your design when the visible face can't print flat.
Know which plate works on which printer — Centauri Carbon and larger Bambu Lab 3d printers have different bed sizes.
WHY YOUR CAR PARTS LOOK "PRINTED" BEFORE YOU EVEN SAND THEM
Most 3D printed car parts fail the OEM test at the surface level — not because the fit is off, but because the texture is wrong.
Factory interior plastic has a specific grain to it. A gentle, uniform matte texture.
It doesn't reflect light evenly, it doesn't have horizontal ridges, and it doesn't have a hot-end drag pattern across the top surface.
Most 3d printed car parts come off the bed with exactly those problems.
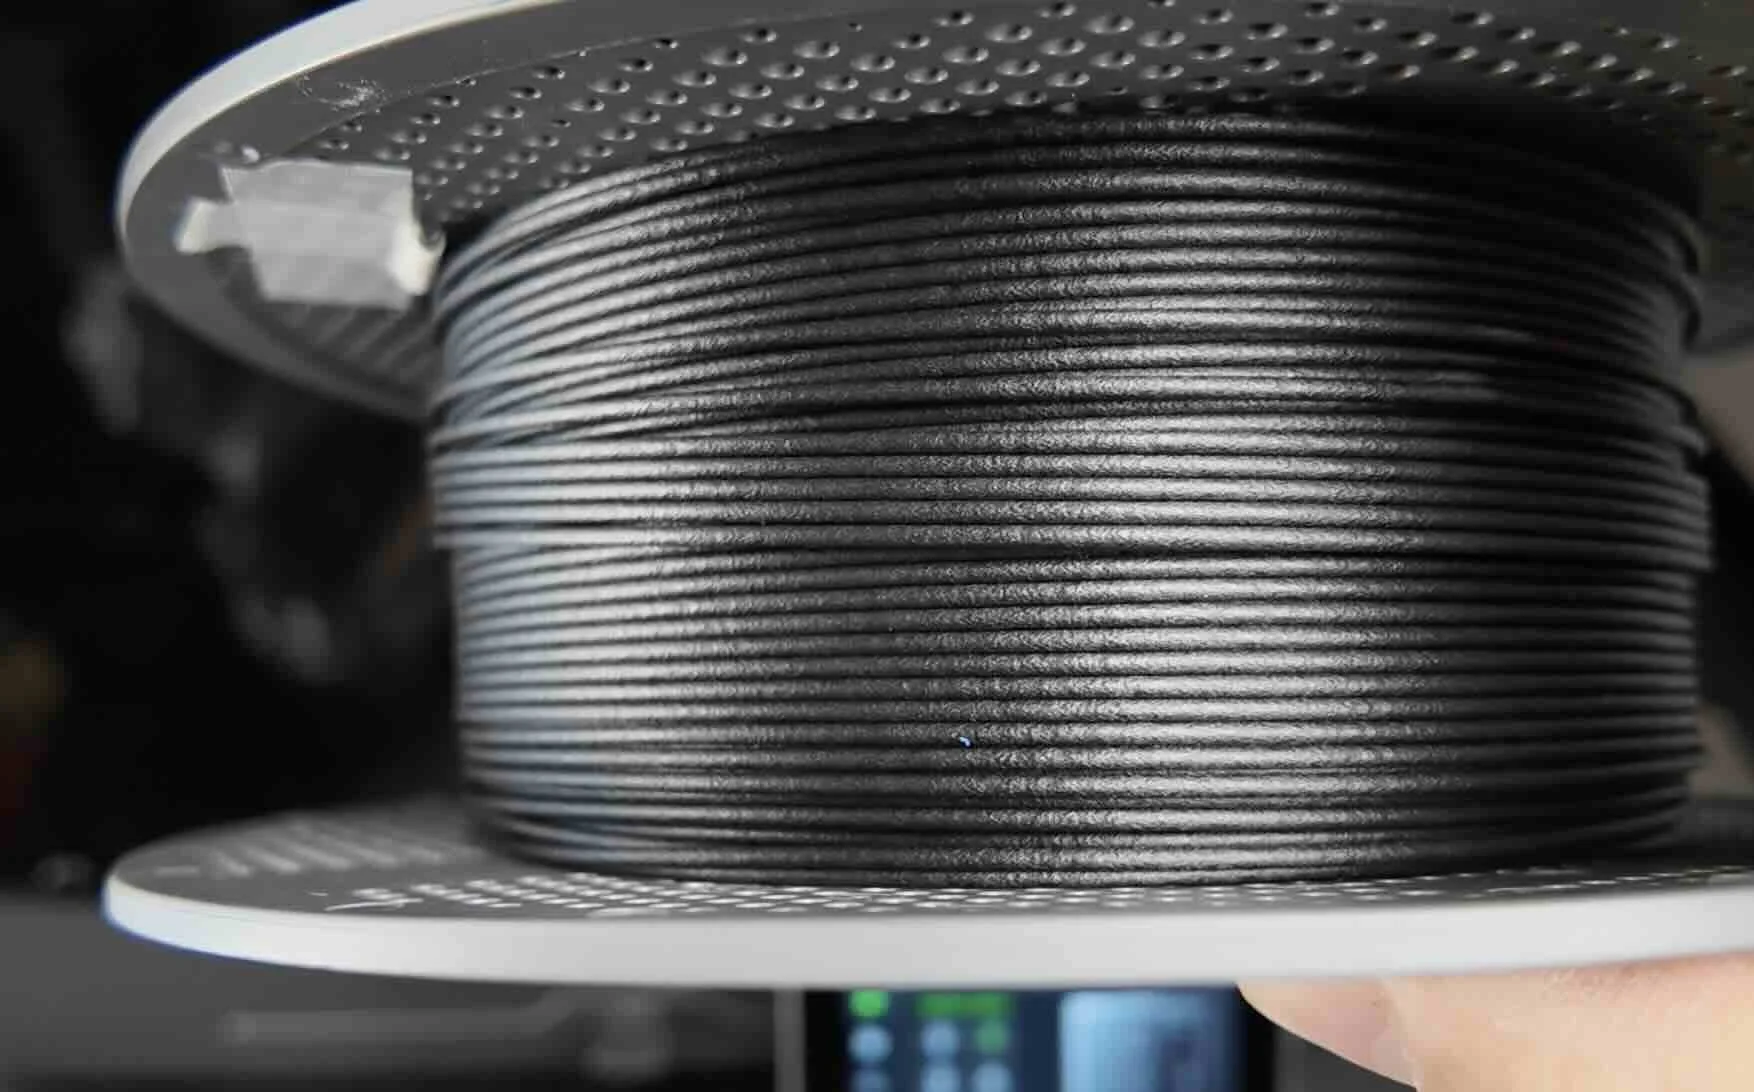
The standard textured PEI on a Bambu Lab P1S or Centauri Carbon gives you a uniform pebbled bottom — decent, but not always an OEM plus look.
The smarter move is deciding what the surface looks like before you hit print. That's what 3D effect build plates let you do.
WHAT IS A 3D EFFECT PLATE AND HOW DOES IT WORK?
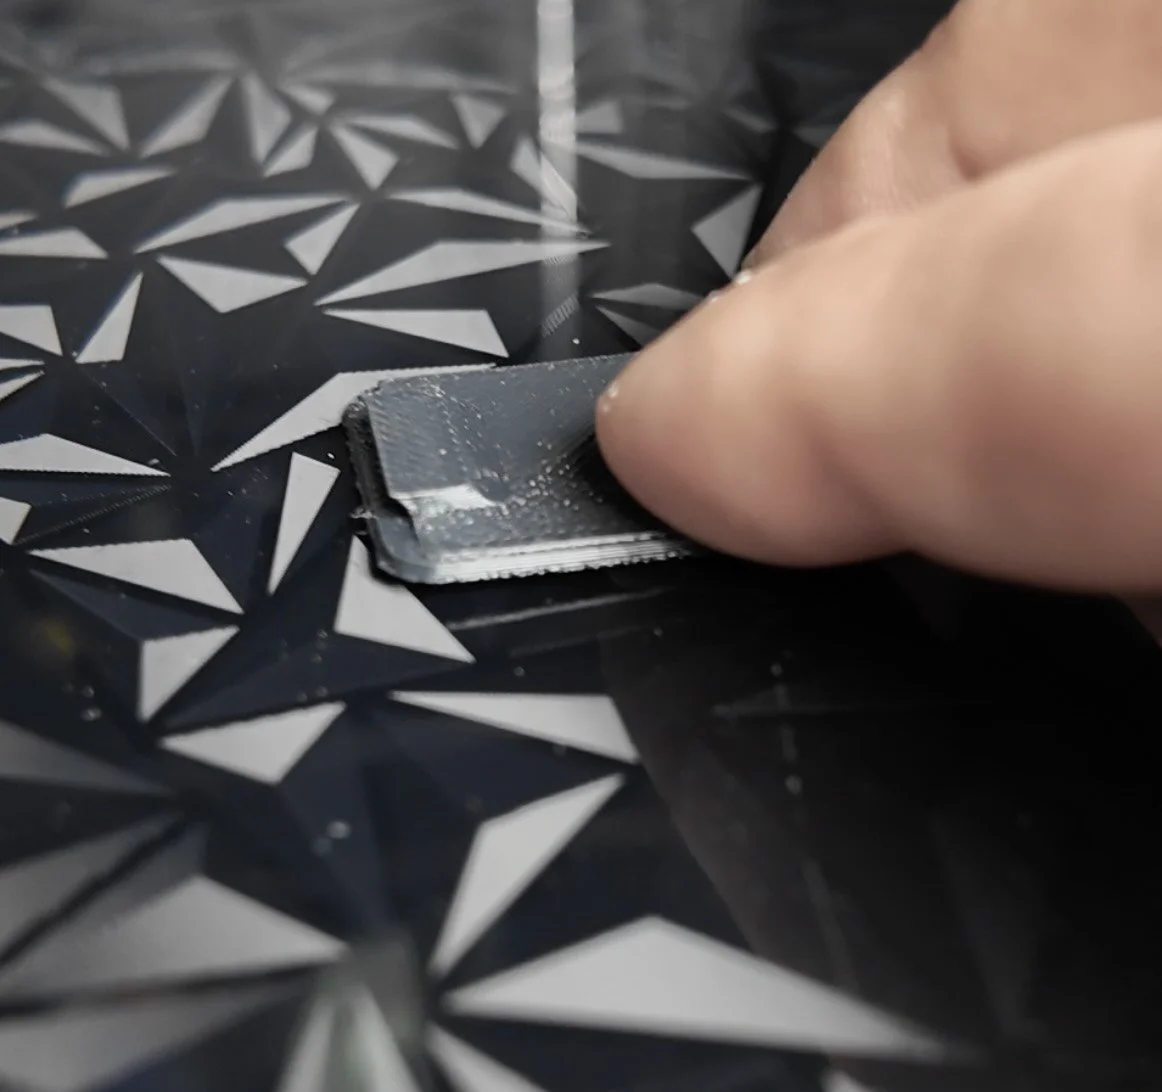
A 3D effect plate has a pattern etched directly into the plate surface.
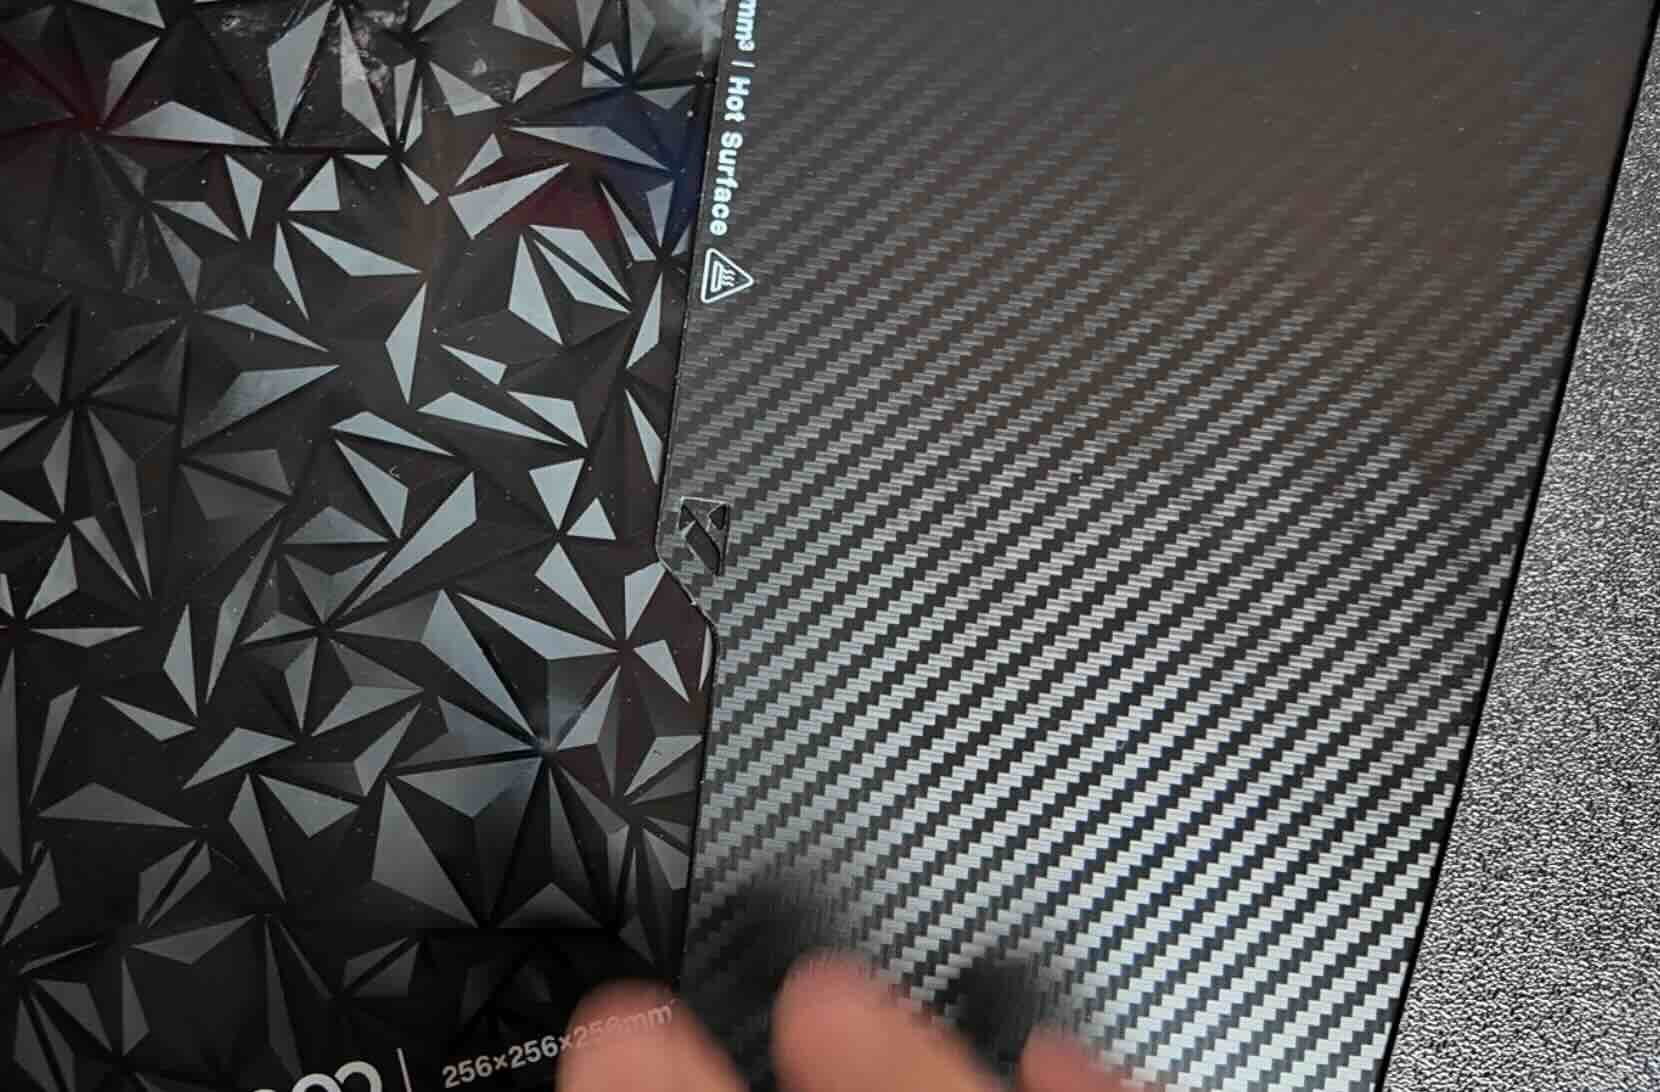
When your first layer prints against it, the hot filament conforms to that pattern. When the print releases, the pattern has been transfered — permanently — to the bottom face of your part.
No post-processing. No sanding. No primer. The texture is baked in during the print itself.
Bambu Lab and most other 3d printer manufactures sell 3d effect plates.
BIQU, a 3rd party company also makes 3d effect plates for larger 3d printers like the Bambu Lab H2S.
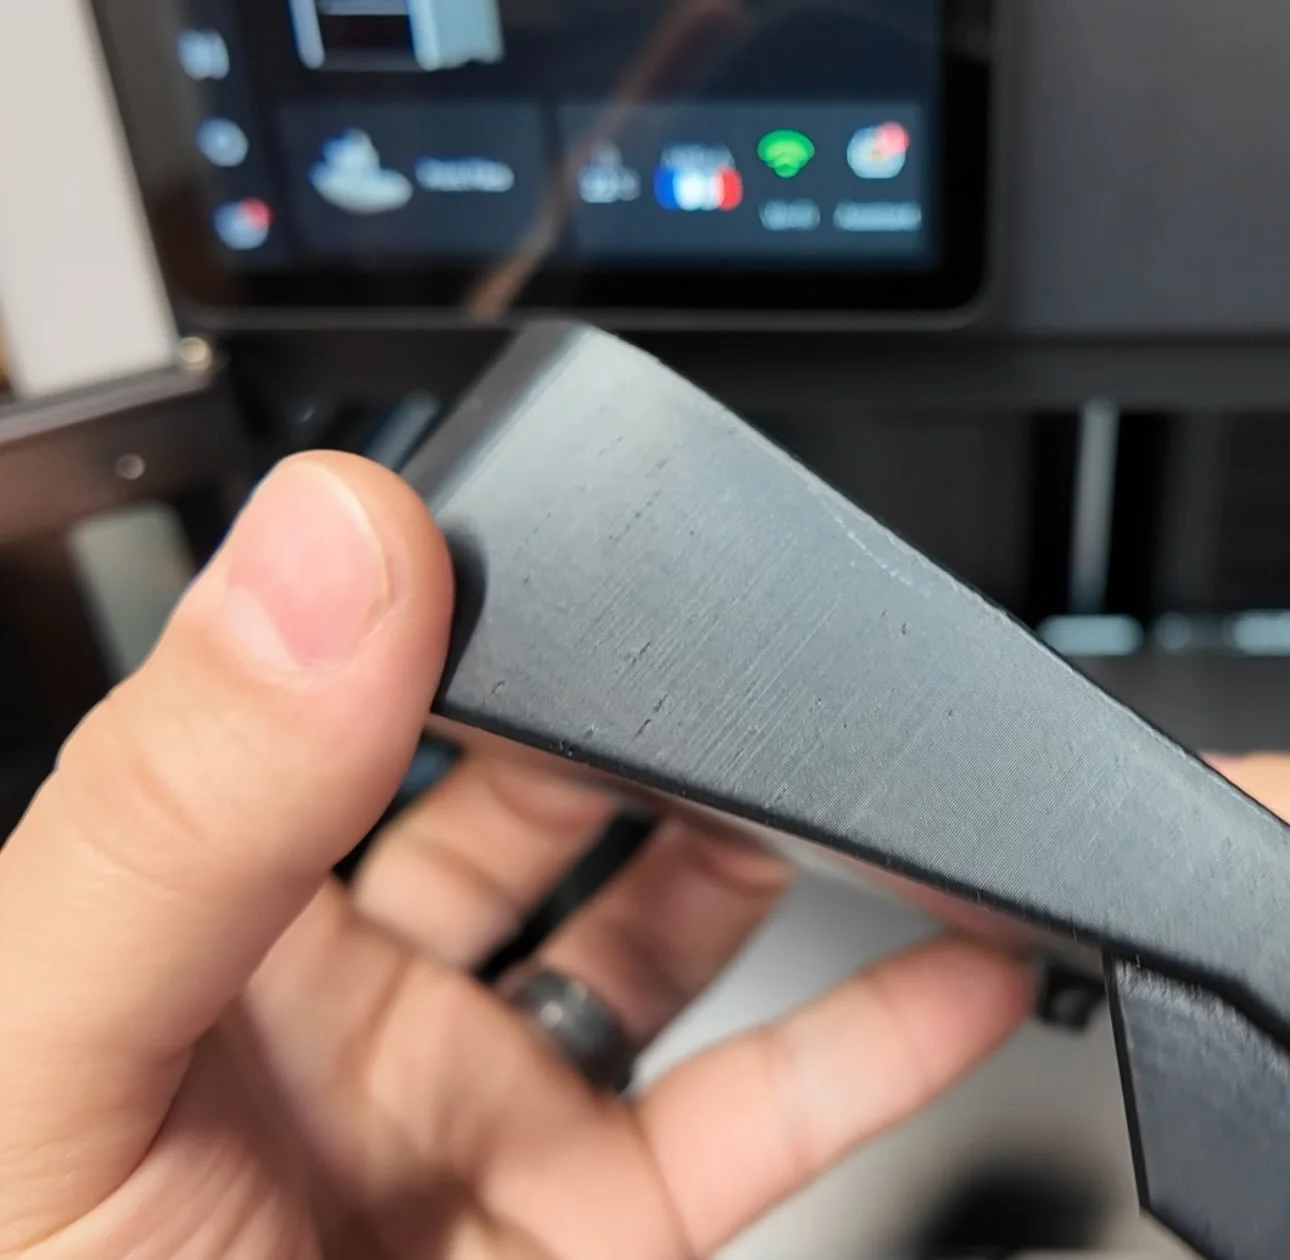
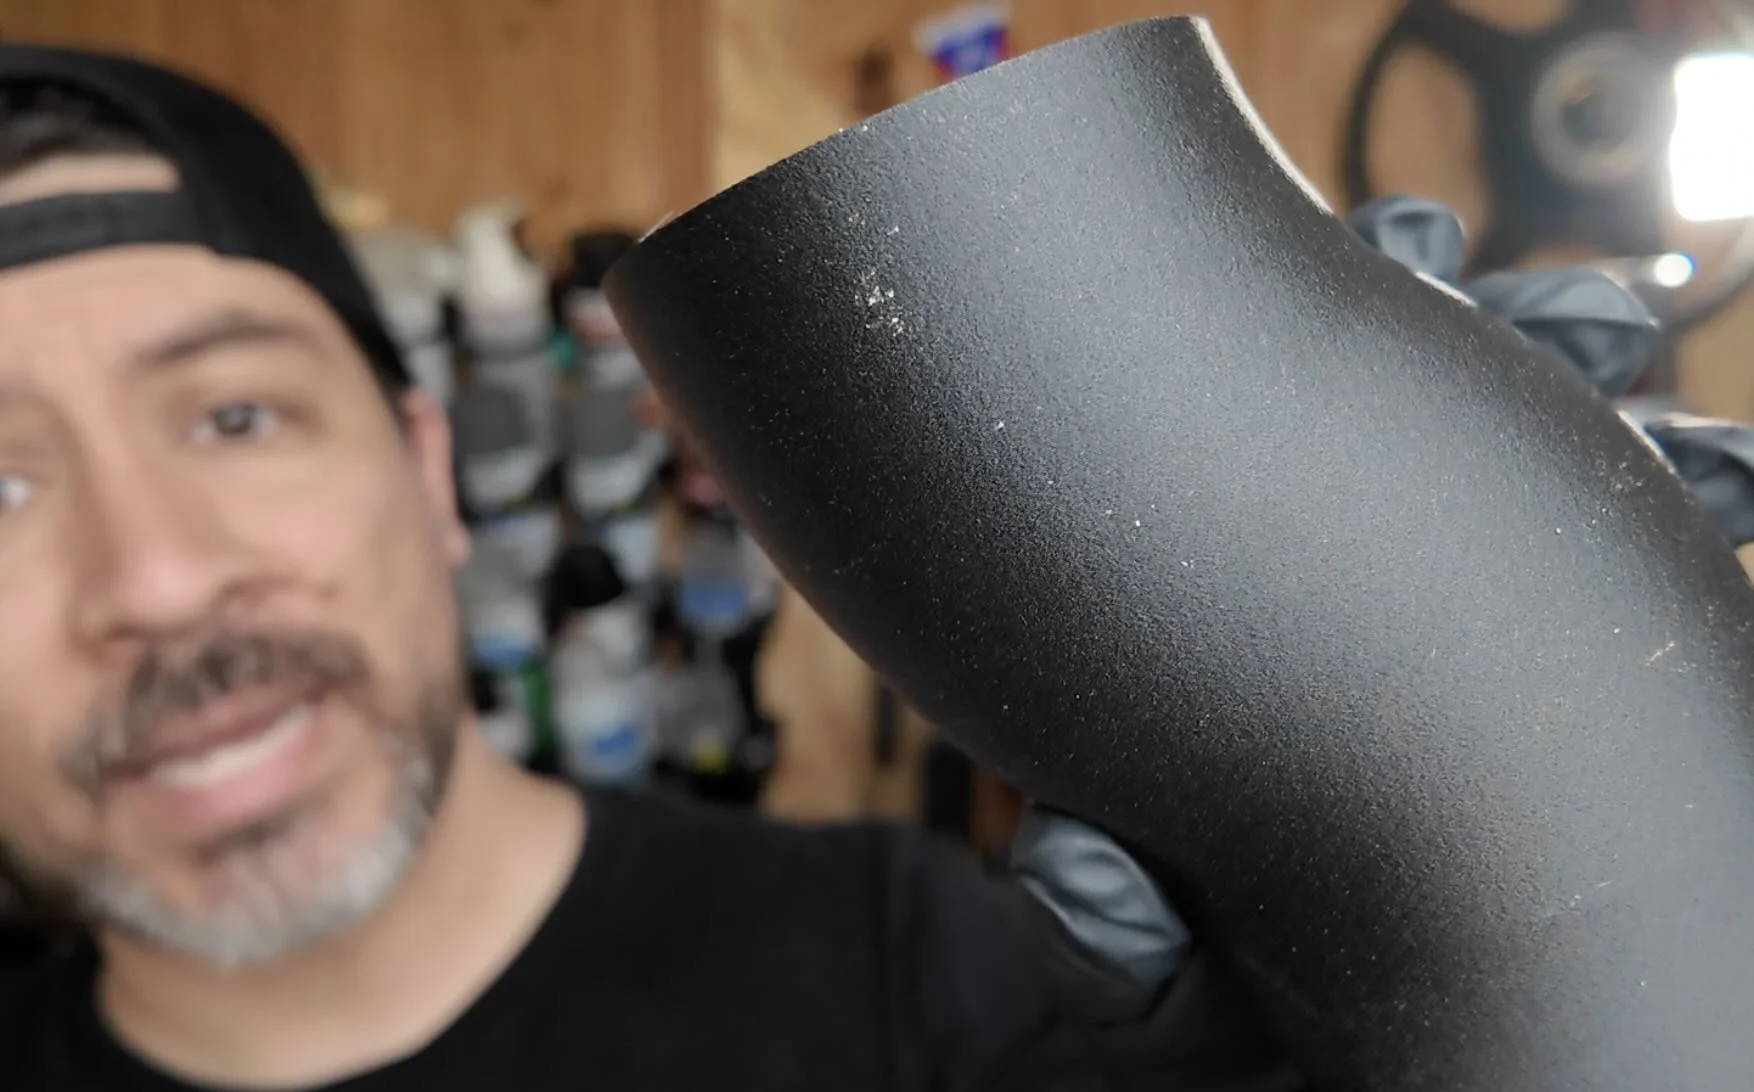
We ran the diamond and carbon fiber pattern 3D effect plate on a few BMW E30 parts flat against the bed.
The result doesn't look like a 3D print.
Instead, we have an OEM plus finish look.
💡 PRO TIP: Print the visible face of your part face-down against the plate. Plan your orientation before you open the slicer.
THE ADHESION PROBLEM — AND THE FIX
But here's the real issue with smoother 3d effect plates: they don't grip higher heat resistant filaments like ASA the way a roughened PEI build plate does.
Corners lift. Parts warp mid-print. You waste an hour of filament.
The way to prevent ASA from warping off a 3d effect plate is using a nano polymer adhesive from Vision Miner.
Use our affiliate code AATB10 and save 10% off on checkout.
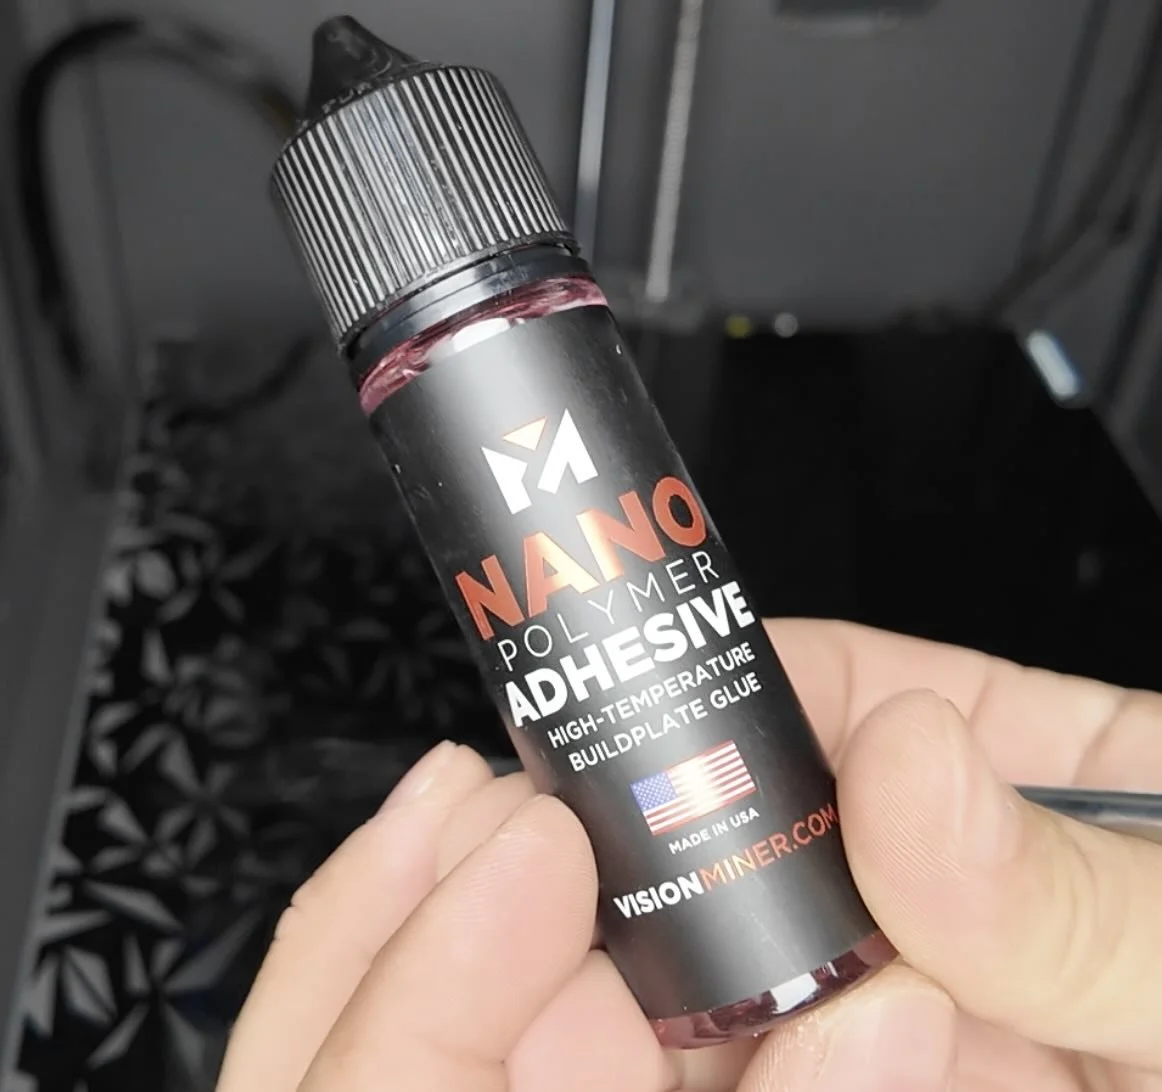

It brushes onto the plate surface in a thin coat.
When the bed heats up, the adhesive activates and creates a grip layer that works even on polished surfaces.
We use it on every smooth or patterned plate run — zero warping, clean release once the bed cools.
❌ Don't use glue sticks or hairspray on pattern plates. They fill in the etching and kill the texture transfer. The nano polymer adhesive is thin enough to leave the pattern intact.
If you don’t have a heated chamber here’s another trick to help layer adhesion with ASA car part prints:
💡 PRO TIP: Pre-heat the printer with the print bed on max temp for 20-30 minutes before you start your print and make sure all the fans are off while 3d printing your ASA filament.
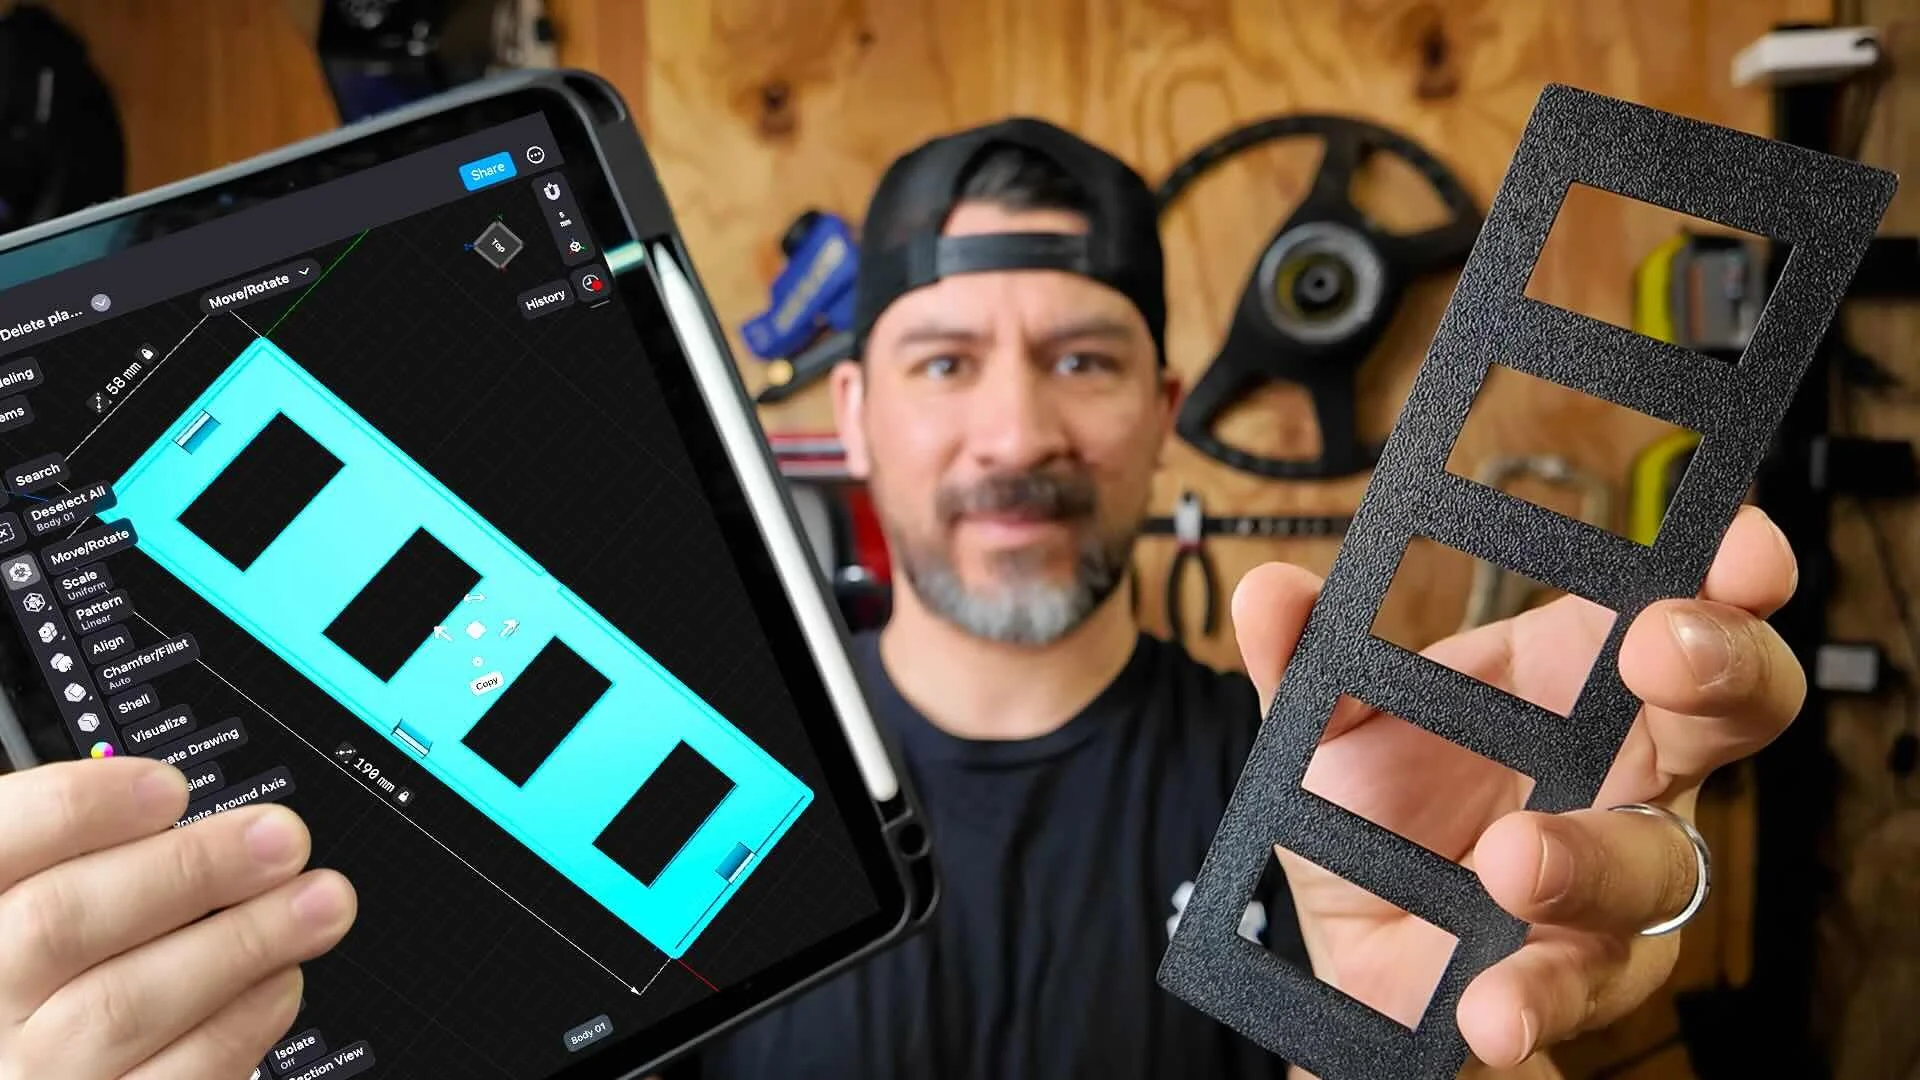
WHAT ABOUT PARTS THAT CAN'T PRINT FLAT?
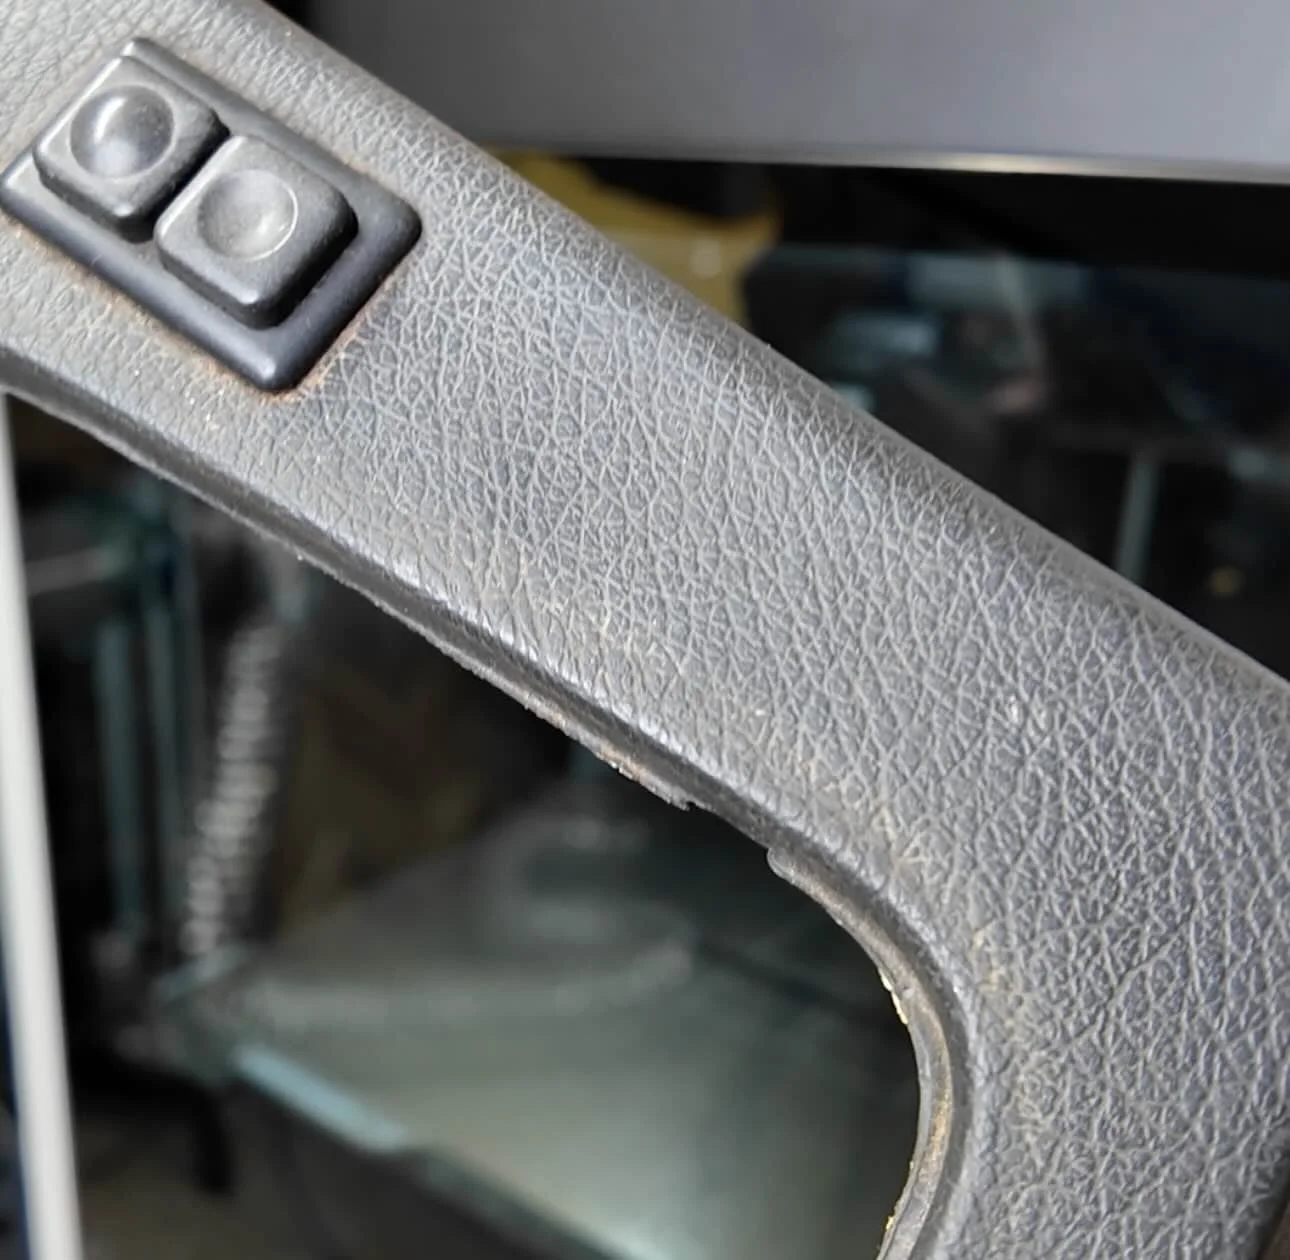
A gauge cluster, a center console insert, a dash bezel — these have geometry that won't sit flat against the bed naturally.
If you print them upright to clear supports, you lose the plate texture on the visible face entirely.
The solution is to split the design.
In Shapr3D, you can cut the part at its widest flat plane and export it as two separate pieces.
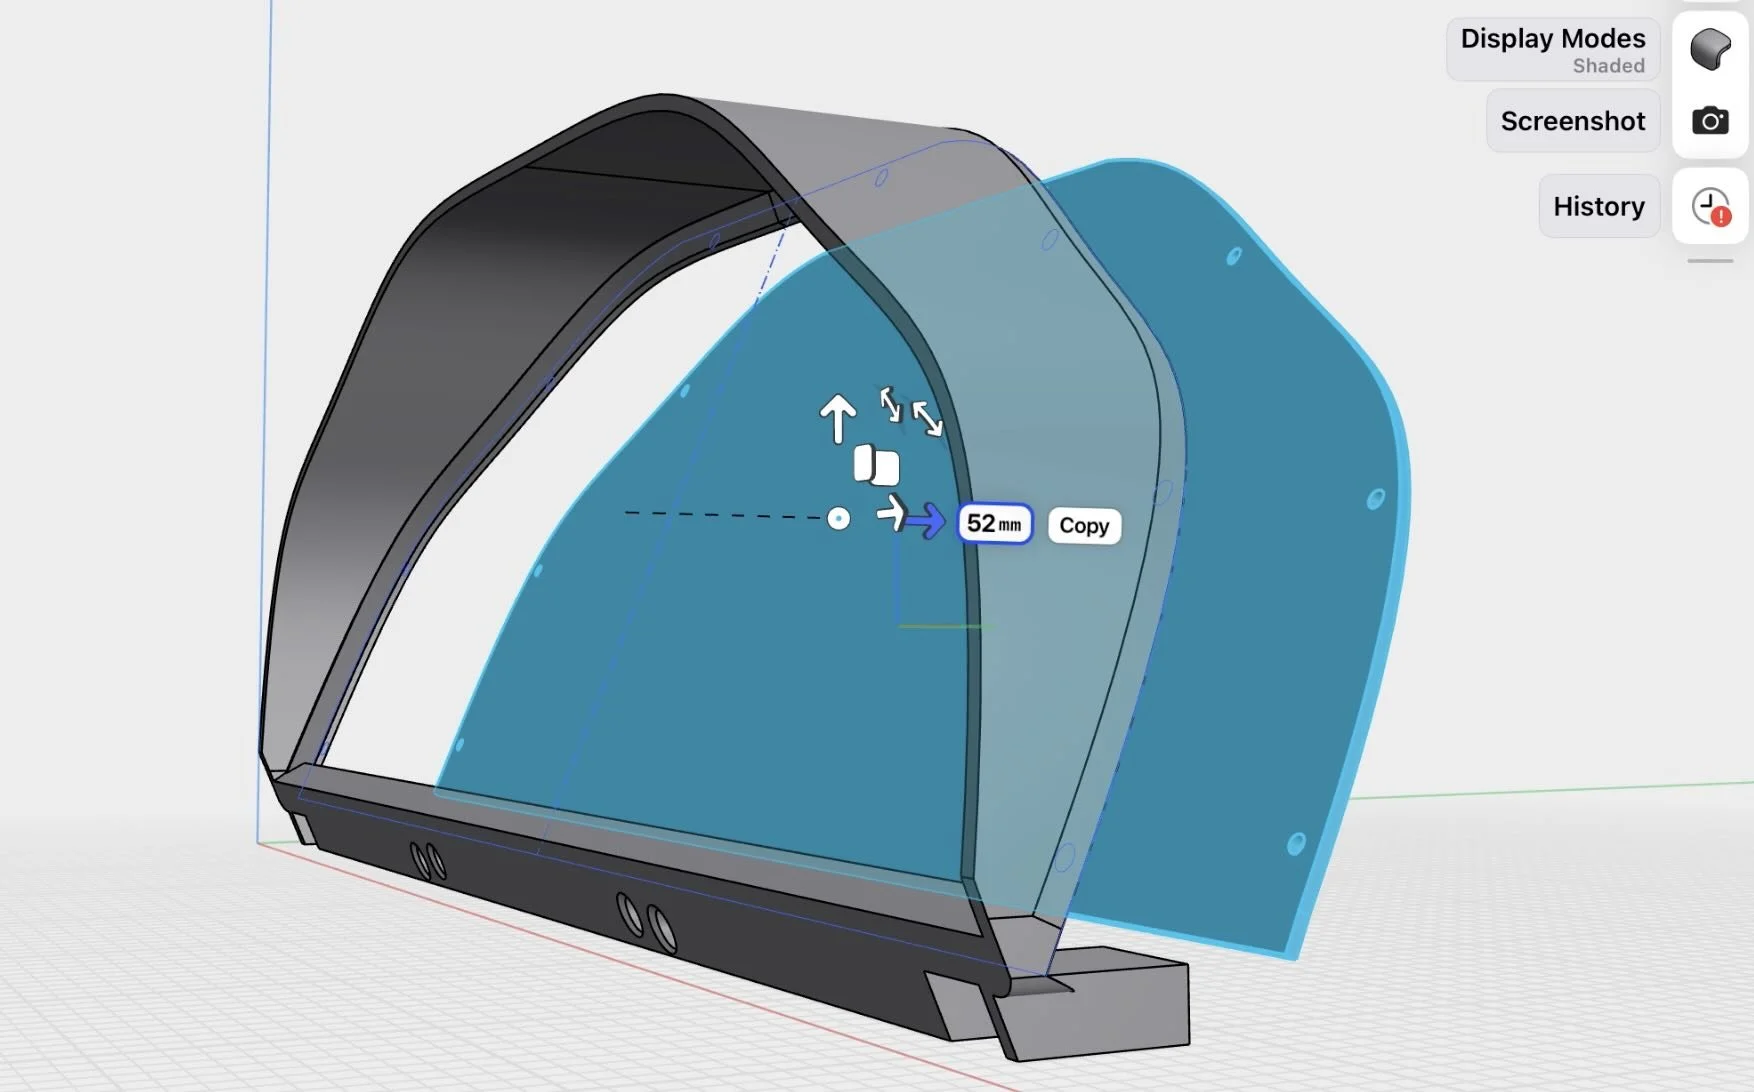
Each half prints face-down. Each half picks up the plate texture.
You join them with brass inserts and a touch of adhesive after the fact.
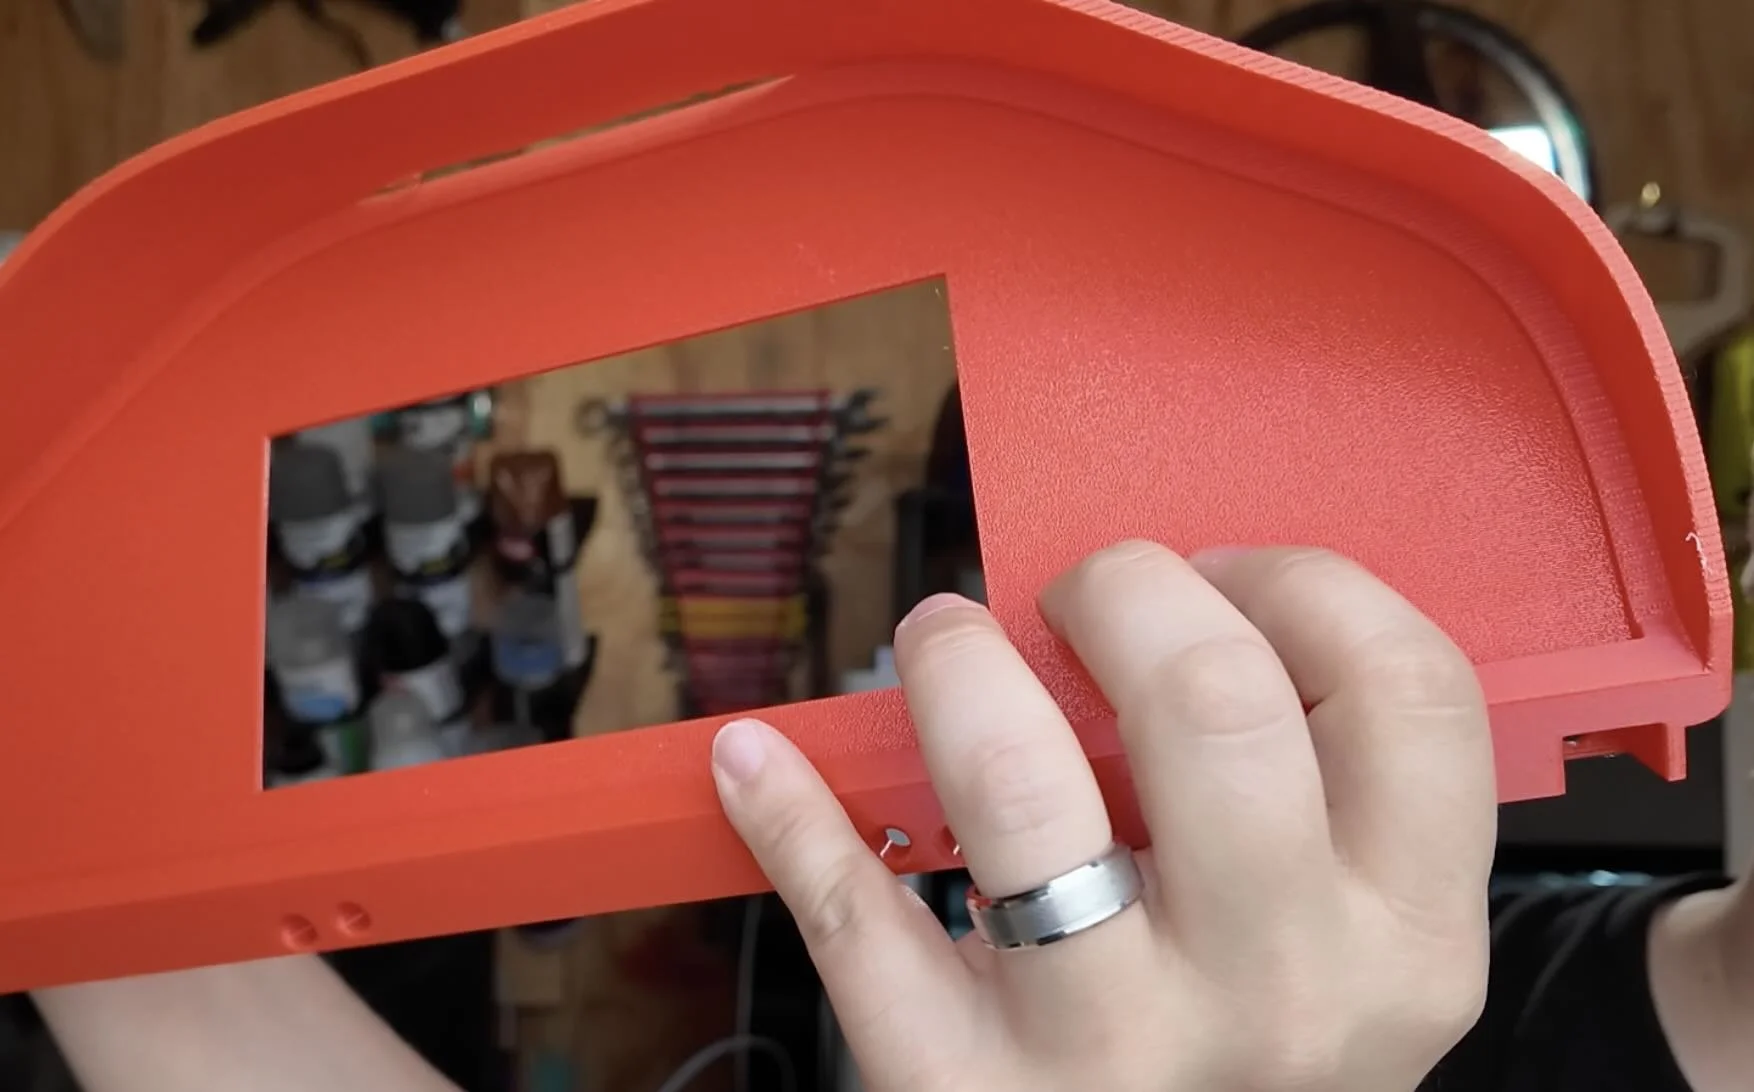
We did this with the E30 gauge cluster surround. The final assembled part has plate texture across the entire visible face — no layer lines anywhere you'd actually see.
THE FILAMENT LAYER LINES PROBLEM (SEPARATE FROM THE PLATE TEXTURE)
The plate handles the bottom face. But the side walls still have layer lines unless you address them.
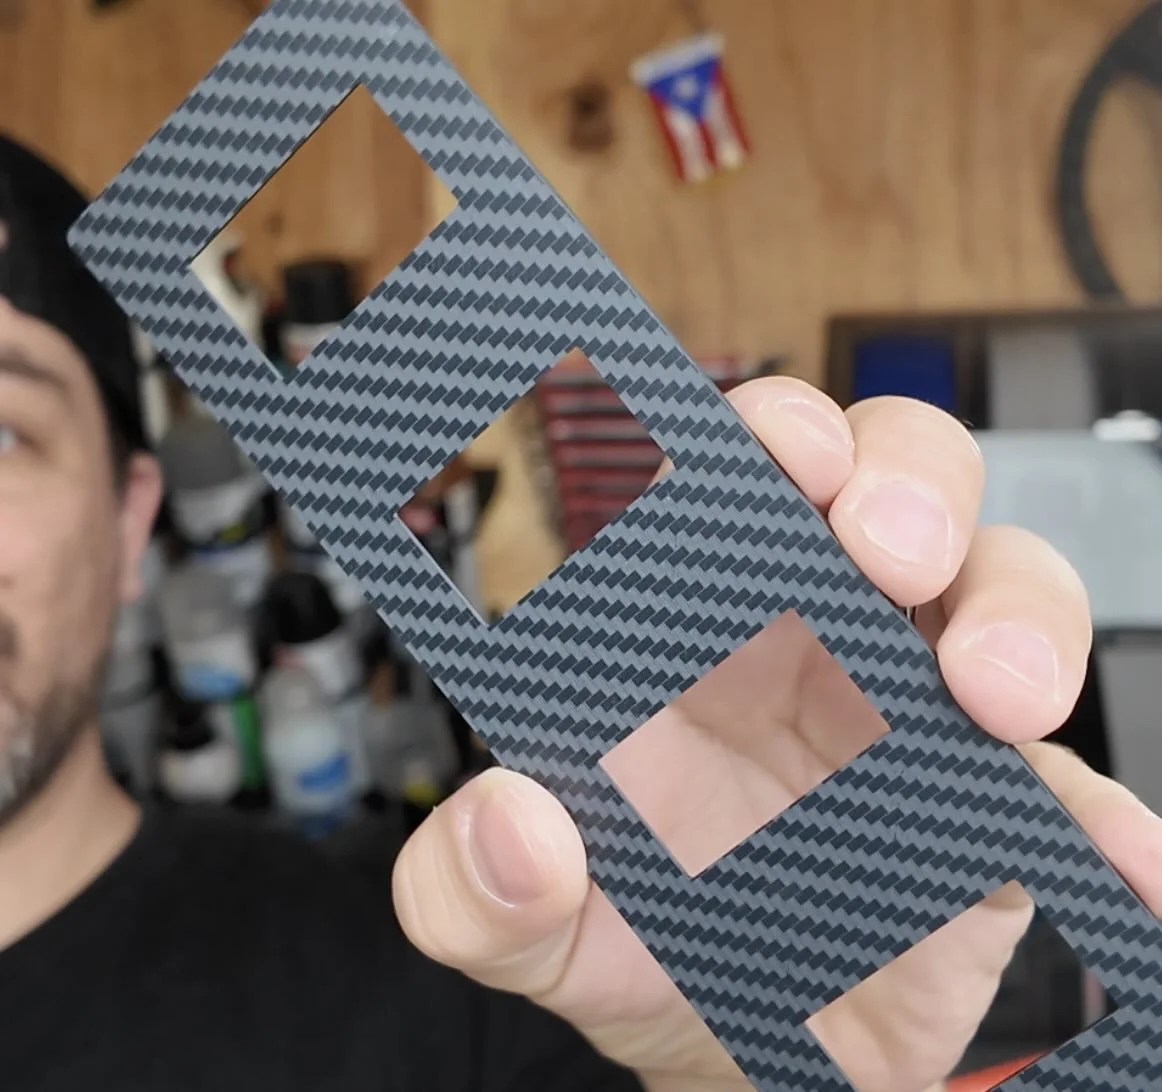
For car interior parts, the two filament types that reduce side-wall layer visibility are glass or carbon infused filaments.
We ran a direct comparison on our E30 build: plain ASA shows layer lines on the sides under good lighting.
PA6-CF with its short carbon fiber strands creates a matte, broken-up surface that reads as intentional texture rather than print artifact.
💡 PRO TIP: Dry the filament first. Especially PA6. It loves absorbing moisture fast — 14 hours in a filament dryer at the right temp before it touches the printer. Skip this and you'll get bubbling and poor layer adhesion, which makes the surface worse, not better.
Now once you've got the finish dialed in, the next step is designing parts that are worth printing in the first place — custom, exact fitment, parts that don't exist anywhere online.
That's what the workshop covers.
Design 3d Printed Car Parts That Match Your Exact Build.
One afternoon. No complex software. Parts that fit your build perfect.
This workshop finally made designing 3d printed car parts feel doable. I had a replacement part ready for my project car in a few hours.
Instant Access, Risk Free Money Back Guarantee