How To Restore Car Parts with Vapor Blasting
We have tons of parts which need to be restored; from a Datsun 510 valve cover to 280ZX thermostat housings.

Datsun 510 Valve Cover, Datsun 280ZX Thermostat, and 280ZX Air Intake
So we purchased a Harbor Freight sand blasting cabinet and decided to converted it into a vapor blasting cabinet.
A vapor blaster uses a mixture of water and glass bead media that uses compressed air to clean/polish parts.
The media is mixed together with water using a pump. The pump also delivers the mixture to a vapor blasting gun along with high pressure air that blasts the surface of parts. Starting with 80 grit glass bead media works great for tough jobs and you can work your way up to 180-220 grit which creates a nicer satin polished finish. Vapor blasting also removes the risk of inhaling dust particles and is much easier to clean up.

Vapor Blasting a Datsun 280ZX Thermostat Housing with 80 grit glass bead media
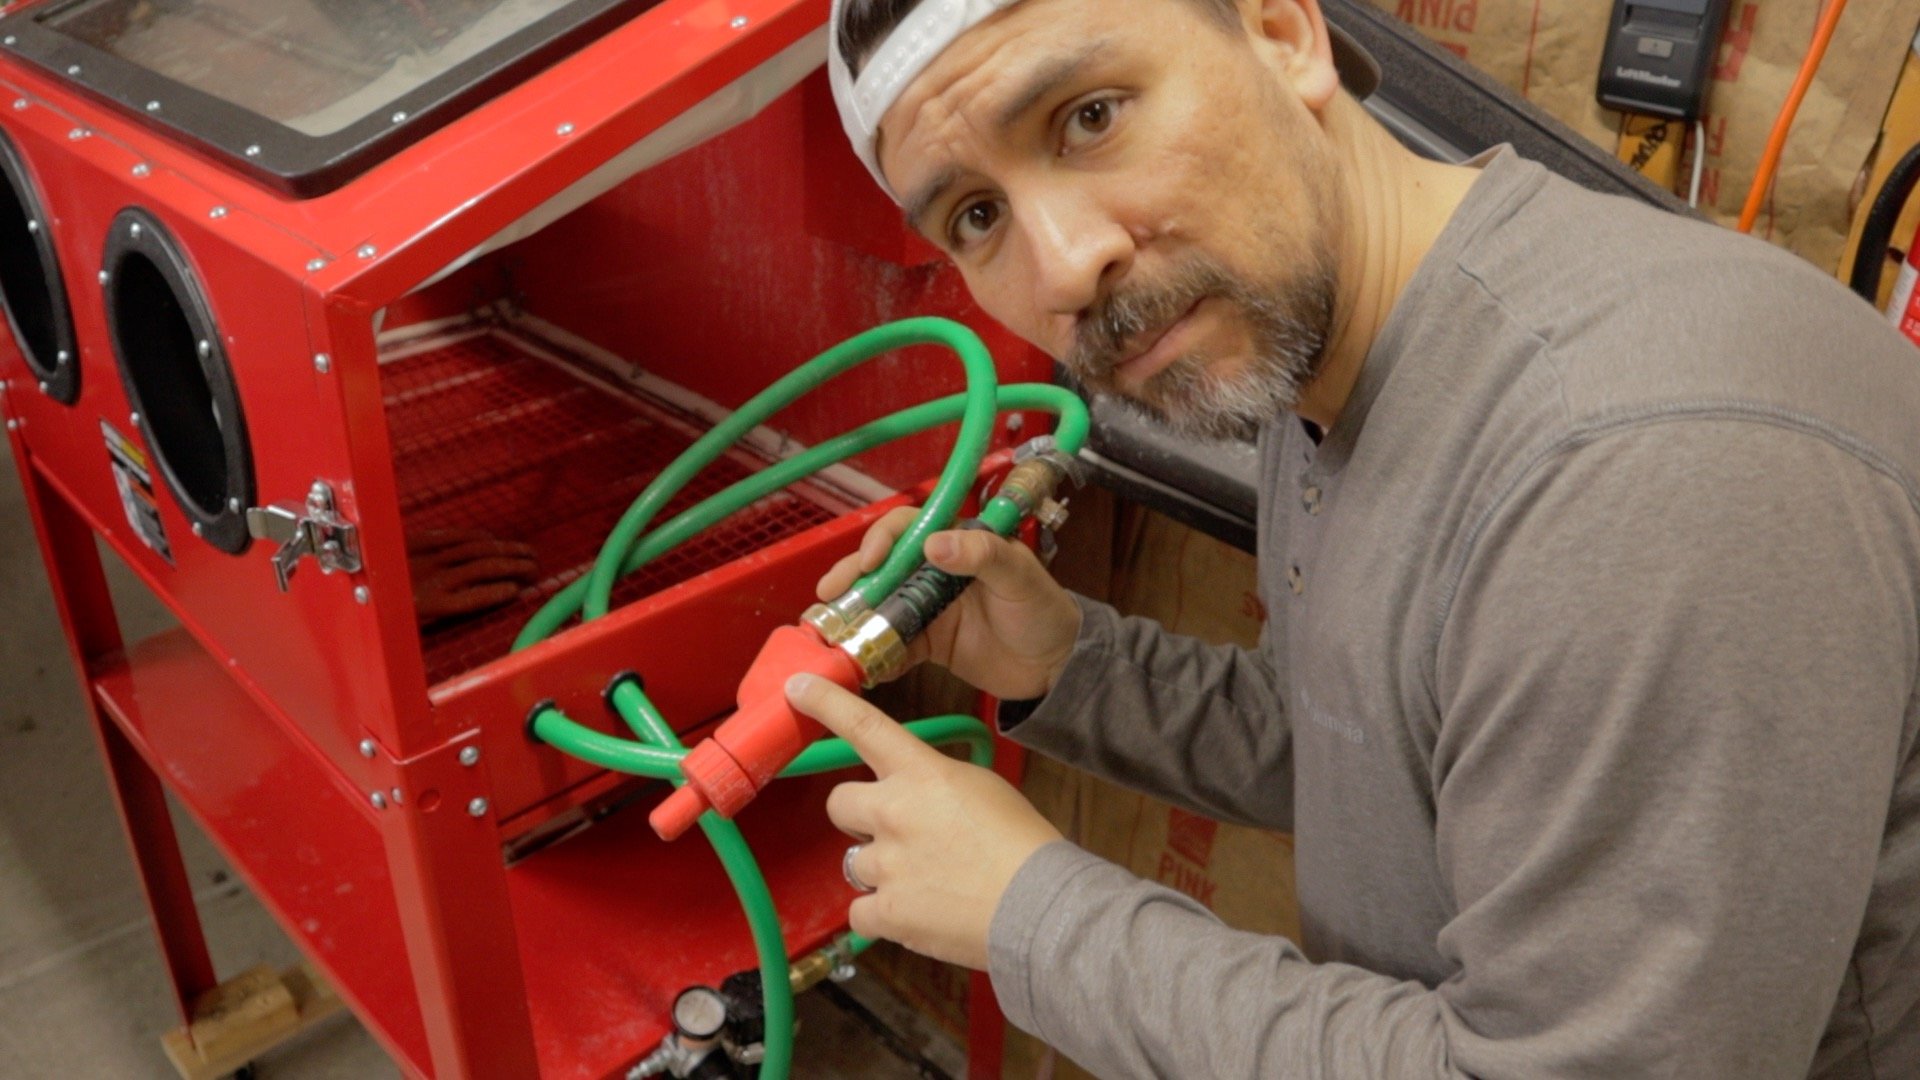
Vapor Blasting Gun & Air Compressor
The first thing you’ll need is a proper vapor blasting gun. We decided to 3d print a vapor blasting gun. We purchased the STL files from https://victor-bared.myshopify.com/ and 3d printed a 5mm body and 8mm tip. A smaller diameter will work a little better if you have a smaller air compressor. The air compressor size and power is crucial. Spend more money on the compressor if you can afford it.
We started with a 28 gallon 1.8HP 120v compressor, but it struggles with parts that have pitted rust and left over paint. We’d recommend you use a proper paint stripper before you vapor blast. You’ll also need to run at 50 PSI. Find the highest rated SCFM and duty cycle you can afford. A pancake air compressor won’t cut it.
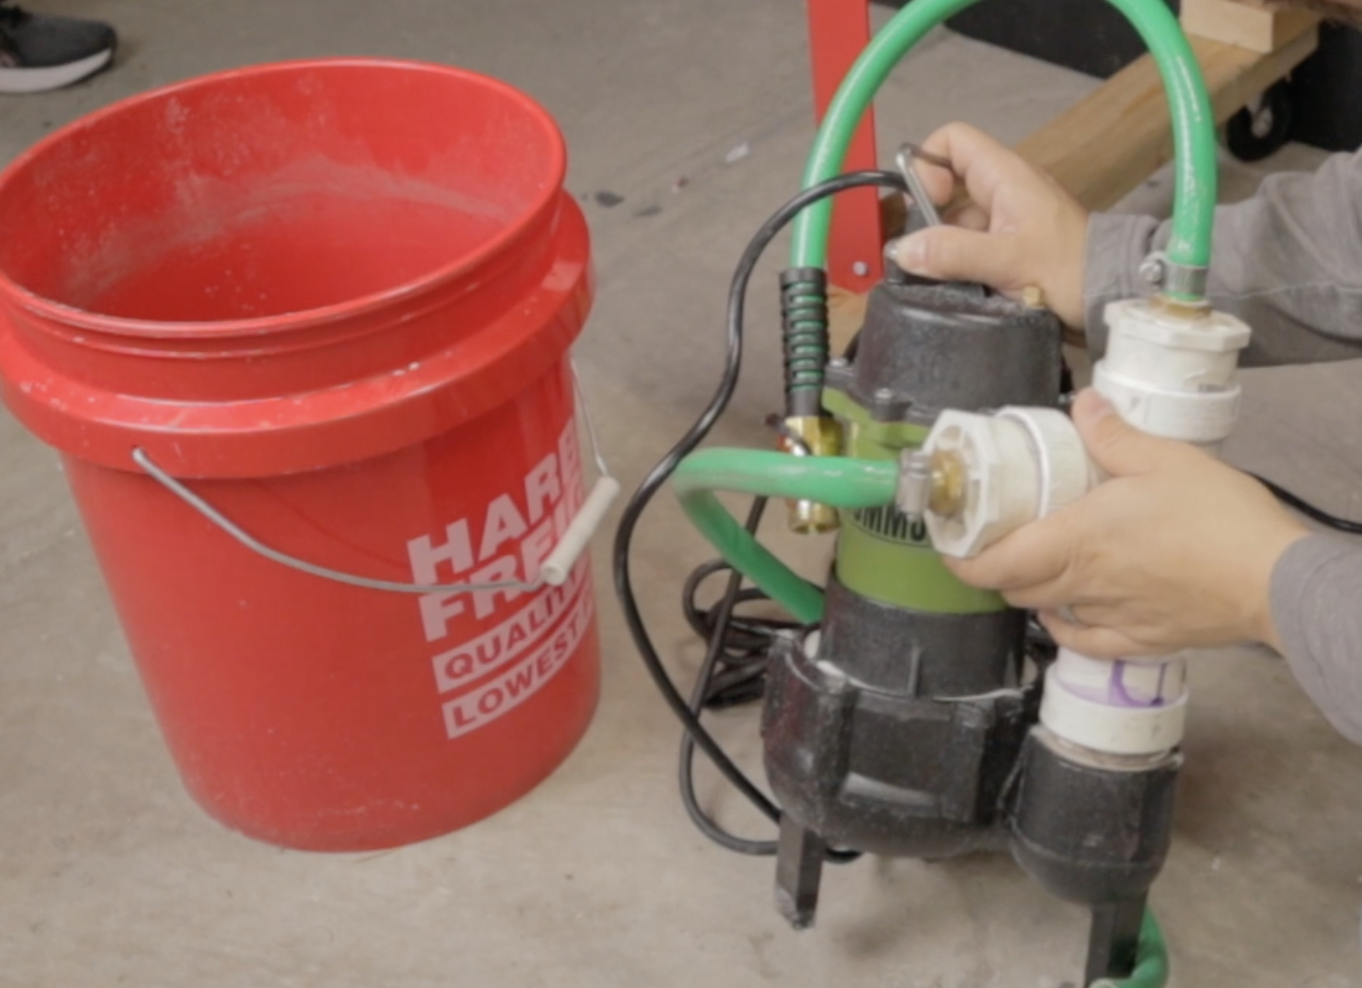
Pump & Misc. Parts
You’ll also need a trash/sewage pump, bucket, hoses, clamps, and appropriate fittings. The trash pump will sit in the bucket with water and media. The pump requires a tee fitting for one small hose to go to the bottom of the bucket and another hose to feed into your vapor blasting gun. The hose at the bottom of the bucket will make sure your glass bead media mixes into the water and the other hose goes into your vapor blasting gun. The bucket with the pump can go right under the bottom of the sand blasting cabinet collector with the trap door open.

Air Hose, Regulator, and Air Separator
You’ll also need proper air hoses to go from your air compressor into a proper air regulator, then into an air/water separator. You’ll also want a shut off value right before the hose goes into the other input port of your vapor blasting gun.
DIY VAPOR BLASTER FULL PARTS LIST
Harbor Freight Sand Blasting Cabinet or Amazon Equivalent Product https://amzn.to/4003W6c
Custom 3d Printed Victor Bared 3d Printed Vapor Blaster Gun
Harbor Freight Drummon 1/2 HP Sewage Pump
Harbor Freight 80 grit glass bead media or Amazon Equivalent Product https://amzn.to/3lcYBcW
Harbor Freight Air Regulator
Harbor Freight Water Separator
Air Compressor (Go for highest CFM you can afford)
Air Compressor Hose (3/8 or larger diameter)
Misc. Flexible Water Hoses (100PSI Rating)
Misc. PVC/Hose/Air Connectors
By using our affiliate links, you are helping support our site and us as creators!
SEE THE DIY VAPOR BLASTER IN ACTION
We assume no liability for anything you choose to do to your automobile/home before, or after reading or watching one of our videos. Working on your automotive/home and using any information from this website should be done at your own risk.